

better homes and gardens vertical blinds printed oak
Home Care & Living
Practical Tips for Buying a Mountain Cabin
Published
1 week ago
on
November 3, 2021

Many Americans love the outdoors and this love for the outdoors birthed the concept of mountain cabins. If the mountains are one of your desired places to visit, I believe buying a mountain cabin will be a dream come true. Besides, you can use it as a second home for vacations and occasionally make money off it as a rental property.
Suppose you've always dreamt of owning a secluded place in the mountains, it'd be best if you went through the proper channel and looked out for features you'd love in your new mountain cabin.
While plenty of cabins are scattered across the country, you'd want to choose one that provides the satisfaction and flexibility you require. So, before you begin your search for your dream mountain home, you'd like to ask yourself these crucial questions:
What Kind of Cabin Do I Want?
Many people perceive the word "cabin" as just any mini wooden house on the outskirts of the town. However, that perception is wrong. There are lots of cabin options worth exploring and you can even rent it out like other best smoky mountain cabin rentals. The following are some types of cabins:
Log Cabins
As the name suggests, this log cabin is made from wood. Suppose you prefer this type of cabin, you'll want to decide on the wood type, corner style, and shape of the logs for the place. Spruce logs are known to be famous for building log cabins. And they're desirable for their resistance to decay, thereby increasing the longevity of the cabin.
A-Frame Cabins
The name of this type of cabin gives its design away. It's a simple triangular-shaped accommodation with vaulted ceilings and sometimes a lofted sleeping area.
Prefabricated Cabins
This type of cabin surfaced a few years back. And it's mostly made of metal and wood. The components of prefabricated cabins are factory-produced and transported to the customer's desired location.
What Can I Afford?
Many see cabins as a luxury. Yes, some can be. But with reasonable lifestyle adjustments and careful budgeting, you'll find out that they can be affordable. And a fantastic opportunity to get a property and vacation time as well.
If you've been able to provide answers to these questions, you can proceed on your search for the cabin of your dreams. The home market comprises many mountain cabin properties, and you might stumble upon one you love.
Interestingly, the easiest way to acquire a mountain cabin is to buy from someone else. You'll save yourself money that way. The thought of getting a mountain cabin can be exciting, and it'd be best if you're not overwhelmed by the excitement of the moment. Else, you might make an unwise decision.
If you've decided on buying a mountain cabin, you can check out this resource link https://theshorttermshop.com/log-cabin-investments-in-the-smoky-mountains/ or use the following tips:
Consider Mortgage
In a case where you're already making a mortgage payment on your primary home, you may find it hard to keep up with two mortgage payments. Yes, luxury and comfort do come at a price. However, you wouldn't want to pay a fee that will cost your peace of mind.
Recall, it's advisable that housing shouldn't gulp more than 30 percent of your monthly earnings. So, before you look to get yourself a mountain cabin, you'd want to do your homework to know if you're capable of financing multiple properties.
Maintenance and Repairs
Is buying a mountain cabin necessary? I thought you'd ask that. I wouldn't say it's essential. However, I know it's a wise decision and a profitable investment. It'd be pleasant to have a nice mountain cabin to enjoy some days off and make some cash off of it. The only problem you might have is its maintenance.
Not a small amount of money goes into home maintenance. For a place you'll visit occasionally, regular maintenance is required. And that's going to cost money. So, you should get ready to cover these costs.
For ease of management, it's advisable to earmark one percent of the cabin's price for maintenance. Maintenance cost is a key reason you should consider the age and condition of the mountain cabin you're about to get. The older the home, the higher the possibility of an increased maintenance fee. An old cabin will likely need multiple repairs. And that'd cost you some extra dollars.

Ease of Commuting
Suppose you intend to run Smoky Mountain rentals, you'll need to consider the ease of commuting from the cabins to the major roads. Mountain cabins often have limited access to the larger roads and highways. It may take half of an hour to get to any significant road from some mountain cabins.
Are you the unorganized type? Are you sure you want a cabin that's far from any major road? These questions and more require answers from you. Imagine driving up to your place on a beautiful weekend to find out you're out of milk or eggs. I bet you'll be frustrated.
So, when searching for a vacation mountain cabin, keep in mind to look for one that best suits your persona. One other important thing you'll want to consider is the power supply and the condition of the roads when it rains. Trust me; you'll not regret looking into those aspects before getting your dream mountain home.
Don't Rely on Pictures: Visit Property Site
Not everything is as excellent as it appears in pictures. With shots taken from the perfect angle, an undesirable property can be made to look exceptional – and otherwise. That's why you should visit any cabin property of your interest.
Even if the pictures speak well of the cabin, you'll still want to check the mountain cabin's surroundings, its proximity to a major road, and other personalized features. You wouldn't want to settle for a beautiful cabin in an undesirable location. Hence, you should be ready to make physical inspections.
Rentability
Since you probably won't be staying in your cabin most of the time. Renting it out would be an excellent idea. Imagine how profitable it'd be to run a rental cabin.That's an easy way to earn some money from your investment.
You can list your property in the Airbnb Smoky Mountain cabin rentals section or have someone manage the property including its rental.
Owning a mountain cabin will save you the cost of lodging your family in a hotel for multiple days if you're in the area for vacation. And this will limit your spending to probably gas and groceries.
Summary
Whatever is worth doing at all is worth doing well. If you've concluded on buying a mountain cabin, you should be prepared to look until you find something you like and one you can afford. These tips will guide you on your quest to buy the mountain cabin of your dreams.
Home Care & Living
Buying a Home: Tips for First-Time Buyers
Published
2 weeks ago
on
October 28, 2021

If you're embarking on the exciting journey of buying your first home, you may feel overwhelmed by the sheer number of homes on the market.
Or maybe you've perused all the listings of homes for sale in Alabama and know exactly what you're looking for, but you're confused by the buying process and have no idea what to expect?
Not to worry. Here's everything you need to know about purchasing a home as a first-time buyer. From getting a mortgage to the day of closing, we've covered everything below – and more.
Save Up for a Down Payment
Before you even consider buying a house, you need to assess your finances. As a first-time buyer, you'll need a mortgage. Getting a mortgage means that a lender will front you the money to buy your home, and you'll pay the amount back with monthly payments.
To qualify for a mortgage, you'll need to put some cash down – this is called a down payment. Usually, a down payment on a mortgage is twenty percent of the price of the house (if you want to avoid additional fees).
If you don't have a down payment of twenty percent, certain types of mortgages will accept five to ten percent.
Know Your Credit Score
When you decide to buy a house, you need to know your credit score. First-time buyers will need a good credit rating (as well as a down payment) to qualify for a mortgage. If you have let a few of your payments to lenders lapse, it will negatively affect your credit rating.
Your credit score is a three-digit number that represents your credit history. Your credit report will also include a document with details that disclose the payments you have made on time, as well as any lapses. This document will display all your past debts, such as student loans, credit cards, and any other credit accounts you have.
When you apply for a mortgage, the lender will check your credit report and credit history to calculate your risk – which is the likelihood that you will pay back the mortgage – and the interest rate you will pay.
A history of non-payment or late payment will reduce your chances of being approved for a lower interest rate, or even decide if you qualify for a loan at all. That's why it's vital to check your credit score before applying for a mortgage – knowing what to expect makes it possible for you to rectify any errors or non-payments and improve your credit score.
Get Pre-Approved
Once you have checked your credit score (and perhaps made some improvements) you should get pre-approved for a mortgage to buy your home. Getting pre-approval from a lender entails meeting with a loan officer – preferably from several different companies as you shop around for the best rates.
The lender will assess your debt-to-income ratio, as well as your assets. This is to determine if you qualify for a loan, and what amount you can afford to pay monthly for your mortgage.
Getting pre-approved for a mortgage will assist you by minimizing the risk that you will default on your payments. When it comes to looking at potential houses, your pre-approval amount will provide a realistic figure for houses that fall within your price range.
Bear in mind though, pre-approval for a mortgage and mortgage pre-qualification are not the same. Getting a pre-qualification is a simpler process that will only give you a rough estimate of the amount you may qualify for, and it's not guaranteed.
Getting pre-approved takes time and requires a lot of paperwork – which is worth it because it guarantees your creditworthiness.
Find a Trustworthy Real Estate Agent
Once you have been pre-approved, you'll need to find a trustworthy buyer's agent. A good buyer's real estate agent can help you find a home in your price range based on your specifications and help you negotiate a deal.
A good real estate agent will also be able to help you with the process of buying your first home and navigate any pitfalls and paperwork. Using a real estate agent's services as a buyer is free – all sales commission is covered by the seller.
Shop Around
Now, it's time for the best part about looking for a home – looking at listings and attending viewings.
You should be able to find hundreds of listings online, in local papers, and by driving around. Once you find a suitable listing, ask the agent to set up a viewing so you can go and see it.
Due to the sheer number of listings, you'll come across, the best approach to looking for a home is to make a list of your non-negotiable features and "nice to have" features and go from there.
Make a list of how many bedrooms you want, how big the yard needs to be (do you plan on having children or getting pets?) and any other must-have features to narrow down your options. You should also consider the area or neighborhood you'd like to live in.
This is also where you'll decide if you want a new home with all the bells and whistles or if you're looking for a home that you'd like to fix up or renovate to your specifications.
Put Down a Strong Offer
Once you've found your dream home, you'll need to make an offer. In a competitive buyer's market, you might consider limiting your contingencies and offering more than the asking price of the home.
Your real estate agent will be able to help you negotiate and give you an idea of what constitutes a strong offer.
Get a Home Inspection
You'll need to hire a home inspector to thoroughly inspect the house. An inspector will be able to see if there are any problems – such as faulty electrical wiring, a weak foundation, asbestos, mold, garden pests, or anything else that might make you hesitant to move in.
The results of the inspection will allow you to find out more about the home that may not be noticeable at first glance, and it can help you when asking for concessions from the seller.
Prepare for Closing
The final step in the process is closing – which is also referred to as settlement or escrow. In the closing phase of purchasing a house, all the relevant parties will meet. This includes the seller, the buyer, mortgage representative, real estate agent, and anyone else who is part of the transaction.
On the day of closing, you'll pay everyone who was involved – which includes the down payment for your mortgage, closing costs, and any other fees. You'll also be given the keys to your home.
Closing costs vary, ranging from two to seven percent of the price of the home.
Home Care & Living
How to Find the Best Outdoor Grill
Published
2 weeks ago
on
October 27, 2021

For many American homeowners, the barbeque grill is the centerpiece of their backyard space. It is the central piece of equipment for every successful family gathering and can be used to grill up delicious meals all year long. Choosing the right grill for your family will take some serious consideration.
If you are a casual barbeque, you will likely opt for either a gas or a charcoal grill, two of the most popular types of equipment. For barbeque experts, you may want to compare wood-burning stoves like the Z Grills vs. Traeger grills. In this article, we will take a closer look at the factors to consider between a gas and charcoal barbeque.
Whether you want to throw a steak on your barbeque or are more interested in taking things up a notch with seafood and side dishes, you need a grill that fits your needs. Let's take a closer look at some of the factors to consider when buying a gas or a charcoal grill.
Gas Grills: Factors to Consider
Temperature Range
Different foods need to be cooked at different temperatures for the best results on the grill. If you like to cook everything from steaks to fish on your grill, you will want to check the temperature ratings of your candidates. The higher the score, the better the range of temperatures are on the grill, making them the right choice to cook various foods.
Burner Warranty
The burners on gas grills are the most common part of any gas barbeque. For that reason, it's crucial to find out how long your burners are under warranty. On average, a burner will last up to 10 years with proper maintenance, so you want your warranty to cover a minimum of that period.
Construction
Your barbeque will have to stand up to the weather of every season and a lot of abuse from yearly usage. You want to find a unit that is of solid construction. When looking at different grills, check out the pressure points and joiners to find the one that has the most solid construction.
Safety
Grilling can be dangerous if you aren't working with a safe grill. Sturdiness is an essential part of keeping you safe. Make sure that your unit also comes with the appropriate safety screening and automatic shut-off features.
Charcoal Grills: Factors to Consider
Airflow
Your charcoal grill will need proper airflow to regulate your cooking temperature. You will want to choose a model with adjustable vents, a secure lid, and solid vents to help you adjust your temperature.
Coal Bed
If you are cooking on your barbeque for an extended period, you will need to add more charcoal. Look for models that have an accessible side door so that you can safely build up your charcoal.
Grill Size
Coal briquettes burn fairly evenly, so your temperature regulation will depend on the size and shape of your grill area. For a hotter and longer-lasting flame, you will want a cooking size that is larger. For low-temperature cooking, your grill surface should be slightly smaller.
Safety
Charcoal grill flames are controlled by the user, not by an adjustable setting. This makes them slightly more dangerous than a gas grill. It's a good idea to have an extinguisher around your grilling station or a garden hose to handle any flare-ups.
Grilling for your family is an American tradition. Consider these factors as you choose your new barbeque that will be with your family for many seasons to come.
Greenhouses
How to Clean Your Greenhouse This Summer in 8 Easy Steps
Published
2 weeks ago
on
October 26, 2021

1. Make Sure Your Greenhouse Is in Good Working Order
Take a good look around your greenhouse. Remove everything that isn't appropriate so you can start over. Look for broken pieces of plastic, glass, or wood, make any necessary structural changes, and check for leaks in the irrigation system. If your home becomes flooded during the winter, you'll want to repair it without delay. Also, keep an eye out for any bug hiding spots (keep reading to learn more).
2. Sweep Your Greenhouse's Interior and Exterior
Remove any dead plants, pots, tools, and other abandoned items from the greenhouse. For the garden, fill a bucket halfway with hot water, some soap, and disinfectant (they're available at any home improvement store or even regular supermarkets). Use a clean cloth to clean and sanitize the outer surface of plants and pots. Do not forget to sweep and clean the floor.
When you're ready to plant, clean out any unused jars or pots you have. Clean the outside of your greenhouse with a high-quality pressure washer. Then double-check to see if there are any leaks.
3. Pay Attention to Seasonality
March is an ideal time to plant the seeds for those plants that need a little more time to mature before harvest. Begonias, geraniums or even peppers, and eggplant are just a few examples of plants that like to begin growing early. Check the online resources to find a convenient and comprehensive schedule of how to make sure your gardening tasks are season-appropriate.
4. Conduct a Pest-Prevention Sweep
The cold, contrary to common opinion, does not solve your insect issues. Snails, critters, and other tiny animals hibernate in previous year's leftover pots and crevices, as well as in the crowns of plants. The vine weevil has larvae that like digging through compost heaps for plant roots to eat. To cleanse your greenhouse against annoying vine weevils, weed out any you discover and apply the anti-parasitic chemical liquid. This is another reason to make sure your deep cleaning is comprehensive and thorough before the new season starts.
5. Make Sure the Beds, Gates, and Trellis Are in Good Working Order
Well before sweltering heat sets in, get the hard lifting done. It's important to repair any structures or equipment that have fallen into disuse now, so once the warm weather arrives, it'll be all about the garden. Another excellent idea is to put a wood preservative on any wood material in your greenhouse during extended periods of dryness.

6. Keep Your Gardening Equipment Clean and Sharp
If it wasn't obvious before, cleaning everything that will come into touch with or be in proximity to your greenery is critical. Dirty tools may spread illness and introduce germs and fungus to newly pruned plant markings. Keeping your tools sharp can also help you save time and money in the long run. If they are sharp, they will function better. They'll also be more convenient to deal with and provide cleaner and more precise cuts.
7. Prepare Your Compost Pile
It's time to create a compost pile in your yard if you don't already have one. It doesn't matter whether you buy a prepared compost container or construct your own out of scrap wood. This achieves two objectives: You now have a place to store your garden trash, and your crops will appreciate the fertilizer full of nutrients, that is produced as it decomposes! Green clippings, vegetable and fruit peelings, wood chips, and even shells may all be used to make the ideal mix. To keep your compost fresh, turn it in once a month with a garden shovel or fork to keep it fresh and oxygenated.
8. Check to See Whether the Ventilation Is Enough
Inadequate airflow in the greenhouse is a common cause of fungal infections. Make sure that your greenhouse has adequate apertures and that they are properly positioned to allow for optimum air circulation to prevent a catastrophic infection for your plants. This should ideally include two vents on opposing sides of your greenhouse, as well as two vents on the roof. Investing in a fully automated vent-opener is one option. This may preserve your whole crop if temps increase and the greenhouse becomes hot. If you fail to open those vents for whatever reason, the automated vent guarantees that warm air escapes, avoiding the withering of plants.
The preceding are only a few things to think about before the official season begins. How long does it take you to get your greenhouse ready for the season? Share your ideas with us so that others may benefit from a beautifully prepared garden.

Home Care & Living
5 Factors to Consider When Renting Out Your New Jersey Home
Published
3 weeks ago
on
October 22, 2021

Renting out your New Jersey property is a terrific way to supplement your income. With New Jersey's higher-than-average family income of $73,702 compared to the national average of $55,322, the potential for profit in the rental business is substantial.
The apartment renting business, which includes more than 500,000 rental units in buildings of five or more units each, is a vital component of the New Jersey economy. The industry has helped produce nearly 44,000 jobs in 2010, accounting for 1.2 percent of total state employment.
Furthermore, the industry actively or passively contributed 1.2 percent of total state GDP, amounting to $5.7 billion to state GDP. The renting business also generated local tax revenues worth more than $1 billion. The rental apartment business in New Jersey has significant revenue potential for you. However, before you get started in the rental business, you should consider the following.
1. The Cleaning Upkeep
It is critical to present a clean rental property to potential tenants. However, don't expect your rental property to be impeccably clean and in good shape once the previous tenant has left.
A well-kept property reflects highly on you and your property. You're sending the message to your tenants that you care about your property and want them to keep it in good condition. However, cleaning between each guest can be quite challenging and time-consuming.
You can either get to someone to perform this or save money by doing it yourself. Remember to account for the time it will take to clean between each guest. Make sure that everything left behind by your prior tenant is removed. Double-check closets and shelves, and clean up any stains on the walls.
Some other cleaning basics include:
- Empty all cabinets and refrigerators.
- Vacuum the carpets, cabinets, and other areas of the house.
- Make sure your property is spotless and freshly painted.
- Take a video to record the property's condition for your next client.
2. The Little Details
With over 500,000 rental units available, competition can be intense. Therefore, you must ensure that your house stands out from the crowd. Adding additional decor and providing items such as shampoo and conditioner can help set your rental apart from the competition.
To finish your house makeover:
- Add paintings and accessories.
- Place a vase on the table or arrange various boxes, candles, and books on the shelf.
- Arrive at your property at least 20 minutes early to meet with prospective tenants (unless you have a lockbox).
- Clean the front porch, vacuum the carpets, set a lightly scented candle, and open the shades to allow in natural light.
3. Have Services On-Hand
Renting out your property has several responsibilities, and you should always be prepared for unexpected events. While tenants are living in the rental home, everything from bug infestations to leaks can occur. You must be prepared to deal with common household pests such as cockroaches, bugs, ants, and beetles. These pests have the potential to contaminate your tenant's food and personal items.
It is better to be prepared with service providers to remedy the problem ahead of time and have services readily on hand. Be ready to contact pest control services in NJ or a handyman that can fix a leak and do minor repairs easily.
4. Protect Yourself
You must ensure that your property is protected before renting out your home. Make sure you have a signed lease that outlines your tenant's rights and responsibilities. A decent lease contract should be following insurance laws and other housing, rental, and tenant requirements.
It is critical to protect your property with the appropriate insurance policy. You'll be required to have rental home insurance as a landlord. This covers policy that protects your home, as well as medical expenditures, legal fees, and loss of rental income.
5. Think Seasonally
Typically, visitors to New Jersey come during the early summer months. That would be from July to August when the weather is usually hot and humid. As a result, this season should see an increase in the number of prospective tenants.
Most tourists avoid winter because it is too cold, preferring the milder weather of autumn and spring. So people likely won't travel to New Jersey as much during the winter. So consider this to be your low season for rentals. Try to rent out your house during peak season if possible.
Be Ready to Deal With Tenants
Renting can generate additional revenue if the rent is greater than the mortgage payments. So, if you have a vacant property, one alternative to explore is renting it out to generate rental revenue. But, of course, you must be prepared to deal with tenants and maintenance along the way.
DIY Projects
8 Modern Features You Need for Your Home Exterior + Bonus Tips
Published
3 weeks ago
on
October 22, 2021

It's not just the inside of your home that sets off the first impression. Your exterior is also important. That's why modern homes are doing things like adding glass walls, radiant heating and cooling systems, skylights, green roofs, and more to their exteriors. Let's explore some of these features in detail!
1. Glass Railing
The first thing that most people see when they step up to your home is the railing. You can make a great impression with a glass railing since this beautiful design sets off both your home's exterior and provides safety for those entering it. You can also find more online if you need new ideas.
Extra Tip: Glass Railing for Stairs on Porches and Added Porch Space
You can add stairs on porches to help protect your house from damage caused by weathering and erosion while adding more living space for you and your guests. When you add a glass railing for the staircase on stairs or porches, it provides an eye-catching look that adds extra safety features.
Adding porches is another way homeowners can enjoy more living space without breaking their budget by moving into a bigger home. With added porch space, families can eat dinner together outside or enjoy time with friends and family around the grill without feeling cramped inside their home! This is also great if you have small children playing nearby in the yard because you can keep a closer watch on them.
2. Green Roofs
You know green roofs provide homes with insulation and natural beauty, but they also help insulate them against noise pollution and bad weather conditions such as high winds or hail. This feature also helps filter pollutants from the air for cleaner indoor air. If you're building a new home, consider adding one to help keep your house cool in the summer and warmer in the winter.
3. Sliding Glass Doors and Energy-Efficient Features
Sliding glass doors are an increasingly popular feature to add to homes because they can turn any room into a fully enclosed patio space. With these types of doors, you can open up several rooms for entertaining or relaxing while enjoying the fresh air!
When you add energy-efficient features to your home, you will have all the above benefits without paying more on your utility bill each month. These features include things like double pane windows, insulation, and radiant heating and cooling systems. With these in place, you can save money by lowering your monthly energy costs. Of course, if budget is not an issue for you, then there are even more modern features that you can choose from – it's truly up to you!
Super Tips: Radiant Heating and Cooling Systems
You can also add radiant heating and cooling features to your exterior design because these types of systems are easier on the eyes when compared with traditional HVAC units. Not only do radiant heating and cooling systems look better, but they also offer the added benefit of keeping your home more environmentally friendly since they recirculate air instead of needing to draw in new air after each cycle.
4. Modern Exterior Lighting
Adding exterior lighting is another way you can turn your house into a modern home. This feature is important because it allows people to see your home more easily at night, but there are some other reasons that exterior lighting is great for homeowners. For instance, security lights will help protect your home against intruders and thieves during the evening hours when most burglaries occur.
5. A Glass Wall on the Garden Side
You can also add glass walls around outdoor spaces like pools or gardens for safety purposes and design appeal. These types of enclosures keep children safe without compromising the look of your property since these glass walls blend in with any kind of architecture that you're using throughout the rest of your property.
6. Placing the Garage at the Front of the House and Front Entrance Areas
With home exteriors all about adding more living space, why not consider placing your garage at the front entrance? This feature is becoming increasingly popular with homeowners because it adds square footage for parking or future expansion room. Plus, this type of layout typically showcases a beautiful front yard and walkway, so you can add amenities like flower gardens or even a water feature to make your home stand out from the crowd!
If you're going to be remodeling or updating your home exterior, then making sure that the front entrance area of your property is just as nice looking as the rest of it is a must! This is why people are choosing to add unique features like glass railing or crystalia glass best railing for staircase with wood accents because they look aesthetically pleasing and keep people safe when walking into their homes.
7. A Roof Suitable for Storms in High-Wind Areas and Skid Resistance Surfaces
Adding a roof suitable for high wind areas is another safety feature you may add to homes in coastal areas or other high-wind regions. This way, when storms roll in, people can remain safe without having to worry about damage to their roof, which could result in expensive repairs.
Because it's common for homeowners in high-traffic areas to walk up to their driveways when returning from work, be sure to consider adding skid-resistant surfaces such as brick pavers or gravel so people don't slip and hurt themselves if it's raining out. Since these walks are typically pretty long, this is an important feature, so people feel safe walking onto their property after a long day at work!
8. A Background That Offers Privacy
Having a background or landscaping that offers privacy is another thing you should consider when updating your home exterior because it will help place more emphasis on your front entrance. This added privacy screen can also minimize noise pollution from nearby roads, so people don't feel bothered by outside distractions once they step onto their property.
And finally, three great bonus tips for your home exterior:
A. Focal Point Decks and Pergolas
When looking at the best ways to add living space without increasing the square footage of your home, be sure to include adding deck areas or pergolas for seating into the plan! Not only are these types of features great for entertaining guests, but they make fantastic outdoor entertaining or living spaces.
B. Brick Accents
Adding brick accents is another detail that homeowners are implementing on their new homes or when updating existing properties because it creates a unique aesthetic appeal beyond wood siding. If done correctly, a brick accent wall can add a lot of personality and flair to your home exterior while also complementing areas like stone or stucco that you may have used on the rest of the structure.
C. Skylights
With all the benefits that skylights bring to the table for homeowners, it's no wonder why people would choose this type of exterior feature for their homes! Not only do skylights allow ample sunlight into your home, which reduces energy costs by cutting down on electricity usage, but they also create a fantastic aesthetic appeal that enhances any room you install them in.
Home Care & Living
Selling a House As Is in Georgia
Published
3 weeks ago
on
October 20, 2021

Selling a house as-is in Georgia appears to be an excellent deal for sellers seeing as homeowners aren't required to rush around repairing the property.
However, what do as-is offers imply for buyers? Some individuals see the phrase "as is" as a cautionary sign when browsing real estate listings without knowing the implications.
Suppose you're a homeowner desiring to sell your property in its current condition, click this link for selling a house as is in Georgia.
What It means to Sell a House As Is
When a realtor puts a home for sale as-is, it signifies the owner is selling the property in its current form, with no plans to make repairs or modifications before the transaction (or negotiate with a prospective buyer for credits to finance these fix-its).
People frequently sell properties that need repairs because the landlords or other sellers can't rectify the issues before selling (which would enable them to sell the house for a higher figure).
If you've been considering selling a house as is in Georgia, this article will help to guide you through the process. Let's delve right in!
Why Sell a House As Is?
Here are some reasons you might want to sell your house as-is:
- You Can't Cope with the Stress of a Property Sale
Sometimes property owners find themselves in positions where they need to sell their house but can't cope with the mental strain of a lengthy sales process.
If you're sick or unable to handle the selling procedure, you might conclude that selling the property as-is is the most suitable option. Ensure you consider all your choices before deciding to sell your home in its current state.
If you can enlist the support of friends or relatives, or if your real estate agent agrees to handle all the stressful aspects, you'll probably receive a higher price for your building than if you sell it as-is.
- You Can't Afford Repairs
You might be in an economic situation where making repairs isn't an option. If the building has flaws that you can't fix, you can be forced to sell it as-is.
However, before making a hasty choice to sell the house in its current condition, try to be open-minded and speak with your real estate agent.
Your realtor might develop innovative solutions that will allow you to avoid selling as-is or avoid including it in your initial listing under homes for sale by owners in Georgia.
Tips on Selling Your House As Is
You can sell a residence as-is by following the same stages as a typical home sale, except you won't have to deal with the home staging. Isn't that wonderful? Who doesn't want to work less?
The only disadvantage is that you must display all the property's flaws. Follow these guidelines to figure out where to begin when selling a house as is in Georgia:
- Consult a Local Real Estate Agent
You may be short on cash, nevertheless working with a knowledgeable real estate agent is critical. First, they'll assist you in determining a reasonable fee.
Seller's agents conduct a comparative market analysis, meaning they learn how much comparable houses have traded for in your region.
This allows you to fix a reasonable price from the beginning, preventing your home from staying on the marketplace for too long.
In addition, an agent provides you with exposure to a multiple listing service, which is a home-listing network run solely by real estate brokers. This network makes it easy to contact the purchasers who are interested in acquiring an as-is residence.
- Disclose the Property's Defects
Even if you're selling your property "as is," you'll most likely need to provide potential buyers with a home seller disclosure before they make an offer.
The disclosure report tells purchasers of all your home's issues in advance so they won't try to cancel the deal later.
All states have various regulations regarding disclosure reports, so consult your realtor to ensure that you understand what you're legally required to submit.
Some jurisdictions have a caveat emptor rule that lets your buyer discover the flaws in your home themselves.

- Conduct a Home Inspection Before You List it
How do you evade getting affected by your region's disclosure laws? Before you put your house on the market, get it inspected.
A home inspection usually costs between $200 and $500. It's a modest fee to incur compared to forfeiting a sale or being sued for failing to disclose a severe problem.
On the plus side, giving prospective buyers a complete disclosure analysis based on a thorough home inspection demonstrates that you have nothing hidden, which may enable you to sell your property faster.
Some issues you may have to reveal to your prospective buyers include plumbing problems, foundation damage, water intrusion, plumbing problems, and mold.
Additionally, your realtor will help you understand your state's disclosure regulations, so you're not stuck guessing what potential buyers are legally required to know.
- Acquire Cost Estimates for Possible Repairs
You can figure out how much it'd cost to repair your house after knowing what's wrong with it. You aren't required to make any repairs after determining the estimates.
If purchasers try to undercut you on price, you'll have greater negotiation leverage if you acquire realistic cost estimates from neighborhood contractors. However, you might discover that some repair expenses are actually within your budget.
You'll also have a higher chance of making more profit at the closing table if you renovate the property. Therefore, create a list of all the jobs that need to be performed and obtain estimates for each.
- Set a Reasonable Price
You should now have all the information you require to determine a reasonable price for your property as-is when selling real estate in Georgia.
Your realtor can help you advertise the home's good aspects, such as size, floor plan, and location, to ensure that prospective buyers aren't just looking at several flaws when they view your listing.
That way, you won't have to bother about scaring off purchasers or not getting your fair portion of the sale.
Summary
Selling a home as-is is a bit different from selling a standard house. Regardless of the state of your house, you can easily sell it off as-is.
Suppose you seek an agent to help you sell your house as-is, contact Tim Stout and Associates today to take care of everything.
Home Care & Living
7 Ways to Get Rid of Mosquitoes Inside the House
Published
4 weeks ago
on
October 18, 2021

Mosquitoes are slender, long-legged flying insects that can be found in almost every corner of the world. Interestingly, the male mosquito doesn't bite people and animals; only the female does. Both males and females feed on nectar, plant sap, and water, with the females also sucking blood to help them grow their eggs.
Female mosquitoes are not just annoying, but they also spread diseases. The insect is responsible for spreading malaria, yellow fever, encephalitis, filariasis, Zika, West Nile virus, and dengue fever. Keep mosquitoes away from your home and protect your family by eliminating the risk of getting bitten. If they have already made it into your home, then take these steps to get rid of them:
1. Block Their Entry Points
Mosquitoes enter your house through the doors and windows. Check for any cracks on the door and window seals and repair them where necessary. You can also invest in door and window screens to mosquito-proof your home and replace them when they develop holes. Open the windows to air the house, mainly during the times when mosquitoes are less active. You may be wondering what time mosquitoes come out, which is usually at night and they remain active through the early morning hours. They are less active in the late morning and afternoon hours, as the daylight dehydrates them.
2. Get Rid of Any Breeding Grounds
Mosquitoes breed in standing water. Keep your dishes clean and void of water, even those that you use to feed your pets. Check under the faucets and plant saucers for any accumulation of water and drain it off. With no standing water, there will be no place for mosquito larvae to thrive.
3. Plant Mosquito Repellant Herbs
Mosquitoes are very sensitive to certain smells. Grow herbs like marigolds, citronella grass, tulsi, peppermint, and lemongrass around your windows and door area to keep the nagging insect away.
4. Make Use of Essential Oils
Essential oils work in the same way that repellant plants do. Mint, tea tree and lavender oils will keep the mosquitoes away, and tulsi oil will go an extra mile and keep them from breeding. You can also mix these essential oils with a carrier oil, then apply them to your skin to keep mosquitoes from biting you. Essential oils get rid of mosquitoes and also keep your home smelling great.
5. Use Chemical Insecticides
Chemical insecticides can help you eliminate all the mosquitoes from your home. Pay close attention to those dark and humid places like the laundry room, closets, under the sink, and under the furniture. Ensure you observe safety standards when applying the chemicals, or better yet, engage the services of a professional fumigator.
6. Use a Mosquito Trap
A mosquito trap attracts mosquitoes to it using UV light. It then sucks them in, traps them, and kills them. All you have to do is clean and empty the trap occasionally. This device is affordable and works best when you use multiple of them in different locations around the house.
7. Use Mosquito Nets
If mosquitoes keep finding a way into your home, or you simply can't sleep with your windows locked at night, get some mosquito netting. These come with breathable homes so you will be comfortable, but the mosquitoes cannot manage to pass through. Install the netting all around your bed and sleep bite-free.
Endnote
Apart from transmitting diseases like malaria and yellow fever, mosquitoes can be annoying. Use these tips to get rid of mosquitoes inside your house.
General Gardening
Garden Remodeling Ideas On a Budget: The Ultimate Guide
Published
4 weeks ago
on
October 18, 2021

A garden remodeling project can be expensive, but you can get the best out of it for less with proper planning. This will help you come up with estimates for your budget. You may also seek professional help if you require it. Here are a few garden remodeling ideas you can execute on a budget.
1. Add flowers
Flowers are an affordable and easy way to remodel your garden. You can plant ready-bought bedding plants, seeds, or bulbs. Choose beautiful, low-maintenance flowers you can easily take care of. For your flower garden to succeed, collect samples of your garden soil and have it tested to determine if it has the proper nutrients. If your garden soil doesn't meet the relevant nutrient requirement, check out this company for enriched topsoil mixes. Find out what flowers will thrive in your soil type and know your frost cycle to ensure your garden survives all seasons.
2. Grow some produce
Vegetables, fruits, and herbs are an excellent addition to a garden remodel. It's cost-effective and doable even with the smallest amount of space. You can use pots to grow tomatoes, courgettes, salad leaves, basil, or coriander plants.
3. Invest in outdoor furniture
Depending on the available space and the theme you want to bring out, consider buying garden furniture. Go for quality furniture designed for the outdoors and ensure it's easy to care for. This will not only create a relaxing space for your family, but also upgrade your garden.
4. Build a fire fit
A fire pit is an excellent fit for your garden if you want to create a cozy and comfortable environment for your dear ones. It's ideal for the evenings when family members are relaxing and catching up. When building a fire pit, consider its size and location and go for a comfortable height.
You may also consider incorporating a built-in seating area while taking advantage of the surrounding views. You can buy a fire pit from a local store, get a custom-made one, or seek the help of a landscape professional with experience in fire pits.
5. Consider wall garden plants
Adding plants to your garden wall is a great way to beautify your outdoor space. When choosing plants for your garden wall, ensure they won't grow past the wall and that they can do well facing a particular direction. Check the soil to ensure it isn't thin and dry. Select plants ideal for walls and vertical spaces such as roses, fruit vines and trees, flowering vines, climbing vines, and shady climbing plants.
6. Maintain your lawn
Maintaining a healthy, green lawn requires regular mowing and watering. If your lawn lacks lustre, consider using lawn seeds or grass food for an easy and quick lift. Rake your lawn to identify any bare patches that need your attention then gently fork over the patches and add compost or top soil. Scatter the seeds, sprinkle compost over them, and sparingly water them.
Endnote
Garden remodeling can be done on a budget and still boost aesthetics. Consider using these tips for your next garden renovation project. Additionally, find ways to protect your garden and keep it healthy.
Home Care & Living
The Most Popular Home Decor Trends in 2021
Published
4 weeks ago
on
October 17, 2021

If we talk about the world of interior designing a few decades back, it would definitely not have been the same. The recent years have seen a great change in the world of interior designing. Shifting from the art deco of the roaring twenties, onto the emergence of new shapes and colors into the '80s, the recent era has developed with a new twist of modernity in our home decors. As interior designing continually evolves, today great significance is being given to making homes comfortable and relaxing.
Home decor trends may come in quick, but they won't always last too long. Much like the changes in the previous years, interior designing trends in 2021 are much different than the previous years. If you are searching for home decor trends in 2021, you're at the right place. Below are some of our favorite home decor trends of 2021.
1. Use a Wallpaper
Wallpapers are an old trend that has made its way back in the year 2021. Being used greatly in the previous decade, wallpapers had lost their charm in the early years of 2000. Today, there are multiple wallpapers of diverse colors and designs available that you can choose on from. For those who love and adore minimalist designed homes, this tends to be a great option. Nevertheless, this doesn't mean that wallpapers have to be monotonous, you can keep them as colorful and wild as you want. The color and design options are endless.
2. Greenery With House Plants
Again, the use of indoor plants to decorate homes is not a new trend but has boomed in recent years due to the pandemic. Not all of us have the privilege of being surrounded by nature, but you can always bring nature inside with house plants. The recent trend of 2021 has revived the beauty of indoor plants. Decorate your comfort zone with beautiful greenery. You can plant flowers, or grow herbs in your windowsills to bring a touch of nature inside.
3. Add Layered Rugs
One of the popular home decor trends of this year is layered rugs, and there's no doubt why! Layering rugs not just double the depth and texture of the palace but also makes the place seem warm and cozy. Moreover, layering your rugs is a convenient option because it costs less than buying one big rug. A good combination for a layered rug is one big jute rug with a smaller-sized patterned rug.
4. Being in Personalized Pillows
A custom pillow like a throw pillow is a superior interior designing tool. Again, customized photo pillow has been a running style for several years and only continues to be a great trend in 2021. You can get your favorite pillow with picture from different shops. Allaboutvibe has the best collection of personalized throw pillows for your home. Click here to explore the collection and find your favorite one. Personalized throw pillows are a pocket-friendly option because you won't always have to get new ones, you can just swap the pillow covers and get a new look.
5. Get Started With Leather Furniture
Leather furniture, ever since the start has been a constant style in interior designing because of its natural hardiness and everlasting beauty. Leather furniture is a classic idea for your home decor, one that never goes out of style! Other than the elegant look that this furniture gives, this timeless beauty is never going out of fashion!
6. Set Your Home Office
In the 21st century, people have shifted from work outside to work from home. With this recent rise, homes are now turning in offices. People have started setting up trendy and pretty offices in their homes. After all, who wouldn't want to work in such a pretty office, and that too at the comfort of their homes? Home offices are decorated and set to bring motivation and creativity to work. So, with the rise in work from home, home offices have made their place in the list of the most popular home decor trends of 2021.
7. Decorate With Curtains
This year, bird farewell to blinds and welcome in the curtains! The home decor trends of 2021 have brought elegant floor-to-ceiling curtains that make the room feel cozier, and the windows, larger. Moreover, curtains are an elegant addition that will add depth to your room. Curtains are an interesting way to decorate your home as they bring in the shade with style.
8. Try Woven Wall Hangings
Woven home decor like wall hangings has been amongst the list of the most popular trends in 2021. What better way to add a touch of detail and texture to a dull wall than to add an interestingly woven wall hanging. Woven wall hangings are an attractive addition to your wall and are sure to capture everyone's attention. Get creative with these wall hangings because there is plenty to choose from. Woven wall hangings come in different colors, shapes, and sizes. And the best part, they won't be heavy on your pocket.
9. Gallery Wall
The gallery wall trend is one we can assure you won't go out of fashion that easy! There are multiple ways you can set your gallery wall, and the best part, it sets in perfectly with almost every style. When you are setting up your gallery wall, make sure to blend the colors, sizes, and textures of the art you choose. This adds a great aesthetic look. If you like it raw, you can even go for standalone art pieces like mirrors, clocks, or canvases.
Verdict
We have seen some of the most exciting home decor trends that came rose to the top in 2021. With the trends of home decor changing every year, we can't predict what the next year will bring, but we hope that most of these amazing trends stay the same! If you are yet to decorate your home, make sure to follow these top home decor trends of the year. We are sure you will love them!
Home Care & Living
Why Engaged Couples Should Consider An At-Home Wedding
Published
4 weeks ago
on
October 17, 2021

81% of respondents to the 2020 Brides American Wedding Study have changed how they look at and plan their weddings in light of recent global health circumstances. Smaller ceremonies and micro weddings are on the rise and the focus has been placed on celebrating love rather than how elegant or grand the wedding ceremonies and receptions are. Social distancing, travel restrictions, and economic uncertainties have also made a lot of couples think of hosting their weddings and receptions at home. Even a small garden can look stunning and just as classy as any for-rent venue. Read on to find out why a small at-home (garden) wedding can be a wonderful idea.
Environmental Impact
87% of Millennials think that all companies have the duty to seriously take into consideration social and environmental issues. This concern has been influencing companies in all industries including the wedding industry. 73% of events like a wedding's total carbon footprint comes from guests making the trip to and from the venue. Needless to say, having a small sustainable wedding at home will be of great help to Mother Nature.
Natural Backdrop
Having the wedding in your garden or backyard will reduce the need for decors, which is one of the more wasteful elements of a wedding. Instead of ordering floral arrangements that are usually thrown after, the plants and flowers you already have will serve as a gorgeous natural setting for a memorable occasion. If you have the budget, consulting with a professional landscaper will help you decide how to best get the look you want for the wedding. If you'd like to keep costs down and you feel that what you currently have in your garden isn't enough, getting a variety of potted plants is one way to go. They are also a lovely addition even if you decide to hold the ceremony indoors or on the patio. You can add fairy lights or candles for an evening wedding to create a more romantic ambiance. The best thing about having your own plants as decors is you'll still have those plants after and you'll be remembering your wedding day every time you see them.
Making Memories
Having a small wedding at home can be likened to an intimate dinner party with your closest family and friends where you realize which people you truly want to share such a momentous event with and even how to celebrate it. When you have the ceremony and reception at home, you and your partner decide on how formal or casual it would go. This and having it at home, which is certainly special for you, will make for an extraordinary event that will be retold in years to come.
Just like with any important event, you'll still need to plan for a micro wedding at home. You'll be able to save more when you carefully think about which part of the house to use, the number of guests, and the mood you want to create.
DIY Projects
6 DIY Home Remodeling Ideas That Pay Off
Published
4 weeks ago
on
October 14, 2021

Ever thought of giving your home a makeover without the trouble of a complete renovation? Then you're in luck; there are plenty of fun DIY projects you can undertake to spruce up your space and add something new. Check out these simple projects to transform your house and spice it up, and without any help from a contractor.
1. Spruce up Your Front Door
Your front door is one of the most visible and noticeable parts of your home. Mixing things up with your front door is an easy way to add some character to the house's exterior. A fresh coat of paint helps revive your door and creates a new look for your exterior. You can match the paint to the colours inside the house to give any visitors a taste of what you've got to show off inside. If you want to take your renovations to the next level, you can even add a new door handle or knocker to add a few more points of interest just before anyone comes inside.
2. Make Your Own Shelves

You can never have too much storage space, and a few extra shelves around the house can help you in that regard. Think about adding some shelves, particularly floating shelves, or avail a self-storage North York facility to give yourself some more storage space. A few extra shelves can also work as great decor. For example, place some books on the shelves so you have your favorites close to hand, and show them off. You can also consider using recycled materials like used wood pallets to make your project more eco-friendly while staying cost-effective.
3. Update Your Fixtures
Replacing your lights is a great way to change the ambiance inside for the better. It's a good chance to replace any harsh white bulbs with more calming yellow ones that'll be easier on the eyes. Opt for LED lights that'll last longer to get more bang for your buck and make the house just a little more energy-efficient. You can also install dimmers instead of light switches to go with your new lights. Dimmers let you set the brightness in each room to match your mood and time of day, allowing you to create specific moods as you like.
4. Get Smart
Technology brings with it some new conveniences, and you can take advantage of them to spruce up your home. There are plenty of smart home features you can integrate into existing systems. Think about adding smart thermostats or irrigation controls. In Toronto winters, having these devices offers greater control over your systems to avoid wasting heat, water, or electricity. You can set timers or control those systems from your phone and make those essential systems more energy-efficient and easier to control.
5. Replace Cabinet Hardware

Rather than replace your cabinets entirely, you can replace the handles to give them a dramatic uplift without breaking the bank. Measure the existing drill holes to get the right size, then buy the hardware you like. Take care to choose a style that complements your cabinets to create a harmonious aesthetic in your rooms. This project works equally well for all sorts of cabinets, from the medicine cabinet in the bathroom to your bedroom drawers. You can also think of it as a tip for storing your glassware, clothes, and knickknacks in style.
6. Add a Touch of Green
One effective way to breathe some new life into a bland or dated space is to bring in some plants and flowers. Plants do far more than just add a splash of colour to your home. Even adding a few potted plants to your rooms can freshen the air and add some vitality to your space. For beginners, look into more durable and low-maintenance plants that'll be easier for you to take care of. Rather than using pots to hold your plants, you can use your imagination. Look for old items around the house you don't really use anymore and turn them into DIY pots. Not only is it a great way to be more eco-friendly, it's also a great chance to show off your artistic side as you decorate your recycled pots to your liking. You can even make it a bonding activity with the family; take a weekend to decorate your own personal DIY pots and put your own stamp on each one.
Renovating your home doesn't always have to be a large, time-consuming process. Even a few simple DIY projects can go a long way toward making a house feel new. Use these ideas or connect with an interior decorating Toronto professional to start giving you some inspiration and making your home look and feel exactly how you want it to.
General Gardening
Essential Spring Gardening Tips
Published
4 weeks ago
on
October 13, 2021

When spring is around the corner, it's time to step up and do your chores! Going back to your garden after a long, cold winter might seem a bit overwhelming, but you could also see it as a relief. The air might still be chilly, but there are lots of things you can start doing little by little to get your garden ready for warmer weather.
The beginning of spring is a great time to assess your garden's state – leftover effects of winter, condition of your tools, landscape, lawn, pruning plans, flower beds, soil feeding, and new ideas for planting. Your garden will certainly need help to get back in shape, so it's best to have a plan for how to make it all happen. This is also an ideal time to install a deer fence to keep those winter starved deer from invading your garden. Here are several essential spring gardening tips that you might find helpful.
Inspect your yard
The first step would be to inspect your yard and assess the trees. Decide which tree limbs need to be removed or supported, particularly those that overhang structures. You can also enlist the help of an arborist to tackle larger trees.
The next step is to assess the mid-level. You should cut down and clear out last year's perennial foliage, and add it to your compost pile. Then, move to the ground level and rake out all the mulch from beds planted with bulbs before foliage starts growing. Also, mulch in other planting areas should be refreshed after the soil warms. Finally, inspect all your hardscaped areas –check your steps, pathways, and fences for any necessary repair.
Tune-up your tools
You have probably stored your essential gardening tools properly before the onset of winter, but just in case, give them some attention to make sure all is functioning when the time comes for garden work. Pruning tools might need sharpening and wooden handles can benefit from a good clean and another layer of linseed oil. Also, if anything is missing or broken, you have time to buy new tools for the season.
Prune shrubs
While the shrubs are still in their winter sleep, it's perfect timing to do some clearing up – remove dead, damaged, and diseased branches. With the exception of once-bloomers, you should thin and you're your roses and summer-blooming shrubs such as hydrangea and butterfly bush. Cold-damaged wood should be pruned after plants start growing in the spring and those shrubs and trees that bloom in the spring should be pruned after flowering.
Refresh the lawn
If you have a lawn, spring is the right time to give it some TLC. Have your mower and leaf blower serviced and sharpened. Refill your mower with oil, replace old spark plugs, and lubricate all the moving parts. Clear the winter debris off your lawn and check out if there are any areas that might need reseeding before you start mowing.
Address the gaps
If you see there are empty or bare spots in your garden, choose new plants that could fill up those spaces. You could opt for perennials, trees, or shrubs. Nurseries are generally quite helpful when it comes to ordering whatever variety you want even if they currently don't have it in stock.
Prepare new beds
If you feel like creating a new planting bed where there was none before, this is a perfect time. Start by digging the soil, adding oxygen, and relieving compaction. The next step is to add compost to kick-start the development of nutrient-rich soil. As soon as the soil can be worked on, clear the planting area from debris, weeds and sod spread the amendment of your choice, and cultivate it 10 to 12 inches deep. Then, rake it well and smooth before you start planting.
Plant new flowers and shrubs
Once you've done all this preparatory work in your garden, you can finally being to add some new plants. When it comes to choosing what to plant come springtime, it's best you first check with what grows well in your climate. Different zones are suitable for different plants, so picking the right plants will mean much less hassle and worry later on.
The general advice is to pick more perennials rather than annuals since annuals have to be replanted every year. This means investing in plants that will die every year and need replacement the next.
Fertilize
As your garden begins to wake up from the winter slumber, it'll appreciate some fuel. Choose a balanced fertilizer or fish emulsion to spread around trees and shrubs once the new growth starts appearing. Also, fertilize perennials when they start actively growing. You can also use high-acid fertilizer and pine-needle mulch around shrubs like blueberries, azaleas, camellias, or citrus.
Add mulch
In addition to fertilizers and compost, consider adding mulch to flower beds. A couple of inches of mulch can help prevent weeds and diseases. It also locks in the moisture in the garden and maintains the optimal temperature.
Put up supports
If you've taken down your trellises and stored them safely into the shed for winter, early spring is a perfect time to put them back up in the garden. Make sure their structure is still solid and apply a fresh coat of paint if necessary. If you grow peonies, or any other perennials that need support, set them out and when they start to grow, gently wrap their stems to help them grow up. This is easier done now than when the leaves start unfurling.
Start a compost pile
This is also a perfect time to start your compost pile – begin by collecting plant debris and all the leaves you have previously raked up. Combine equal amounts of brown and green materials – dried leaves and straw and grass clippings and weeds. There are different ways you can take to forming your compost pile so pick the one that most suits your preferences and possibilities.
Be prepared for the weather
If you live in an area where there are late spring frosts and freezes, be ready to cover up plants. The tender emerging buds or foliage need protection if freezing temps have been predicted. However, if the buds haven't started opening yet, you don't need to cover them.
Old sheets and towels are a good option to use but you can also get professional row covers. One thing you shouldn't do is to cover tender plants with a tarp or plastic sheeting. This will only amplify the cold's effect, rather than reduce it.
With these tips, your spring won't be a hectic time any longer! On the contrary, it'll become a productive period and as it slowly turns into summer, you'll be pleasantly surprised how all the good work you have done has paid off!
Home Care & Living
Diagnosing Solar Panel Problems in 5 Easy Steps
Published
1 month ago
on
October 1, 2021

Many people out there want to make their houses environmentally friendly, and installing solar panels on the roof is one of the easiest ways to do just that. However, as easy as it might be, your journey with solar panels does not end with the installation. Then, you will need to learn how to keep your solar panels in top shape.
Fortunately, this article will definitely come in handy! Here, you will find a list of ways to diagnose common solar panel problems, including checking your breaker switches, looking for obstructions, checking your solar inverter, inspecting your solar meter, and installing solar monitoring. Check it out!
Check Your Breaker Switches
For starters, you might want to check your breaker switches. As experts from 10powerup.com state, if you plan to inspect your solar panels, you will need to turn off the breaker switch that feeds your solar panels beforehand. This way, you can ensure that you will stay safe while inspecting your panels.
If it is an old system, you should see one breaker switch per panel. Once you have located the breaker switches, ensure that they are all in the on position. If they are, turn the panels off for a few minutes before switching them on again. You should find your breaker switches in boxes on the ground, below the solar panels. If your solar panels are pretty new, the chances are that you have an electronic monitoring system instead of breaker switches.
Check Your Solar Inverter
If you have a string inverter, you should find out if it has a built-in amp meter. If it does, it should give you an accurate reading of how much power your panels are generating. If you have an inverter without a built-in amp meter, you can use a separate amp meter to check your solar panel system. You should be able to get one in most solar supply stores out there.
If you are a homeowner that is looking to invest in renewable energy, you need a great solar ac and a great inverter. Hooking up your ac and other appliances to the inverter can ensure that it runs efficiently. This will not only save extra energy but also cut down on repair and maintenance costs. Make sure that you check the kind of solar inverter you are getting for your home. If you need to make it work for a heavy-duty commercial affair, you would need an inverter that will help you with your load requirements.
Check Your Solar Meter
Solar meters are used to measure the total amount of electricity generated by your solar panels in a specific period. If there is something wrong with your solar panels, the readings that your solar meter will give you are expected to be way off.
If you have a metered system, it is vital to check the solar meter regularly. That way, you will be sure that it is working the way it should and gives you accurate readings.
Inspect Your Solar Panels
If you are experiencing problems with your solar panels and checking the breaker switches and the solar inverter did not help, you should inspect your solar panels visually. If you want to take a closer look, remember to disconnect the solar panels from the main power supply before you get to work.
First, check for damage and dirt on the surface of the solar panels and the frame around them. Next, look for broken and missing screws, as they can cause problems with your panels' connections. Lastly, check for dirt on the power cable connections and corrosion on metal parts.
Install Solar Monitoring
If you suspect something is wrong with your solar panel system but cannot pinpoint the exact problem, think about installing a solar monitoring system! This piece of software will help detect solar panel problems early on before they become too severe issues that you can handle on your own.
In short, a solar monitoring system is a piece of software that will allow you to keep an eye on several important metrics. These include the number of panels generating energy, the current generated by each panel, the voltage output from each panel, the current coming into and going out of your house, and the total generated kilowatt-hours, among other things.
Hire a Solar Panel Inspector
In the end, you might end up unable to determine the cause of your solar panel problems, and that is perfectly fine! Instead of worrying about it, hire a solar panel inspector. They will help you figure out what the problem is and come up with a viable solution. It might be a bit costly, but it will definitely make you rest easy knowing that your solar panels are in the hands of a professional who knows what they are doing.
In Conclusion
Hopefully, this article has given you valuable insight into how to diagnose the most common solar panel problems. If you are experiencing issues with your solar panel system or just want to check whether everything is working the way it should be, you should try looking over the list of our tips.
If you end up unable to figure out the source of the problem on your own, hiring a professional solar panel inspector is always a viable option. However, you should hire someone who really knows what they are doing. In order to do that, you might want to check out a few discussion boards related to solar energy and ask for recommendations, as well as look for other people in the area who have already installed solar panels on their roofs. That way, you should be able to find someone who will take care of your solar panel problems in no time!
General Gardening
How to Create an Eco-Friendly Garden
Published
1 month ago
on
October 1, 2021

One would think that conventional gardening is inherently eco-friendly, after all, it's just working with soil and plants, isn't it? What's there to improve? Should the grass be greener? Should the flowers that we tend to so carefully grow higher or attract more buzzing bees?
Well, let's just say that while certain things might seem to be already perfect, there's always something that can be improved. You've probably already heard about being more environmentally conscious, but what does it mean in practice? Here are 5 sustainable gardening ideas you can consider when trying to help the planet and make the local wildlife love you!
Learn a Safe Way of Dealing With Uninvited Visitors
Whether just a beginner or a pro, at some point, every gardener has to deal with the type of guests who don't call before paying you a visit. They just show up in your prettiest begonias, and while most of the time their presence is just slightly annoying, they can also cause some serious damage. What's a safe solution to the problem, then?
If it's a deer that's wreaking havoc in your garden, try planting plants with fuzzy and fragrant leaves like verbena or boxwood. The strong scent should keep them away. Got some rabbits? Hot peppers, spicy basil, mint, and garlic is the way to go. Protecting individual plants with physical barriers like picket fences or chicken wire should also do the trick. And, just so you know, gophers hate daffodils, while squirrels will leave you (and your plants!) alone if you provide them with some free nuts or maybe a few extra tomatoes from time to time.
If you think that all of this sounds great, but your main problem is that you have no space for a garden, you might want to check Sea Pines Real Estate website and see whether anything catches your eye.
Know Your Allies (And Your Enemies)
While it doesn't quite mean being at war with your own garden, learning which plants enjoy growing next to each other could work to your advantage. Just like people can have their likes and dislikes when it comes to who they associate with, plants also enjoy some of their neighbors' companionship more than the others. Let's see some examples:
- Corn will enjoy growing next to cucumbers, squash, peas, beans, and pumpkins, but it doesn't do well next to the tomatoes.
And on a more positive note:
- Tomatoes should go next to basil because it actually makes them taste better.
- Bright and fragrant nasturtiums help protect the courgettes from aphid attacks.
Balance the Landscaping
While planning which materials to use while arranging the most beautiful garden, remember to be mindful. Try to resist the urge to go straight to your local home improvement and gardening retailer. Instead, use what you already have. Got some wood pieces laying around that would look great if sanded and stained a natural color? There goes your own flowerbed! Rather than replace that old garden furniture that had seen some better days, opt for a new layer of paint and maybe do some repairs. Why buy new, when you can use what you already have. And save some money on the way!
Appreciate What's Already There
Don't be shy – celebrate the native plants. Instead of going grey while trying to figure out how to grow those stubborn exotic seeds you got online, look around and let into your garden more native plants. While some of them might not look as impressive as, let's say, a sequoia tree growing in the middle of the lawn, they're much easier to sustain because they're already used to the climate, soil, and even the rainfall in your region.
If you tend to feel just a tad bit lazy from time to time, you'll be happy to hear that they also require much less effort than rare flowers or exotic plants. If you're not sure where to start, try asking your local gardening experts for some tips.
Be More Efficient With Water
Now, if you really want to call yourself eco-friendly, don't you dare to waste that precious rainwater. Get yourself a nice-looking big barrel and start collecting. Do you have a tendency to over-water? There's an easy solution — remember to always turn off your sprinkler system when it rains and try to water your garden in the morning; this way, less water is going to evaporate from your precious plants.
If you have the opposite problem and live in a dry place, look up some drought-tolerant plants. And no, succulents aren't the only ones! Herbs like rosemary and lavender, shrubs like lilac and forsythia ensure beautiful colors, even better smells, and they don't require that much water!
Conclusion
Becoming more environmentally conscious doesn't have to mean a complete revolution in your garden. So don't feel pressured to flip everything upside-down in one day. Start by taking one small step after the other and improve your space in ways that feel most natural to you. Whether you introduce the changes in one month or one year, the rush is not necessary. Just like anything in life, creating an eco-friendly garden is a learning process and there are no gardening mistakes, only experiments along the way to becoming more mindful of the world around us and the ways that we can give back to it.
Home Care & Living
7 Interesting Ideas to Give Your Interior Design an Elegant Touch
Published
1 month ago
on
October 1, 2021

Redecorating your home gives you an opportunity to improve its interior and adding a touch of style to it. And it does not always take a lot of time! Sometimes, all you need to do is to buy contemporary display cabinets, repaint an old table and use it as a kitchen island, or do whatever else your imagination suggests. However, it can be hard to figure out what elements to add to make it more unique.
To help you find a solution, here are a few not-so-common ideas for giving your home an elegant touch. Below, we tell you about rethinking old furniture, using metallics, considering crown molding, choosing shades and drapes carefully, using unique elements, adding wainscoting, and buying a taller headboard. Read on, find something that will freshen up your house, and enjoy your stylish interior!
Rethink Your Old Furniture
If you are looking for ways to give your interior design an elegant touch, the simplest solution is to repaint an old piece of furniture. If you have a few chairs that are too worn out to be used, repainting these chairs in a warm shade should result in an elegant look!
However, if you want to take it a step further and drastically change the appearance of your old furniture, there are many other options to choose from. For example, you can reupholster it in a different material. It might take a bit of time and effort, but it is definitely worth it!
Use Metallics
To make your house stylish, you should think about incorporating metallic items into its décor. Metallics are thought to be fashionable, as they are both trendy and timeless. On top of that, the metallic finish works great in many different spaces, particularly in kitchens.
Ideally, you should buy a few metallic chairs and tables for your kitchen. However, it is worth noting that metallic accents should not be that prominent. Instead, they should complement the design style that you use throughout your house.
Consider Crown Molding
Crown molding is an original element that can add depth to every room of your house. In addition to that, it will make ceilings appear taller than they really are. If you want to make your house appear more spacious, using crown molding to add height to a few rooms is a great option!
Choose Shades and Drapes Carefully
In order to make your house appear more elegant, you should pay special attention to shades and drapes. They are usually made of fabric and wood and can influence a room a great deal. In fact, they can change its ambiance and the amount of light that enters it, which means that they have a significant impact on the way your house feels.
In terms of colors, pastels, such as sand, creme, dove-grey, and mint green, are great, as they bring a sense of lightness and warmth into the room. However, if you prefer a darker ambiance, opt for neutral tones instead.
Use Unique Elements
You might not be aware of this yet, but unique design elements can make any room look great. In case you have a lot of money to spend, you can purchase things like custom-made furniture and rare trinkets, such as collectibles and souvenirs from foreign countries. On top of that, if you have a large and empty wall, you can decorate it with works of art painted by your favorite artists!
Add Wainscoting
Wainscoting has been around for a long time, and it should come as no surprise. It is one of the most popular design elements out there, and it can work wonders for most interior design styles based on classic themes.
In short, wainscoting is a baseboard that is made of wood and installed on the walls as an architectural adornment. It helps define the room and can be used as an accent piece in long hallways and spacious living rooms. Unfortunately, it might not fit your house if you are a fan of contemporary interior design.
Buy a Taller Headboard
In order to make your bedroom as elegant as possible, you should buy a taller headboard. It will draw attention to the bed and make it seem bigger than it really is. If you want the headboard to look great, you should choose one that will complement your mattress and other pieces of furniture in the room. Otherwise, it will look out of place.
Final Words
To sum up, there are quite a few things that you can do to make your house appear more elegant, such as using metallics and adding wainscoting. Doing that does not require that much time and money, and yet it can add a touch of style to any room and freshen it up!
DIY Projects
8 Easy and Quick Garage Projects You Can DIY
Published
1 month ago
on
October 1, 2021

What does your garage look like? Is it as useful and spacious as you would like it to be? If not, do not worry. It is an area of the house that tends to be forgotten about and neglected. In fact, it is often reduced to being a chaotic storage space filled with spiders and dust.
Fortunately, there are many easy and quick ways to upgrade your garage. Would you like to know what they are? In that case, this article is definitely for you!
Here, you will find a list of garage projects that you can take care of yourself, including installing a garage heater, adding windows to your garage door, insulating your garage walls, adding storage space, and updating the lighting. Check it out!
Install a Garage Heater
It is safe to say that most garages out there are cold and stuffy. If your garage is like that, do not worry – you just need to make it a bit cozier, and one of the easiest and most efficient ways to go about it is to buy a garage heater.
It will ensure that your garage is warm and toasty during the winter months, turning your garage into an ideal space for a number of exciting activities, including fixing your vehicle and woodworking.
Add Storage Space
The other thing that you can DIY is adding more storage space to your garage. This should be your priority if you store many different items inside your garage, such as sports gear, camping equipment, gardening tools, seasonal decorations, etc.
It would be beneficial to install cabinets, shelves, and hooks, among other things, in order to keep this space organized and use it to the maximum extent.
Add Windows to Your Garage Door
Next, you might want to upgrade your garage by adding windows to an existing garage door. That way, you will allow the natural light to come in and brighten up the garage's interior, making it feel comfortable and cozy.
Ideally, you should add windows near the top of your garage door, making your garage look more airy and spacious. Other than that, you should choose the type of windows that will match the rest of your house.
Insulate Your Garage Walls
Your garage will be a much better place to work in if its walls are insulated. This will ensure that the temperature inside the garage is comfortable, regardless of what the weather is like outside. Ideally, you should go with fiberglass insulation – it is really efficient.
Add Durable Flooring
If you want to upgrade the flooring in your garage, you should go for something durable and easy to clean. In addition to that, you might want to customize it a bit. For instance, if you want to buy floor tiles, you can go for the ones in your favorite color.
Other than that, you can think about installing epoxy flooring in your garage. It is a unique choice that will improve the durability of your garage floor and make it easy to clean – and it is affordable, too. You can expect to pay $2 to $5 per square foot for the equipment and materials alone.
Update the Lighting
If your garage is dark and gloomy, it is high time that you update the lighting. It is an easy and quick way to make it feel much more welcoming. Besides, insufficient lighting can make it more difficult to repair your car or perform other tasks in your garage. Ideally, you should go for LED lights, as they are both eco-friendly and energy-efficient.
Furthermore, it is recommended that you go for warm lighting – it will be easy on your eyes. You do not have to install the lights on the ceiling if you do not want to; instead, you can buy a few bigger lamps.
Add a Personal Touch to the Garage
Each room in your house could really benefit from a personal touch, such as a painting that you like and souvenirs from your journeys – and your garage is no exception! If you want your garage to feel welcoming, this is definitely the way to go.
Replace the Garage Door Seal
Lastly, think about replacing your garage door seal. First of all, it will help keep the warm air inside the garage, making it much more comfortable in the winter months. Second of all, it will keep rainwater away from your garage.
In Conclusion
These easy and quick garage projects will help you turn your garage into an area that is as functional as it is attractive. Once you are done, you will get to enjoy having a cozy, warm, and welcoming garage that your neighbors will be jealous of.
It is worth noting that garage project ideas can be put into action even if you are not a car enthusiast. In fact, if you do not own a car, you can turn your garage into a home office, workshop, extra living space, or even a cinema room. It is up to you!
Home Care & Living
7 Budget-Friendly Building Materials That You Should Think About Using
Published
1 month ago
on
October 1, 2021

When building or renovating a house, every homeowner strives to make it durable without somehow spending a fortune on it. And for many of them, this seems to be a dream scenario impossible to implement in real life. However, everything's not that hopeless.
Today, you can find several inexpensive building materials that will last you for years to come. And in addition to their cost-effectiveness, they do not look cheap, so choosing budget-friendly materials no longer means settling for ugly ones. Thanks to it, you can live in a nice-looking home without spending a small fortune on it. Moreover, according to highestcashoffer.com, it will also have a positive impact on the overall value of your property.
Below, you will find a list of several inexpensive building materials you should consider using for your house. They range from reclaimed wood, concrete sheets, and stone veneer to used bricks, bamboo, and cork, among others. Continue reading to learn more about their characteristics and how you can use them.
Concrete Sheets
If you want an inexpensive building material that looks neat and modern, concrete sheets are exactly what you need. Made of cement coated with colored aggregate, concrete sheets are durable and pretty water-resistant. This is why they are used for floors, walls, and countertops.
One of the best things about concrete sheets is that they can be easily installed over existing surfaces without removing the previous layer of the floor or wall. And if you're not sure about how to install them, you can always ask your local builder to help you out with the process.
Stone Veneer
Stone veneer is an affordable building material that can be used to create a unique decorative look. You can use it in the form of panels, tiles, blocks, and even in the form of stripes. Stone veneer is made of stone (granite, marble, etc.) combined with adhesives that give it the flexibility to conform to any shape or size.
It can be used in interior or exterior areas like patios, bathrooms, kitchens, living rooms, fireplaces, etc. The texture and color of the veneer will vary depending on the type of stone used. For example, if you choose granite veneer, it will have a smooth finish with a grayish color. On the other hand, the marble veneer will have a fine grain and a white-colored finish.
Reclaimed Wood
Reclaimed wood is another inexpensive building material worth considering. In fact, many builders recommend using it because it's very durable. It also has a distinct texture and appearance that make it perfect for rustic homes. However, not all reclaimed woods are good for use in any setting. So before choosing a specific type of reclaimed wood for your project, be sure to consider its appearance and characteristics. This way, you will end up with a home that looks sleek and stylish while also being sturdy and durable.
Bamboo Flooring
Bamboo flooring is an excellent alternative to other flooring materials like hardwood, laminate, and tile. In addition to being inexpensive building materials, bamboo flooring is also easy to install and maintain. To add to this, it is also highly durable and water-resistant. So if you live in an area with frequent rainfall or floods, bamboo flooring is the perfect choice for your home. It won't succumb to water damage and rot like other types of flooring would.
Cork Flooring
Cork flooring is another inexpensive building material worth considering when renovating your house. With cork flooring, you can prevent noise from transferring from one room to another and reduce sound transmission by up to 48%. It also absorbs moisture which makes it an excellent option for areas such as bathrooms and kitchens. And lastly, cork flooring can be laid over existing floors, so you don't have to worry about removing them for installation.
Used Bricks
Bricks are usually associated with luxurious buildings. However, there are now inexpensive building materials that you can use to create a brick facade on your house. You can find used bricks at brickyards, which sell them at low prices. There are also some companies that repurpose old brick buildings so you can get your hands on some really great-looking bricks at lower prices.
Bricks give your house a rustic, cozy, and warm vibe. You can either lay them on the ground or use them as wall cladding. Used bricks are easy to install and maintain, and they come in a variety of colors and designs.
Stucco
If you're looking for inexpensive building materials that can make your house look rich and stand out, consider stucco. Stucco is a plaster-like material made from lime, water, sand, and cement, which is applied directly on walls after troweling. It's commonly used to cover the exterior of buildings, although some homeowners also use it on their interiors. Stucco is one of the most popular materials for home exteriors. It's often found in Mediterranean homes, where it may come in different styles like ornamental stucco, which can be painted or left plain, or carved stucco. Stucco has the advantage of absorbing small amounts of moisture without getting damaged, so it's great for areas with high humidity. It also resists fire and pests. However, it doesn't do well if exposed to freezing temperatures, so it's not ideal for houses located in cold areas.
Conclusion
There you have it – several inexpensive building materials that will not only save you a lot of money but also last for years to come.
When renovating your house, you don't have to worry about spending a fortune on materials. There are many inexpensive building materials out there that will not only save you from the expenses but also from looking cheap.
So if you're on a budget yet want your house to look modern and stylish, try opting for the materials mentioned above.
Home Care & Living
Why Do We Need Outdoor Furniture?
Published
2 months ago
on
September 17, 2021

Why do we need outdoor furniture? There are many reasons, and the great news is that there are some attractive and affordable furniture options for your yard, garden or even a balcony! You don't have to have a large space to enjoy your outdoors, and as we will show you it's good for you! Where to start looking at outdoor furniture?
The first step is to assess the space you have. If you have even an average size of yard you can pick the spot where you want your outdoor furniture to go. We suggest a spot that gets the sun but also offers shade, and that you can protect from the wind. You may want to lay decking for added practicality, or you can simply place your furniture on the lawn. Let's have a look at outdoor furniture and why you want it.
Relaxation in the Open Air
First, we recommend you click this link https://www.eq3.com/us/en/category/outdoor and have a look at the superb modern outdoor furniture they have. EQ3 is a forward-thinking company that offers quality furniture at great prices and has some truly beautiful designs that would look great in any yard.
Now think about this: you've had a long day at work, you're looking to wind down. You get home, grab a beer from the fridge, and step outside onto your patio where you can relax on a comfortable chair or sofa and enjoy the fresh air and evening sun. It may sound idyllic, but it's entirely possible and should not cost much.
If you have an outdoor space and are not using it, you really are missing out as getting outside and enjoying some relaxing time is the best thing for that wind-down you're looking for. Check out that furniture again and see what would look great in your garden or yard.

Health Benefits of Being Outdoors
There is more than ample evidence that being outdoors is good for your health especially when we are talking about mental health. We live busy lives with much expected of us from our employers and families, and sometimes it all gets a bit much. Getting that weight off your shoulders by simply going outside and relaxing is one benefit of outdoor furniture.
But consider this: people who are diagnosed with anxiety and stress are often told to take up gardening. Even if it's just a few pot plants on your patio or in a small outdoor space, the benefits of watching something that you have tended grow, bloom or produce fruit are proven. If you're not into gardening, just chairs and tables on your lawn, patio or decking can make a world of difference to that heavy feeling we all get.
Being outdoors is therapeutic and being among nature is also great for your health. Use that outdoor space no matter how large or small and you'll see the benefits of being outdoors surprisingly quickly.
Socializing with Friends and Family
Our final reason for enjoying your outdoor space is that it is a great way of spending time with friends and family. Outdoor furniture adds a lot to a gathering – whether a party for a special occasion or simply an impromptu get-together – and a few chairs and tables here and there make it more of an occasion. We suggest that if you are investing in decking, a patio or even that family favourite the hot tub, you also add lighting.
Some of the best evenings outdoors are those where the light fades and it's still warm, and your automatic lighting – solar powered is the way to go – cuts in providing a lovely warm light that keeps the evening going. That's a picture conjured up for you that says exactly why you need outdoor furniture – it gives you more reason to enjoy the outdoor space you have access to.
Conclusion
How you use your space is up to you but here's the thing: do use it! Too many people fail to take advantage of the outdoors and don't realise the benefits it has to their state of mind and general health, so check out that outdoor furniture at EQ3 and see how you can add something special to your garden at little expense.
Home Care & Living
How To Use A Leaf Blower (8 Easy Steps To Blow Leaves)
Published
2 months ago
on
September 17, 2021

How to blow leaves with a leaf blower may seem straightforward, but there is a technique to getting your yard looking in tip-top shape.Follow these 8 easy steps to get leaves cleared in no time.
Leaf blowers are supposed to help you get your leaf blowing job done faster but they can be counter-productive when not used correctly.
We want to help save you both time and energy by knowing how to best blow leaves with a leaf blower. So let's get on with it.
Choosing the Right Leaf Blower

To clear leaves efficiently, you first need to find the right power tool for the job. There is no point investing in a huge backpack gas-powered leaf blower if you only have a couple of trees. However, on the other hand,buy one too small and you will have wasted your money.
You will want to find the right leaf blower for your needs. The most important factors to consider are that it holds enough power for the size of your yard and the number of leaves falling.
How To Use A Leaf Blower: Tips & Tricks
Before starting your leaf blowing you first need to understand how a leaf blower works and a couple of important safety precautions. Firstly, gas leaf blowers are noisy so always wear ear protection, and secondly, wear suitable clothing, long pants, and sturdy shoes are a must.
A leaf blower is a versatile tool but it can kick up a lot of dust and dirt, especially when blowing around bushes or in corners. Therefore, before you start blowing, it is very important to protect your eyes with safety goggles.

1. Have a Plan
Look at the layout of your yard and think about the most efficient way to blow leaves. Generally, a good rule of thumb is to start with awkward areas, such as tight corners and under shrubs. After which, you can then move away from the house,but plan where you want your pile to be before you begin.
If your leaf blower doubles up and can also be used as a leaf vacuum, you may want to keep the bag attachment handy. A leaf vacuum is great for those tight spots, under shrubs, and around flower beds.
2. Holding the Leaf Blower Correctly
The most common mistake people make is holding the leaf blower directly in front of themselves and attempting to clear the ground by walking forwards.
However, the correct technique is to hold the leaf blower at a slight angle and by your side. This way you can then clear a path perpendicular to where you are walking.
3. Use a Sweeping Motion
Keep your arm at a slight and shallow angle and at a steady height, while creating a swooping motion. A subtle movement is better as you will have more control over where the leaves go.
4. Consider Wind Direction
Although it is important to blow leaves on a calm day, if possible, get to know the direction your winds usually blow. Then should gusts start to blow halfway through the job you can let the wind work in your favor.
There may also bedifferent air flows around the house so check this beforehand. Plan for these differences when deciding on how you will move through the backyard. You may even find you need to make several piles because of this.

5. Start High & Work Down
All things must come down and this is something to remember when considering how to blow tree leaves more efficiently. Start with objects standing at a greater height, for example, cars, outdoor furniture.
6. Gather Leaves onto a Tarp
Here's a great tip for how to make a leaf bagger you can blow the leaves right into. Place a large lightweight tarp on the grassto blow the leaves onto. When you're finished all you have to do is lift up the corners and tie it off.
7. Don't Try to Blow Wet Leaves
Dry leaves are lightweight so ideal to use a leaf blower on, even with other debris mixed in. However, no matter how powerful your leaf blower is,you will not successfully make wet leaves into piles. For this, you will need a rake and even then, it will not be easy.
8. Don't Try to Get Them All
With the exception of very small yards with little vegetation, you probably won't be able to collect all leaves when you use a leaf blower. Get a good leaf raketo gather the small amounts of strays left behind.
People Also Ask (FAQs)

The tips we have given you above should help you get through the fall season with a tidier backyard. These last few tips could answer some of the questions you might still have.
What is the fastest way to pick up leaves?
Using a leaf blower first and finishing off using a leaf rake for stray leaves is probably the fastest way to pick up leaves. Before starting, place a lightweight tarp and secure it, once all the leaves are gathered simply pick up the corners and away you go.
What can I do with a large pile of leaves?
When you have a large pile of leaves either mulch and bag them or add them to your compost heap. You will then be able to use the mulch as a natural fertilizer for your trees, shrubs, and flowers. Alternatively, some landscaping companies and/or local services offer leaf collection.
Should you leave fallen leaves on flower beds?
You should leave fallen leaves on your flower beds as they provide nutrients for your plants as they decompose.They also provide a safe habitat for valuable garden insects during the winter months. The only time I recommend that you remove the leaves is if they pile up so high, they start to cover the plant life.
Conclusion
We hope this quick guide has helped you in your leaf clearing quest and that you are now confident that you know how to use a leaf blower efficiently.
Home Care & Living
What To Know About Moving to Robstown, TX
Published
2 months ago
on
September 1, 2021

Moving into a new home can be both thrilling and scary. You won't always know what to expect, but there are ways to make the move with more ease.
If you are making the move to Robstown, aka "The Biggest Little Town in Texas," you are up for an adventure. The highly accessible town has a lot in store with a rich history and continuously growing economy. For one, Robstown is recognized as the home of Texas hold 'em. Beyond this, there are many exciting things to discover about the city.
A major move can be daunting, but the challenges and worries can be easily alleviated with preparedness. There are several things to keep in mind when moving to Robstown, TX.
Robstown Has an Interesting Past
According to history, Robstown's name actually came from Rob's Store, a small store established by Robert Driscoll, Jr., who was among the early entrepreneurs to settle in the area. Rob's Store became Rob's Town; thus, Robstown is called as it is today.
Beyond just the name, Robstown, TX, has a rich history as a civilization. It is located in the Gulf Coast region, where the early inhabitants were Native American. Therefore, you can expect traces of various native tribes in the area.
Robstown was established in 1906 and received township status in 1907. It was eventually incorporated into a city in 1912. The economic growth in the city of Robstown was brought about by railroad construction that connected it to the entire Gulf Coast and South Texas regions. The railroads paved the way for retail, agriculture, and business opportunities, which later helped make Robstown the "crossroads of opportunity" and "The Biggest Little Town in Texas."
You can visit many historical sites and museums in the city, including Hotel Brendle, the train station, sites where Native Americans lived, and the Robstown Area Historical Museum.
Prepare For the Weather: It's Hot Here, So Keep Your Cool
With its humid subtropical climate, Robstown's average weather is projected to be hot and humid during the summer, while winter will be cool and windy, though it often does not last long. It is also mostly cloudy throughout the year.
It is important to make sure your new home is well ventilated during the hot season. Also, you should consider a good heating system for the winter. Preparing the proper clothing is also necessary to make sure you'll get through different weather conditions comfortably.
There is also a risk of hurricanes and flooding in Texas, especially in the southeast region, which borders the ocean. Familiarize yourself with hurricane preparedness and write down important websites and emergency contact details that you can reach out to in case of calamities, especially in the city of Robstown. Securing home and vehicle insurance can also be very helpful in preparedness and recovery.
Get Ready to Handle the Local Pests
With its high humidity and hot weather, there are common pests in Robstown, including mice/rats, wasps, ants, and mosquitos. There is also a chance you may find silverfish in your home. These nocturnal insects seek shelter in dark, moist, and humid areas, just like mosquitos. Inspect your basement, ceiling, attic, and other corners of your home, and make sure to clean those areas using proper chemical treatments to avoid infestations.
Keep your home clean and maintained to prevent any kind of pests from coming in and infesting your space. If you notice that pests are setting about, try to control them as early as possible.
If you feel overwhelmed or unsure how to handle a pest problem, don't hesitate to get expert help and search for Robstown pest control services near you. You actually save more money, time, and stress by avoiding severe damage to your property and furniture.
Making Robstown, TX, Your Home
Robstown, TX, has the right amenities and is home to an array of museums, restaurants, nightlife, and events, as well as a booming business district. Located in Nueces County and as a western suburb of Corpus Christi, Robstown is also near some well-known educational institutions like the Texas A&M University-Kingsville, Texas A&M University-Corpus Christi, and Del Mar College.
As most of the year is cloudy to sunny in Robstown, there are many outdoor activities. Go shopping, find community groups within the neighborhood, or start a new one. Make new friends and nurture life. Make the city work for you.
Enjoy the Warmth of Robstown
It is warm in Robstown, especially in the summer, but the warmth you should anticipate more is in your new home as you start your new life in it. Getting familiar with the city is important. But it is also worth mentioning that getting to know and see it by immersing yourself in its authentic culture and people will be a whole new experience. Be sure to prepare everything you need ahead of the moving day so you can enjoy your new adventure.
Home Care & Living
Plants You Should Have In Your Outdoor Garden if You Are Living in Toledo
Published
2 months ago
on
August 30, 2021

The most important thing to remember while setting up a garden in your front yard is that you must use native plants. And even if not native, they should at least be able to tolerate the weather and climate conditions of that area. Otherwise, there is no point in having plants that you know cannot survive the weather.
Weather data collected by the Toledo weather radar over the years gives us a vivid picture of how the climate is over there. In this particular part of Ohio, the summers are quite warm while the winters are windy and freezing. There is also cloud covering throughout the year. Temperatures usually vary from 19-83 degrees Fahrenheit, and hardly go below 3 degrees, or above 91.
So when you are thinking of setting up an outdoor garden at your place in Toledo, Ohio, you have to take these conditions into account. Without considering the weather and weather forecast, you cannot be sure what type of plant you should have there, and when.
To get you started on that front, here is a list of plants, mostly shrubs, and flowers, that you can have in your outdoor garden at Toledo. For this list, we will specifically focus on plants and flowers that will make your front yard or outdoor garden look attractive.
Black-eyed Susan
From a distance, they look somewhat similar to sunflowers. However, when you get closer, you will realize these flowers are much smaller and a bit brighter too.
Black-eyed Susans look more like daisies than sunflowers. They grow 2-3 inches in width and on 1-2 feet long stems. This golden-yellow flower has minute hair-like particles on it that give it a slightly rough texture. They bloom from June to October and need slightly cool weather for this. Keep these flowers away from the scorching heat of the sun, otherwise, they might not bloom.
You should remember that Black-eyed Susans are territorial flowers. Their presence might affect the growth and development of other flowers around them.
Iris Versicolor
The Iris Versicolor has a tulip-like appearance. It is graceful in the sense that these flowers have down-curved sword-like sepals. The violet-blue color makes these flowers look more appealing. You can find them in different shades of purple with a bit of yellow on them at times as well.
The Versicolor grows 2-3 feet in height, while some of its regional versions (like the ones in Texas) are much smaller, around 60 cm. These flowers will look great in any type of outdoor setting. Whether it is a normal garden or just an arrangement of plants and bushes, the Iris versicolor always manages to outshine the others.
These flowers bloom from May to July. They require wet soil, and partly shady conditions to grow, although full sun also does not bother them. The Versicolor is an invasive species. So at times, you will find them growing in your garden even though you have no recollection of planting them.
Ironweed
The Ironweed is a stout plant with small and bright flowers and dark-green leaves. They usually grow small, with numerous leaves and flowers on a single branch. The rose-purple color on these flowers makes them very attractive. Having them in your garden will elevate its overall appeal.
Ironweed blooms from July-September. They can attract a lot of butterflies which facilitates the pollination process. So do not be surprised if you find them all over the garden at some point in time.
Butterfly Milkweed
These plants are bushy and grow up to 2 feet tall. The flowers are bright orange, with alternate leaf growth. Flowers are mostly clustered on top of the flowering stems.
Like the Ironweed, they too attract butterflies and facilitate pollination. They bloom from June-August. This plant is versatile in the sense that it can tolerate different temperature and humidity settings. It is native to Toledo and other regions of Ohio and flourishes in the environment in these regions.
Wild Geranium
These pink flowers bloom from late spring to early summer. They grow in loose clusters of 2-5 with deeply 5-lobed leaves. The Wild Geranium has deeply cut leaves. They colonize through rhizomes but are not aggressive in any way.
These are some of the plants you can have in your outdoor garden in Toledo. They are all native to the area, and you do not have to ensure special weather conditions for their overall growth and development.
Home Care & Living
Extending Your Outdoor Living Space With a Patio
Published
3 months ago
on
August 19, 2021

Most homeowners dream of having a backyard where they can spend lazy days in the sun or having friends over for a barbecue. Unfortunately, homeowners often find that they can not spend as much time in their backyards as they would like. This is due to one simple, yet unpredictable constant in our lives; the weather. However, with a well-thought-out patio, you can create an outdoor living space equipped for all seasons.
The "Who" and "What"
One of the first things most homeowners consider when creating a new patio space is their furniture. As exciting as it is to buy new patio furniture, it needs a bit more thought than scooping up the latest springtime displays in your nearest home and garden store. Think about who and what your patio will be serving. Are you looking for intimate moments with a partner or curled up with a book, or do you want to host family dinners or get-togethers?
Once you have the "who" and "what" down, you can more appropriately choose your patio furniture. If you are looking to furnish your patio for more intimate moments, swings and loveseats are always good options. For patios serving the purpose of hosting multiple people or groups, large bench-like patio couches will be able to look purposeful whether their seating is five or 10 people.
Heating for Cold Weather
For those chilly evenings or winter nights, it's important to have the ability to heat your patio space. The best way to do this is to introduce outdoor heaters to your patios. Today you can find heaters in every style, shape, and size imaginable. Although many people think of classic stand-up heaters or parasol heaters for outdoor spaces, an outdoor space heater can be an attractive centerpiece. There are many gas and electric fire pit heaters, or even an outdoor fireplace.
Patio Covers
One of the most crucial elements in making your patio useful through every season is a quality porch cover. Solid or insulated porch covers allow for you to enjoy your outdoor living area, rain, shine, or snow. Professional services such as City Seamless Patio Covers offer a large selection of porch covers to suit your needs. One type of porch cover to consider is an aluminum porch cover. Aluminum porch covers are sturdy and need little maintenance to stay looking sharp throughout the years.
Flooring
Patios do not have to be made up of slabs of cement. Explore different flooring options to give your patio an original look. Spanish or antique tiles, brick, lattice woodwork, or even mosaic are just a handful of options available when considering outdoor flooring.
Once you have pulled together your "who" and "what", your choices for outdoor heating, quality porch cover, and flooring, you are ready to build. Building your dream patio is the ultimate D.I.Y. project, but to be sure that your new outdoor living space is set to enjoy for years to come, consider calling in professionals to help get the job done. All you will have to do is to sit and enjoy your new outdoor living space.
Pest Control
Guarding Eden: Protecting Your Garden from Pests and Disease
Published
3 months ago
on
August 9, 2021

Gardening is good for your health. Studies show that gardening provides health benefits by increasing exposure to Vitamin D, providing aerobic exercise, and improving one's mood. Spending time in green surroundings even helps combat loneliness and dementia.
Since your garden improves your health every time you visit it, shouldn't you do your best to enhance your garden's health in return? Just like humans, gardens need special care and attention to thrive and avoid destructive diseases and invaders. With a bit of planning and effort, you can keep your garden pest- and disease-free and repay it for all the benefits it provides.
Eliminating Pests
Numerous species of insects and small animals can cause irreparable damage in a garden. These pests can ruin all of your hard work and drastically reduce your harvest. While it is impossible to keep all pests out of your plot, there are specific actions you can take to protect your garden without resorting to harmful chemicals.
For instance, slugs and snails are common garden infiltrators. Because they are nocturnal, it's challenging to find and remove them during the day, when you most likely perform most of your gardening. These pests will feed on your crops and leave dozens of eggs, perpetuating the problem indefinitely.
To eliminate slugs and snails, place small containers of beer around your garden. The mollusks will be attracted to the yeast in the beer. When they attempt to drink the beverage, however, they will fall into the container and drown.
Preventing Disease
Keeping your garden clean is the first step in disease prevention. Regularly remove all plant debris from your garden, as it can serve as a breeding ground for plant disease and pests. You should also clean and disinfect all of your gardening tools and paraphernalia regularly, including gloves.
For trees, it is essential to avoid injuring the tree or its roots when caring for your lawn. A cut on the body of a tree is similar to a wound on human skin. Infection can seep in through these abrasions. However, in the worst-case scenario, tree removal due to disease might be necessary as leaving a dying tree in place is a threat to nearby trees. It can even endanger your house and loved ones since dying trees often fall. It's not a task that comes easily, especially if it's a tree that's been around for generations, but if it cannot be saved, it's better to remove it.
Dealing with Sick Plants
No matter how often you clean and disinfect your garden and tools, some of your plants may fall ill at some point. The first step in dealing with a sick plant or tree is identifying its symptoms: discoloration, wilting, and defoliation can all be signs of an ill plant. Several online tools can help you determine what kind of disease your plant is suffering.
If possible, find an organic remedy for the disease with which your plant is struggling. Unfortunately, not every plant can be nursed back to health. If a plant is slow to respond to treatment, it might be best to remove it before the disease spreads to other nearby plants.
While pests and diseases are an inevitable aspect of gardening, you can reduce these factors. Organic products can be used to repel pests. Keeping a clean and disinfected garden can help reduce the chances of infestation or disease. When a plant or tree succumbs to disease despite your best efforts, removing it can help protect the surrounding plants.
Home Care & Living
Impact of Untreated Water Damage on Your Property and What Precautions to Take
Published
3 months ago
on
July 31, 2021

When you don't treat water damage on time, it can lead to severe consequences. A slow drip and massive flood can do huge damage to your property and even deteriorate your health. The untreated water damage adversely impacts your property. Here, you will learn them and the precautions you can take for treatment.
So what are the effects on your property if you don't treat water damage on time?
Here are the adverse consequences:
Weak Wood Structures and Brittle Drywall
Water damage softens and weakens wooden frameworks that support floors and walls. Drywall turns out to be brittle and build mold. Thus, you need to replace or cut out the drywall.
Mold Formation
A microscopic amount of mold starts to grow within 1 to 2 days after water damage. Though, you can see the mold after 1 to 2 weeks.
Unsafe Electrical System
As soon as the water gets in contact with wiring and outlets, the electrical system becomes unsafe. Thus, you should immediately examine the system.
Pipes Breakage
Flood water contains hazardous elements that break down pipes getting into contact with only tap water.
Stale Odors
Some surfaces smell bad after getting exposed to water for a short time. Carpets start to smell fast and attract bugs and bacteria.
Floors and Walls Staining
If you don't clean water quickly and perfectly, it causes stubborn stains on floors and walls. Staining reduces your property value as you can't cover them up sometimes by painting.
Precautions to Cure the Impact of Untreated Water Damage on Your Property
Flood Insurance Claims
Do you have flood insurance? Call your insurance adjuster right away to start cleanup and drying. The adjuster will examine the untreated water damage to your property.
You must sign a loss statement. Reach out to government offices to get more information. If you don't have flood insurance, your insurance does not tend to cover the loss.
Electrical System Deactivation
Deactivate all electrical and gas systems before entering the water-damaged area. Before reconnecting the system, employ electricians to check the premises to detect risks and threats.
Water and Food Sanitation
Purify water to be used for all purposes. Pass water via a filter or clean cloth. Then, boil water for a minute and let it cool. If you can't boil, add fresh, unscented liquid chlorine bleach to water and then stir. Let the solution stand for half an hour.
Remove the labels to save retort pouches and commercial food items in metal cans. Wash the cans and rinse them thoroughly. After that, disinfect them using a sanitizing solution containing one tablespoon of bleach per gallon of drinkable water. Then, add labels specifying expiry date to containers without labels.
Carpets and Furnishings
Remove all carpets and furnishings from your property to clean and dry them outdoors. Replace rugs and flooded carpets as floodwater tends to contain contaminants. You should always replace and discard flooded carpet pads. After flooding reduces, remove water-logged carpets, pads, and rugs within two days.
Spread out carpets and rugs on the outdoor space and hose them off. If they are soiled, hire professional cleaners or use a carpet shampoo with a broom for cleaning. Apply a solution of 1-gallon water and two tablespoons of liquid chlorine to sanitize and rinse the carpets. Don't add bleach if they are made of wool.
Dry your carpets and subfloor quickly. If the carpets are installed damp, they can mildew. Though your carpet tends to shrink, professionals can easily stretch it.
You should discard all the mattresses and furniture affected by floodwater. If you have a very expensive piece of upholstered furniture, you should replace the stuffing and upholstering. You can clean and restore plastic, metal, and solid wood furniture. Remove any mud, clean, sanitize and dry them out directly under the sun.
Walls
The open flooded walls tend to appear unaffected even after untreated water damage. But, take precautions to prevent odor, mold formation, and decay. Wash away water and ventilate the structure as quickly as possible. Replace baseboards and cut holes in your wallboard to drain uninsulated walls.
Cut out the interior exterior of insulated walls to a point above water height and get rid of flooded drywall. Prop open or reinstall undamaged paneling after cleaning. Throw away all flooded fibrous insulation.
Spray disinfectant on wall plates and studs to kill fungi and mold. Dry them quickly with dehumidifiers and fans. Choose replacement materials like ceramic tile that withstand floods.
Bottom Line
So, now you know the impact of untreated water damage on your property and precautions you can take. If you are suffering from the discussed consequences presently, take the right initiatives immediately.
Home Care & Living
How Home Renovations Can Wreck Your Lawn
Published
4 months ago
on
July 23, 2021

Your long-awaited home renovation is almost underway. As you begin preparing for the chaos that will be the next few months of your life, you start to look at your lawn a bit differently. How will the green grass fare during the remodeling of your home?
If you don't take measures to protect it, your lawn might sustain some damage. Tree branches will be snapped, flowerbeds will be trampled on, and grass will be driven over. Looking for ways to preserve your yard? We've assembled a few tips that will help protect it during your renovations:
Store Items Off-Site
Planning to redo your basement? You might be wondering where to store your couch, entertainment unit, and/or storage bins while construction is underway. Here's a tip: don't store them on your lawn, not even for a few hours. The weight of these items will compress the soil and crush the grass. Instead, load any furniture into your vehicle and take it to a storage unit until your renovations are complete.
Schedule Lawn Care
Before and after your renovations, you can contact a professional lawn care service to improve the health of your lawn so it can bounce back more easily afterward and/or to repair damage sustained from a renovation. Some of these treatments include:
- Lawn aeration. During this service, a machine makes small holes throughout your lawn. This loosens up compressed soil and makes it easier for air and water to penetrate it. In turn, it leads to fuller, healthier grass.
- Dethatching. When your lawn is old or damaged, it accumulates thatch, which is a mix of dead and living organic debris. Power raking services remove this thatch to promote the growth of healthier grass.
- Laying down sod. Is it time to give up on your old grass and start fresh? A lawn care specialist can remove all the old material from your lawn, and lay down a new layer of sod. It's a great way to instantly revitalize the appearance of your yard. Just be sure to wait until after renovations are complete to schedule this service—you'll need to avoid walking on new sod for a minimum of two weeks.
Protect Trees, Shrubs, And Flowers
If you have a green thumb, your garden might be your sanctuary. Perhaps you've spent years cultivating an array of greenery in your backyard, from your pristine flowerbeds to well-trimmed trees.
Are you concerned about damaging a particular area of your garden? You can dig up those flowers or small plants and relocate them for the time being. Once the coast is clear, replant them in a suitable location. You can't easily relocate a large tree, but you can build a layer of mulch around its base to boost its defenses.
Lay Down Drop Cloths
Your lawn will see a lot of foot traffic during your renovations. What can you do to brace it for impact? Choose a fabric that's thick, yet breathable, and lay it over top of your grass. Something made of plastic will restrict airflow too much, especially on a hot sunny day.
Are you requesting demolition work in your home? Heavy tires from moving pieces of equipment cause immense damage to delicate lawns. Consider temporarily laying down plywood so that the vehicles have something else to drive on top of.
Work With Experienced Contractors
Damage to your lawn can be minimized when your professional demolition contractors are careful. Of course, some things can't be avoided. But communicating to your contractors about what you want to protect can go a long way in preserving your lawn. Let your renovation crew know which areas you want to protect, and together, you can devise ways to keep them safe from damage.
Make The Most Of It
Despite your best efforts, your lawn may still end up looking like a patchy, torn-up mess. There is one way to turn your fate around—take this opportunity to renovate your lawn, too! Rather than spending your money repairing the damage, consider landscaping the yard and changing its design altogether.
Is the grass torn up? Now is the perfect time to lay down a new path. You can completely change the layout of your flowerbeds or plant new trees where others were lost. Soon enough, you'll be designing the lawn of your dreams to go along with your newly-renovated home.
Homeowners plan renovations for a range of reasons; they might be eager for a change, or they're looking to boost their property value before selling their house. Either way, a wrecked lawn will hinder your enjoyment of your remodeled home.
Put these preventative measures in place to keep your lawn safe during your renovation project.
Home Care & Living
The Importance of Properly Handling Household Leaks
Published
4 months ago
on
July 22, 2021

Household leaks can waste nearly one trillion gallons of water annually nationwide, highlighting just how damaging they can be. However, they can also cause damage in other ways, including financial damage and even structural damage to your home, depending on the leak. In regards to your own home and managing such water leaks, knowing the importance of assessing the problem properly can save you both money and more extensive damage to your home.
The Cause Behind the Leak
While leaks coming from the roof can be an obvious problem that can be caused by weather or general wear and tear due to age, those in regards to appliances such as your hot water tank can seem a little more daunting to assess, especially since there are a number of reasons as to why the leak could be occurring. For example, common causes for a hot water tank leak include issues with the drain valve, having too much pressure in the tank, faulty valves, a problem with the internal tank, or just the fact of having an older tank that's on its last legs. If you notice your hot water heater leaking, the first thing you should do is turn off the water, turn off the power supply, and then identify where the leak is coming from by doing a full inspection (including areas like the bottom of the tank and the top valve). From there, you can then begin fixing the problem. However, other types of leaks may be more difficult to handle.
The Financial Aspect
While a household leak can be a simple fix – like that of a drippy faucet, those that involve the water pipes of your home can present a myriad of issues and hefty financial costs that may require that you actually dig up your yard in order to assess the problem and fix the waterline. For example, if your current copper water line needs to be repaired or replaced altogether, then fixing the issue can result in the need to call a professional (such as a water service specialist or local plumber) in order to make sure it's done properly, thus making it worth the extra cost. However, the job in question can be quite pricey depending on aspects such as locating your water supply line, the location, and potential licensing problems (as in many cases you'll have to obtain authorizations before digging).
The Importance of Inspections
When preventing future household leaks, routine maintenance and inspections are key. This is primarily due to the fact that not doing so can result in damage being done without you knowing about it – until you receive clues like a hefty water bill in the mail. It's important to realize that while repairing household leaks can cost quite the chunk of change, fixing it as soon as possible is key in preventing more extensive damage and cost down the line. Not knowing about a leak and not taking care of it right away can lead to structural damage to your home (depending on the leak, of course), and of course, results in water waste as well. Through regular maintenance and inspection, you can effectively stay on top of the pipes, appliances, and roof of your home, which will aid in considerable savings down the line while keeping everything running smoothly.
Dealing with a household leak can be daunting, especially when the job requires extensive work (like a main water line repair or replacement). However, through routine maintenance and inspection, you can effectively stay on top of things while saving yourself from the potential costs in damages down the line.
Landscaping
The Top Benefits of Opting for a Sod Lawn in Your Garden
Published
4 months ago
on
July 22, 2021

Many homeowners aspire for a beautifully manicured lawn. However, installing and maintaining a lawn is easier said than done. There are plenty of aesthetically pleasing alternatives to a lawn. From a zen garden to wooden decking or paving slabs, the choices are endless. For some, nothing comes close to the feel of grass beneath your bare feet. If you've ever looked over at a neighbor's yard with envy and wondered how they manage to keep their lawn looking so good, you might find that sodding is the answer.
If you don't know much about sodding, we're here to provide you with some useful insights into the advantage of a sod lawn:
What Is a Sod Lawn?
Let's begin with the basics. Sod can be described as grass and soil held together by a biodegradable root system or material. There are different options when it comes to having a sod lawn. From Bella bluegrass and bermudagrass and centipede grass, the list of choices you'll have is endless. Sourcing a sod lawn and installing it won't be easy, so it is best to speak to experts at The Sod Source for more information.
It's an Instant Solution
The most obvious advantage of sod is that you'll have yourself an instant lawn. With regular lawns, seeds take at least a year to grow and are fully established, and you'll have to deal with unattractive yard space. Sodding, however, provides an immediate aesthetic change and will be fully established within a matter of weeks.
Less Soil Erosion
Unlike seeds, which take a while to establish themselves, sod is better able to control soil erosion because it is fully grown. For those with a garden that becomes muddy as soon as it rains, sod is a great option for eliminating the issue of soil erosion, since it acts as a barrier between rainfall and the soil.
You Won't Need to Stress About Irrigation
A seeded lawn needs to be watered at least four times a day at the germination stage. This ensures that the ground will stay moist, but it will also take up a lot of your time. On the other hand, sod only really needs to be watered a few times a day for the first few weeks after it is installed, which makes it a less time-consuming option for the homeowner.
Sod Lawns Are a Professional Solution
Unlike a regular seeded lawn, which will require the homeowner to tend to by themselves, sod is grown by professionals. Sod farms grow their sod using the best quality seeds and use specialist machinery. Furthermore, sod farms harvest to order, so you can guarantee you receive a top-quality product.
Maintaining a lawn requires a lot of hard work and patience. A seeded lawn will take a fair amount of time to establish itself, and that is not to say you won't experience teething issues along the way. Even if you have a green thumb, opting for a sod lawn will save you a lot of time and effort.
Landscaping
The Top 5 Best Approach in Lawncare
Published
4 months ago
on
July 12, 2021

Keeping a nice lawn does not have to be difficult. It could be as easy as following a routine that will rapidly become your favorite part of the day.
Its maintenance may come with a little price, but it doesn't always require a professional to have an immaculate-looking lawn. You don't need to pay a fortune to have an envious lawn in the neighborhood. So allow us to tell you a piece of confidential information: lawn professionals are not doing anything to your turf that you can't do alone. They know exactly what to use on your lawn and when and how it is used.
Indeed, help from professionals like Lakeland Lawncare can be great, and you can take notes from them. However, it will be therapeutic if you can take care of your own yard. The best tips to take care of your lawn in your ways and insert your modifications in your lawn care are just one read away. Take your cue from the following.
Eradication Of Weed, Thatch, And Moss
In some cases, these things don't necessarily damage your lawn. However, they can steal nutrients and water supposedly meant to grow your green, luscious yard.
Weed Removal
Weeds grow unabated in gardens, and there's nothing we can do about it. They fight for nutrients and water with plants and lawn grasses, and they spread over the garden, making it less appealing.
There are precisely three methods to remove weeds: you pull it by hand, remove using a hoe, and in worse cases, you use a chemical product.
Take note that the best time for weed removal is when the soil is moist and damp because it's easier to pull the weeds out by their roots. If you don't, you risk leaving the roots behind since they're caught in the dirt.
Dethatching
Thatch is a coating of organic debris made up of dead leaves, grass, and root stems that can accumulate between the leaves and the soil.
The buildup causes an obstruction, preventing vital moisture and nutrients from reaching the roots through the soil.
The ground will feel spongy, and the absence of nutrients will leave dull, lifeless spots on the grass, making these areas easier to spot. However, there is no need to worry. Scarification, which is the process of raking and removing mulch from the lawn, is the most outstanding technique for eradicating thatch.
Moss Removal
Mosses are non-flowering plants that can take over your landscape and cause chaos. They flourish in regions with a lot of wetness, shade, and poor turf.
The level of moss will increase if left uncovered or untreated, decreasing the grasses' ability to thrive. The cause of the moss must be recognized and reduced before you may remove the moss. It can then be fed and satisfied, and it can be watched and nurtured from there.
Upgrade Drainage System
Lawns with inadequate drainage systems carry lots of disadvantages. Ranging from issues such as being soaked for hours, even days, and to the extent of destroying your green grasses.
In upgrading your drainage system, you have to make sure that it is sufficient in giving enough water and nutrients throughout the whole lawn, and it will avoid problems such as drowning the grass. An improved damage system should fix these issues, not make them worse.
A drainage system expert will evaluate your property (slope, soil, etc.) and recommend what will work best for you. A professional will also be aware of any local restrictions on where you can direct your water. For example, directing the water into storm drains is unlawful in many places. In addition, there are regulations prohibiting water from being directed onto sidewalks or roadways that may freeze over during the winter.
Aerate Your Lawn
Aeration is essential for keeping a healthy lawn because it enables air and water to penetrate developed grass or turf mulch.
This technique permits more air and water to get to the grass's root system, critical for the grass to get the nutrients it needs to flourish. It's an excellent approach to deal with drought-stricken or water-logged lawns.
Aeration is accomplished by poking small holes in the soil at defined levels and thicknesses with a garden fork or mainly designed instruments and machines.
Aeration's primary purpose is to alleviate soil compaction. Soil layers have an excessive amount of solid particles packed into a small amount of space, impeding proper air, water, and nutrient flow.
Much yard thatch and heavy organic compounds hiding beneath the grass surface could be depriving the roots of these essential nutrients.
Over-Seeding
By covering the entire area with massive amounts of seed combined with fertilizer, over-seeding rejuvenates old and worn-out lawns. This method improves the color and reduces the possibility of weed and moss incursions while filling in damaged and thinning areas.
The grass should be kept moist after seeding to aid germination, and a top dressing should be applied to preserve the seeds and offer nutrients.
This method should be done once a year to keep your lawn healthy.
Feeding And Watering
Most gardening supply stores have a variety of grass feeds and fertilizers. The type required will be determined by the soil and weather conditions in your area. The majority of these will come with application directions, so it's best to stick to those.
In general, you should fertilize your lawn twice a year, once during the springtime with a nitrogen-rich yard fertilizer and again in the fall with phosphorus and potassium-rich feed. All lawns require watering in addition to feeding. If a lawn isn't given enough water, it will turn brown and lose its spring, causing the grass to stay flat when stepped on.
DIY Projects
8 Exclusive Tips for Painting a Garden Fence
Published
4 months ago
on
July 9, 2021

Maintaining your garden fence and keeping it up to date may not sound like something fun, but it would be if you're fond of gardening. Unfortunately, sometimes it could be a tiring job. A job that will sap all of your energy even you're the most practical person in gardening.
But if you do not maintain your garden, the garden will lose its beauty. On the other hand, if you keep painting or staining your fence and garden gate every couple of years, its beauty will be preserved for many years.
Let's face it; the garden is where we spend most of our time when the weather is favorable, pottering around the flowerbeds or inviting friends and family round for barbecues in the sunshine.
Having a perfectly groomed garden will add value and beauty to your house. So please don't rush out and splash the paint when the time comes; take your time and follow our top tips for painting your garden fence mentioned below to give your garden a beautiful look.
While painting the garden, preparation is vital, like in most DIY jobs. The trick is that the more care you take and more time you spend while making sure that the preparation work is completed as best as you can, the better the final outcomes will be.
Tip # 1 – Trim
Mow the lawn. Get your garden trimmer out to trim around the fence gate, the bottom of the fence, and fence posts. You can use edging shears or scissors if you don't have a garden trimmer.
Tip #2 – Debris and Dirt
Brush away all debris and dirt from all fence areas by using a stiff bristle hand brush or broom. Make sure to clean all the areas that need to be painted properly. To stop any leaves and grass cuttings from blowing up against the fence while painting, it's also a good idea to sweep away them from around the fence base before painting.
Tip # 3 – Scrape Before you Paint
You'll need to scrape the fence before moving onto the next step if the old paint is flaking, cracked, or chipping. To smoothen the paint surfaces, try to use a wide blade paint scraper and coarse sandpaper.
Tip # 4 – Wash and Dry
The next step before starting the painting is to wash the fence thoroughly by using a pressure washer if you have one, or you can use a garden hose and spray nozzle if you don't have the washer. For any stubborn spots of dirt cleaning, keep your stiff bristle brush and a bucket of soapy water to hand and clean all of them right away. Next, apply a diluted bleach solution (1 part bleach to 1 part water) with the hand brush for cleaning fences that have attracted mildew and algae. Before rinsing the bleach solution, please clean it with the pressure washer and leave it to dry thoroughly.
Tip # 5 – Masking or Removal
It's best to remove the hinges, door handle, and barrel bolt when you are repainting a fence with a gate so that they don't get paint stains. However, if you'd instead paint it, you can mask off the hardware by wrapping a small plastic bag over the handle, simply sealing the edges with masking tape so that it doesn't get painted.
Tip # 6 – Protect, Don't Forget
Now we are almost there where we are ready to start painting, but before making it happen, lay tarpaulin or dust sheets to cover up the ground below the fence areas that you'll be painting.
Doing this will help you to protect your grass, garden decking, flower borders, or whatever lies underneath it from getting splattered in paint or stain.
Tip # 7 – Trees and Greens
Place a plywood sheet or hardboard against tall shrubs or hedging trees planted close to or making contact with the fence if you have them in your garden. Doing it will allow you to squeeze in between the woods and the fence and gently lean back on the hedging to keep it away from the fence while painting.
Tip # 8 – Paint, Don't Faint
Avoid garden painting during the heat of the day when the sun will be at its strongest and sunlight for best results and make the tiring job a little easier. Otherwise, the garden paint will dry too quickly, and the outcome will result in a patchy finish.
While painting a garden fence, the final tip is to check the weather forecast and choose a couple of days that are looking dry.
For excellent garden painting, you can contact Promain, a leading supplier of exterior paints and coatings from some of the world's largest paint manufacturers and brands, including Centre coat, So lignum, Ron seal, Cuprinol, and Rustoleum.
Their exclusive range of external paints not only covers the outdoor of your home but through to large industrial premises, and all hold waterproofing properties second to none. Feel free to take the time to browse their large selection of multi-surface paints.
Landscaping
Top Benefits Of Installing Drip Irrigation For Your Home Garden
Published
4 months ago
on
July 8, 2021

Drip irrigation is not just suitable for large farming areas, as it can provide your home garden with numerous benefits. Whether you are growing organic produce, a herb garden, or simply searching for ways to maintain your landscaping, drip line irrigation will offer you these excellent benefits.
Save On Water Usage
Regardless of how extensive or small your yard area is, of course, you want to reduce your water bill for numerous reasons. However, your plants and lawn need watering regularly, and an ordinary hose can waste a lot more water than you may be aware of. Installing an irrigation system will save you a small fortune each year on your water bill. These systems use between thirty and fifty percent less water than other traditional methods of watering the yard. Even using the ordinary sprinkler will have up to fifty percent of the water evaporating in hot weather conditions.
Enhance Growth
Providing your yard with smaller, more constant amounts of water will boost growth substantially. Therefore, irrigation systems improve the growing conditions for plants. It also prevents soil erosion, which can hinder growth significantly. A nutrient runoff will also no longer be a concern for your landscaping or vegetable garden as your plants will have an ongoing supply of water.
Discourage Weed Growth
Overspray from water sprinklers can cause weeds to germinate where you don't want them to. This can also lead to your yard growing out of control as the build-up of surface water is not ideal. Installing irrigation will reduce the growth of weeds by delivering water straight to the roots of plants in your garden.
Reduce Fungal Diseases
Fungal diseases can become a problem when watering a yard the traditional way, as fungal diseases thrive in moist conditions. Wet foliage can burn with sunlight and spread disease quickly, so watering only where hydration and moisture are necessary is an excellent way to ensure the reduction of fungal diseases that can destroy everything growing in your garden.
Prevent Overwatering
It's a lot easier to overwater a garden accidentally than most people realize. Forgetting you have left the sprinkler on can lead to a swamp pretty quickly, and this will damage everything in your yard. Irrigation systems prevent the possibility of overwatering as you can add a timer to your irrigation system and have your yard watered automatically.
Save Time And Effort
You won't only be saving on your water consumption bill when installing an irrigation system, as you will also be saving substantially on time and effort. You won't ever have to spend hours on end hosing your plants and lawn or waiting for the sprinkler to deliver enough water to each area of your garden. Installing an irrigation system with a timer means you won't have to worry about watering your yard ever again. However, you will need to prioritize maintenance and potential repairs of the system to ensure it is always functioning at its best to benefit your garden and everything in it.
Landscaping
4 Ways to Drought-Proof Your Lawn This Summer
Published
5 months ago
on
June 10, 2021

Summers are getting hotter and drier each year. In 2020, many northern states were subject to unprecedented droughts that exacerbated wildfires across the area. Droughts can take a harsh toll on your lawn. To prepare for the dry weather, you can take steps to make your lawn and landscaping more resistant to drought.
During a drought, you may not be able to add extra watering times to your lawn maintenance schedule. Many towns and cities have water usage mandates during the aridest parts of the year. When your lawn is parched, it can look dull, yellow, and scrubbish.
If you live in an area that experiences an annual drought, you will need to prepare your lawn in advance. Taking action prior to the dry season can help your lawn resist a harsh period of drought. In the spring as you prepare your lawnmowers, you can take these steps to help drought-proof your lawn.
Aerating
During a drought, your lawn has to work harder to leech moisture out of the soil. In many cases of extreme drought, your lawn will go into a dormant period with minimal growth and some permanent loss. To prevent your lawn from drying out you can help it to access the moisture in your soil by aerating. The process of aerating will provide deeper pockets in your lawn where moisture can accumulate providing an extended water source for your lawn.
Fertilizer
A lawn that is well-fed will have a better chance of surviving a drought. Prior to a period of drought, it is essential that you switch to a potassium-rich fertilizer and ditch the nitrogen formula. A potassium fertilizer will help to strengthen each blade of your lawn including the crown helping it to retain strength during periods of heat and dryness. During a drought, it is best to avoid using any pesticides or herbicides as they can leech the soil of excess moisture. To help retain moisture and provide extra nutrients during a drought you can spread a light coating of your clippings.
Watering Schedule
The key to helping your lawn survive a drought is to encourage longer root growth. By establishing the correct watering schedule you can promote the proper growth pattern in your grass that will help them cope with drought. Watering less often with more water is the best way to train your lawn for a drought. Watering less than once a week to the extent that there is minor pooling on your lawn will help your grass extend its roots and become more drought resistant.
Proper Mowing
Mowing your lawn too short or too often can put a strain on your grass. Following the one-third mowing rule is the best way to cultivate strong blades. Only cut off the top third of your grass routinely to keep the blades strong and avoid damaging the crown of the root. Keep your mowing to a minimum, no more than once a week.
If you want to help your lawn survive the summer drought, you will need to start your maintenance in advance. Before the dry heat hits, follow these tips to help your lawn become drought-resistant and stay looking great all season.
Home Care & Living
New Home, Old Furniture? What to Do With Your Furniture When You Are Moving to a New House
Published
6 months ago
on
May 20, 2021

There is only so much that you can do with your old furniture when moving to a new place. However, despite the limited options, you should still be able to make the most out of your old furniture. Hence, to help you understand better, here are all the things that you can do with your furniture when moving to a new house.
Take the Furniture with You
The simplest solution to the problem at your hand is to take the furniture with you to your new home. This option is especially applicable if your old furniture is not really that old. That means it is still new and maintains necessary standards in terms of quality.
You need to take the furniture measurements into account if you want to bring them with you to your new home. That will help you to plan the layout quite easily. In some cases, like when you are moving to a home with smaller rooms, the old furniture might not fit. Hence, to see if you can fit them, you must take their measurements first and work out the different layout options available to you.
By utilizing your old furniture, you will not have to buy new ones. That means you get to save money. Most importantly, by not buying or making new furniture, you are helping to preserve nature and save the environment in a way. Hence, taking the furniture with you to your new home is undeniably the best option out there.
Repurpose the Furniture
You do not have to use your old furniture if you do not want to. However, you still need to take them with you if you cannot find a buyer. In such cases, instead of just throwing them away, you can repurpose the furniture. Break them down and build something else with them.
Or you can also use your old furniture on the patio or in the garden. For example, you may need garden loungers or pool loungers for your new house. But instead of buying new ones, you use DIY methods to turn your old chairs into loungers.
Repurposing is a great way to save money as well as the environment. Plus, you also get to utilize the material and build something you might need at your new home.
Sell Each Piece (or Set) of Furniture Separately
You should consider selling the furniture if you cannot or are not willing to take them with you to your new home. There could be multiple reasons why you might have to do so. For starters, you may not be able to accommodate the old furniture in your new house. Or it could be that they will not look good over there. Besides, it is also possible that you are no longer fond of them and want to get some new ones. Thus, under these situations, the logical thing to do is to sell your furniture.
Selling the furniture will require a bit of work from your end. Since you are likely to sell them online, you first need to take a few good pictures of them. In your product description, you should mention the furniture dimensions, material type, how old they are, what problems they might have, and so on.
You will find it difficult to attract buyers if the furniture looks too old or has too many issues with them. In such cases, you might want to get them refurbished before putting them up for sale. However, that decision will ultimately come down to whether or not you want to invest in something that you will be getting rid of anyway.
Sell the Furniture with the House
Apart from selling the furniture sets separately, you can also sell them with the house. In such cases, it is important to make sure that the furniture is in good condition. People will be easily put off with the idea of buying a new house with furniture that is of poor quality. Hence, get the furniture refurbished if necessary, but do not try to sell them in poor condition.
The furniture's condition will affect the value of the property. You are more likely to see a depreciation if the furniture's conditions are below standard. Besides, furniture can affect the valuation in other ways as well.
There is a possibility that selling the house with the furniture may not seem like a viable option. Besides, people have their preferences when it comes to furniture and interior decor. Hence, even if they like the house itself, they will try to settle for a deal where they do not have to pay extra for the furniture.
Each of the points mentioned above comes with its pros and cons. You have to work out which one will be more beneficial for you before you can choose that particular option.
Home Care & Living
5 Practical Box Opener Hacks
Published
6 months ago
on
April 30, 2021

Your package arrives in the mail, and you grab the first pair of scissors or keys to pry it open. Or, maybe you have a box opener handy to see what the delivery carrier brought you. While you may have initially bought that box opener for obvious reasons, don't just think it's for opening packages. In fact, this versatile tool might just become one of your favorite "go-to" gadgets once you see the many life hacks it can be used for.
A box opener also called a box cutter or utility knife is a nifty little tool that consists of a handle and a blade. Typically, the blade is retractable and stores neatly inside the handle housing when not in use. There are many different styles, colors, and designs to choose from. Finding a box opener should be fairly easy. One should take into account the blade style and handle, as well as the material that they are made of. For instance, ceramic is a really great material, especially from a safety point of view. A practical box opener is really durable and easy to grip. So let's find out more about why you need one and how to make the most of your purchase.
Why Do You Need a Box Opener?
As the name suggests, a box opener is great for opening and breaking down cardboard boxes. However, box openers are also handy for:
- Home Improvement Projects: Cutting drywall and insulation board; scoring vinyl tile or veneer; trimming linoleum or carpet; deburring polyvinyl chloride (PVC); removing caulk seals
- Landscaping Applications: Cutting landscape fabric or sod; opening bags of mulch or granular fertilizer; pruning small unruly bush stems
- In the Kitchen: Opening food packages; slicing through meats, cheeses, and small fruits and vegetables.
- For Hobbies and Crafts: Scrapbooking; wood carving; bookbinding; soap and candle making; leather and fabric crafting
- Outdoor Adventures: Cutting fishing lines; cleaning fish; trimming rope or twine; making emergency repairs
Do Box Openers Really Have Hacks?
While this isn't a comprehensive list, here are a few very practical hacks for box openers that you may want to try.
Hack #1 – Perfect Edge Painting
Have you ever taken the time to carefully apply painters tape to trim and other woodwork before painting your wall, only to be frustrated when the tape tears away bits of your freshly painted wall when removed? A box opener tool can be used to remedy this pesky problem.
Before pulling off your painter's tape, simply make a neat cut with your box opener tool right at the edge of the tape, where it connects with the wall paint. This small step will help your tape pull off cleanly, leaving the wall paint intact.
Hack #2 – Cardboard Template Cutting
Mounting items on the walls of your home is often necessary—but tedious. It can be difficult to know exactly where to place your nails or screws, especially when there are multiple brackets and you are working alone. The next time this problem arises, reach for your box opener tool and some basic cardboard to help.
Use a pen to trace the shape of the item onto the cardboard, and then cut it out with the box opener tool. Mark appropriate places where brackets or mounting hardware is located and then place your newly created template on the wall for reference to narrow down where you will need a drill or hammer.
Hack #3 – Softening Ice Cream
Having a good working freezer is a fabulous thing until you try to scoop hard-as-rock ice cream from a carton. The next time you want ice cream and it's frozen solid, skip the mess and try this box opener hack instead.
With your box cutter blade fully exposed, run it under hot tap water for about 30 seconds. Using the warmed blade, cut several horizontal lines straight across the surface of the ice cream. Turn your carton into a vertical position, and make similar cuts perpendicular to the first ones. This will result in a checkerboard pattern in the ice cream. Once all cuts are made, use your ice cream scooper to get your dessert.
Hack #4 – Trimming Photos
Whether you print your own images or you cut apart sheet photographs delivered from a print studio or photographer, a box opener tool and a straight-edged ruler make this task quick and easy.
Start by laying your photo on a solid-cut, proof surface. Then lay the ruler along the photograph's edge. Score carefully with the box cutter tool, and then discard any unwanted scraps. Your photos are now ready to frame!
Hack #5 – Replacing Screens
Everything from pets to the weather can wreak havoc on a home's window and door screens, and replacing the screen material seems to be on every homeowner's to-do list at some point in time or another. With the help of a box opener tool, this becomes a relatively simple DIY project to tackle.
Once you have removed the old, torn screen material, cut your new screen just a few inches larger on all sides than the screen's frame. After aligning the new screen with the frame and pressing in your rubber seal strips, use your box cutter tool to trim off the excess screen material, leaving a clean-cut finish.
Whether your project involves a sweet tooth, a do-it-yourself project, or showing off your favorite pics, here's hoping these five handy tips make your life a little easier courtesy of your box opener.
General Gardening
Organize and Store Your Seeds Right to Keep Them in Perfect Condition
Published
8 months ago
on
March 19, 2021

If you are a keen grower, your seeds represent the engine room of your horticultural operations. If seeds are not properly stored and organized, you can't expect to grow healthy and vibrant plants. Effective seed management and storage practices are about more than just keeping your garden shed tidy and organized. They are intrinsic to the ultimate success or failure of your crop.
Storage Basics
The beauty of seeds is that you can hang on to them for a long time before planting and they will not deteriorate in quality. But that only holds true if you store them correctly. There are some fundamental things that apply across the board, whether you have carrot seeds for your vegetable garden or you want to try cultivating feminized cannabis seeds in one of the states where that has been legalized. Practically all seeds like to be stored in dark, dry, and cool conditions. Yet most gardeners keep them in little sealable plastic bags, or perhaps in half-open envelopes. Stored like this, they will be OK if used within a few months, but don't expect them to remain at their best for much longer.
Moisture Control
Keeping seeds away from moisture is the most important consideration and the easiest way for things to go wrong. People often elect to keep seeds in a basement, and that typically meets two out of the three requirements, being dark and cool. But basements are often damp, too. There are a few tricks for keeping seeds dry. Those little packs of silica are, of course, made for the job, while you can fashion a home-made alternative using cat litter. The ideal solution, though, is to store your seeds in small metal tins with tight lids. As well as keeping the moisture at bay, it also guarantees they stay in the dark till you need them.
How Cool Is Cool?
Ideally, seeds should be kept at a temperature below 40°F (5°C), so the exact storage strategy will depend to a large extent on where you live. If you have the luxury of that cool, dark basement we were talking about, then that's your problem solved. For many of us, however, the only way to maintain an ambient temperature that low is by placing your seeds in the fridge. If you don't want them in the kitchen, you could always buy a beer-cooler-style fridge especially for them and keep it in your shed.
You've Got to Have a System
With the environmental conditions worked out, the last step is to work out a system so that you know what you've got and can immediately lay your hands on the seeds you need. It's an extreme illustration, but remember our example from earlier. You really wouldn't want to find you'd got your carrot seeds and cannabis seeds mixed up. There are so many options open to you here. If you are just storing the seeds in paper, an old-fashioned photo album is highly effective. Alternatively, a jewelry box, tackle box, or pill organizer will all do the job.
Home Care & Living
How to Efficiently Clean Your House
Published
8 months ago
on
March 16, 2021

Everyone loves a clean house, even though the process can be an arduous task. There are many elements involved in cleaning that take up a lot of time, and you might not know where to start. If you live in a house with outdoor space or garden, the cleaning might seem all the more daunting. However, you don't need to take a lot of time cleaning. Here are a few tips and tricks to help you get the house cleaning done quickly and efficiently.
Clean the whole house
Many people tend to pick a few rooms to clean or a few tasks to do each day. This makes the chore seem a lot more time-consuming. Try to tackle the whole house in one go. Another helpful tip is to pick up one task, such as dusting, and do that throughout the house first before moving on to another task. Don't clean the house room by room, as this will make it feel like an endless cycle.
Gather all your tools in one place
Before you start cleaning, gather all the cleaning equipment in one place in a caddy, bucket, basket, or something similar. This will make cleaning easier as you won't have to keep leaving a task just to get the necessary cleaning tool. You can also include baking soda in your caddy to freshen up your home.
Declutter
Before you start cleaning, clear the clutter around your house. There might be magazines, toys, footwear, or other items lying around, and putting them away will make cleaning easier. If you're planning on doing a deep, extensive cleaning, you can declutter by clearing out any items you no longer need, and either throw them away, recycle them, or sell them.
Go top to bottom, left to right
When cleaning a room, it's best to start from the top of the room by dusting ceiling fans or shelves and work your way down to the floors. Similarly, work your way from left to right to ensure that you cover the entire room.
Vacuum in rows
Vacuum the length of a room in a row, and continue cleaning this way until the whole room has been covered. This is a fast and efficient way of vacuuming, especially for high traffic areas that you need to vacuum frequently. If your carpet needs more deep cleaning, you can get it done by carpet cleaners Dublin.
Wash your cleaning tools
Clean tools can be of great help when trying to do a quick clean. A dirty mop or a vacuum with a full bag will be less efficient and you will end up wasting your time on tasks that could be done quickly. Be sure to replace any tools that have been worn out.
Don't procrastinate on cleaning your house. Dedicate the time you think will be needed and get started. If you live with others, you can get them involved in the cleaning process to get it accomplished faster. Cleaning can be tiresome, but it can be fun when done with a group.
Landscaping
Does Landscaping Increase Property Value?
Published
8 months ago
on
March 11, 2021

If you have been wondering, does landscaping increase property value, then you will find this article to be extremely insightful. The truth of the matter is that landscaping that is done in the right manner does indeed increase the value of your property. That is why we share in-depth some amazing ways that landscaping can increase the value of your property. We've written this article with the help of a landscaping company called RocDog, which says a lot of clients are property developers wishing to increase the price of their property.
1. Increase the value of a property by adding trees.
Though adding trees can seem like a simple landscaping feature, the reality is that trees are beautiful and do make a property look more interesting. They are perceived as increasing the value of a property. Thus, those properties that have trees tend to have a higher value than those properties that do not have trees. That is why properties that have trees can sell for as much as ten to fifteen percent more than the asking price in comparison to those properties that do not have trees.
2. Increase the value of your property with uniformity in style.
A sure way to add value to increase the value of your property is to apply an approach of uniformity pertaining to the style of your landscaping and home. In other words, your landscaping should conform to the style of your home. If there is a different style for the home and a different style for the landscaping, this would result in the clashing of the designs and would make the property much less appealing. This then causes the property to experience a decrease in its value. But when you are careful to apply landscaping that matches the style of your home, then this will surely increase the value of your property in a positive manner.
3. Increase the value of your home when you add colorful flowers and plants.
When you take the time to invest in adding gorgeous and colorful flowers, plants that bloom as well as thick shrubs, you will be magnifying the curb appeal of your property instantly. This will portray the idea that your property is well landscaped and meticulously maintained. Moreover, when you also are careful to add flowers and plants that are aromatic, this will attract butterflies and birds to your property as a result of the lovely scents. This will also contribute to increasing the value of your property.
4. Increase the value of your property when you provide a definition with lawn edging.
If you are looking for an easy way to increase the value of your property, then you should consider providing definition via the usage of lawn edging. This will result in giving your property an appearance of being nicely manicured. This also gives the look that a property is more low maintenance, which can be a great selling point for those who want a nice-looking property that does not require a lot of fuss during the process of caring for it due to being busy. To achieve this look, there should be a neat separation that is noticeable in regard to the walkways, garden beds, and lawn. The addition of bricks, stones, or timber between the walkways, lawn, and garden beds can make the ideal type of lawn edging.
Landscaping
4 Landscaping Tips for a Beautiful Patio
Published
10 months ago
on
January 28, 2021

Image by ljlabarthe from Pixabay
Nothing is more relaxing than having a beautiful home with amenities to help you unwind after a tiresome day. Apart from offering additional relaxation space, an attractive patio enhances the value of your property. It can also minimize the hustles of lawn maintenance while providing extra multifunctional space in your home. A well-designed patio can make your home feel more inviting and cozy in many ways. In this piece, we will take a look at some landscaping tips you could use to make your patio a space of beauty.
1. Variety of Plants
Plants breathe life and a relaxing feeling into almost any space. Whether you are building a new patio or reviving an old one, think about how flora can help you construct a beautiful area. Introduce a diverse range of colorful plants that bloom at different seasons of the year. You can also use containers with different colors or designs to bring in the aspect of art. Moreover, they are portable and can easily be interchanged.
This will bring energy and a sense of life to your patio out of the varied ornamental leaves blooming throughout the year. For instance, some of the plants like the Rozanne geranium bloom from June to October. Planting a variety of plants will also ensure your patio retains its attractiveness.
2. Use of Bricks
Stone or brick are some of the materials you can use to add a unique feature to your yard patio. Bricks are long-lasting, and they bring out a natural feel, style, and class. You also have a variety of designs and colors to choose from. The colors range from traditional red to grey, brown, and even multi color options. You can assemble the bricks in your own unique design that best suits your preferences.
3. Fountain Patio
Designing a captivating patio can be a daunting task, but it becomes easier when you are guided and informed. Water fountains are a unique feature. It speaks elegance to your outdoor space. If you are looking into ways to enhance your patio, a fountain will deliver exemplary results. The sight and sound of the falling waters will bring a sense of calmness and relaxation aura. It's soothing and fascinating to watch and hear the water trickling.
4. Covered Patios
Lately, covered patios seem to have acquired significant popularity. Many homeowners are embracing covered pergolas to create comfortable and inviting outdoor spaces. As seen on Malone's Landscape website, the shaded outdoor units are multifunctional. They can be used for a wide range of outdoor social activities or occasions like barbeques, dinners, parties, and many more.
The shade allows you to hide away from the hot rays of the sun while enjoying the soothing warm breeze. The cover makes it a cozy recreation area. It provides an ideal hideout for your family and friends during summer while enjoying your barbecue portions. You can even add extra entertainment like TV or sound system to make it more alluring.
Considering the countless benefits they offer, a patio could be just what you need in your home for times when you need to escape into the solace arena of nature. With the right tips, you can create an oasis of comfort and allurement in your yard. The above tips can help you design an eye-catching patio that your neighbors will probably get jealous of.
General Gardening
4 Tips For Optimal Tree Maintenance
Published
10 months ago
on
January 25, 2021

In tough times, many Americans are relying on their gardens to get them through, with The New York Times recently publishing the headline, Food Supply Anxiety Brings Back Victory Gardens. In times of need and plenty alike, few things are quite as gratifying as having a large garden with trees that provide shade and food. Common trees you may have in your yard include American hollies, red oaks, silver maples, sugar maples and Eastern redbuds. Popular fruit trees, meanwhile, include honeycrisp apple, Lapins cherry, Harken peach, Warren pear, and Santa Rosa plum trees. If you want to ensure that the trees in your garden last a lifetime, resisting common problems and pests, the following tips may be useful.
Getting Your Watering Schedule Right
Trees have very specific needs when it comes to watering. For instance, newly planted trees require frequent watering, with experts recommending daily watering for up to two weeks after planting, tapering to every two or three days for the next three months or so, and culminating in just once a week of watering after the roots have stabilized. This is only a general rule, though, since watering frequency will depend on everything from the type of tree to the climate in the zone you are living in. One general tip to test for the need to water is to take an eight-inch or longer screwdriver and stab it into the soil. If it doesn't slide into the soil further than around six inches, it is a good sign your tree needs more water.
Choosing The Right Fertilizer
Fertilizer is a vital way to ensure your beautiful trees receive an optimal cocktail of nutrients, but choosing a quality product is key. Avoid those containing high levels of nitrogen as well as weed-and-feed fertilizers, since they can damage roots. Seeking advice on the best products for your specific trees is important, to ensure you aren't doing more harm than good through your product choice. Aim to fertilize your trees every two or three years in the autumn or winter season. Make sure you reach the totality of the root area, applying product to any turf surrounding your tree as well. Be aware that some trees require less fertilization than others; for instance, applying too much fertilizer to pine trees, causes 'leaf scorch' and an unattractive, gapped appearance between leaf whorls on branches.
Keeping An Eye Out For Pests And Disease
When pruning your tree to remove broken branches, watch out for signs of disease and pest infestation. Signs are usually visible on the leaves, bark, branches and twigs. These signs can include leaf discoloration, thinning foliage, poor branch growth, holes and frass on the trunk, and roots that lift upwards. Sometimes, pests such as carpenter ants are present. While these insects don't necessarily destroy the tree itself (since they feed on parts of the tree that are already rotten, injured or dying), they should be given due importance. Carpenter ants in trees should be eliminated quickly, since they can damage nearby structures, tunneling and chewing through wood to create nests. Other common pests include gypsy moths (which eat hardwood tree leaves), the Western tent caterpillar (which attacks aspen, fruit trees, poplar and willows, as well as other trees), and wood borers (which attack the bark of ash trees). It is a good idea to have a yearly inspection by a trusted professional to spot such problems before they cause severe damage to your tree or other parts of your property.
Applying Mulch
Mulch is a great ally for any tree to have, since it insulates roots, helps them stay hydrated, and protects them against wear and tear. To ensure your tree benefits optimally from mulch, remove any turf beneath your tree and apply around four inches of mulch, keeping the tree base clear. There are many different types of mulch to choose from – including wood chips, grass clippings, and hay. Whichever you choose, aim to go organic, since these materials decompose, improving the quality and fertility of soil.
Trees are a boon to many families currently undergoing tough times and seeking to literally 'live off the land'. If you have a yard with fruit trees or you simply enjoy gathering with others beneath the shade of your favorite tree, remember to water, fertilize, apply mulch, prune, and check for pests. Most importantly, schedule an appointment with an ISA-certified arborist, who can alert you to any potential problems early, so you can take the steps you need to save your trees.
Landscaping
Landscaping Ideas for Small Gardens
Published
10 months ago
on
January 12, 2021

A charming outdoor space is always invigorating to the mind and soul. However, designing this area of your home comes with several challenges, and space is one of them. If you have been wondering how you can create a stunning garden that will awe your guests and family at your abode, look no further. Below are some landscaping ideas you could use to give your small garden some life.
Use Potted Plants
Creating a lush, welcoming garden shouldn't be complicated. Landscaping with pots can add extra space when gardening in a small backyard. You can grow a wide range of potted plants, including creepers, ornamentals, herbs, and much more. Some could even be hung or placed on the ground. Integrating pots into your landscaping is also cheaper. Doing this will also help you add more color to your yard. The best part of it is that pots are mobile. You can change them after some time to break up the monotonous look. Add some uniqueness by choosing pots with visual appeal. You can use metal buckets, barrels, teapots, or whatever suits your style.
Create a Secluded Nook
Every backyard needs a nook where you can relax from the turbulence of life. Consider setting some space aside in your small garden where you can relax alone and read a book, welcome guests, or nap in a chair or a hammock. You only need to select the right spot in your backyard with minimal noise, preferably one with a wall and a surrounded hedge. It should be placed for privacy away from the house. Add some seats with pillows and blankets to keep you warm and cozy at night. Ensure it is surrounded by some potted plants, especially creepers, herbs, and a few trees where possible.
Consider Illuminated Walkways
Walkway lights can go a long way in improving the visual appeal of your garden. Ensure you choose the ideal lighting for your yard to supplement the landscaping and the architectural hallmarks of your home. You can install geometrical structures or tall angled lights with more illumination coverage. The walkway lighting should give you a stunning view and set the right mood for your outdoor space. It should be relaxing as you enjoy the surroundings, the trees, flowers, and plants around.
Don't Forget the Contours
A garden path connects distinct areas in the garden. The paths in your garden should be inviting and encourage an expedition. With the help of an expert landscaper, you can create subtle, curvy paths with a fun and interesting look. This helps enrich your landscaping design as the contours create curiosity about what's lying around the corner. Complement the meandering paths with an attractive trail of beautiful blossoming plants. You can use pebble stones, bricks or gravel, or granite stepping stones on the walking surface.
Whether you are making a garden from scratch or modifying an old one, landscaping can be quite puzzling, especially in a small backyard. Despite the space limitations, you can transform your small garden space into a marvelous haven of greenery. Along with the few tips above, all you need is a little creativity and perhaps some professional help to create a lasting statement in your small garden space.
Greenhouses
4 Reasons Everyone Should Have a Greenhouse
Published
10 months ago
on
January 11, 2021

2020's COVID-19 pandemic forced people to retreat into their homes under government-imposed lockdown orders. While this was a major inconvenience, it also provided a great opportunity for us to focus on home improvements. Spending more time in our homes provided the much-needed motivation for some people to kick-start those projects they'd been putting off for years. For many people, their outdoor spaces became a tranquil retreat. With limited opportunity to get outdoors, we began to appreciate our small outdoor spaces and gardens in a greater capacity.
As lockdown measures ease in some places, many of us will continue to invest in these outdoor spaces. Installing a greenhouse is one such project. While it may seem like quite an intense job, there are lots of greenhouse kits available, which means it's highly likely that you'll find something suitable for your space. If a greenhouse is something you are pondering, these are some of the best greenhouse kits on the market currently.
You Can Grow Your Own Vegetables
Having a greenhouse enables you to have access to quality, fresh vegetables all year round. Being able to have your own herbs during the winter is very satisfying. While hardier vegetables such as cabbage and brussel sprouts can grow well under tough wintery conditions, this isn't the case for more delicate vegetables such as lettuce. The year-round growing conditions provided by your greenhouse will allow you to grow more fresh produce than a regular vegetable patch would. Furthermore, by growing your own organic produce, you can be secure in the knowledge that your veggies haven't been sprayed with chemical pesticides making these considerably better quality than you'd find at your local supermarket.
A Greenhouse Can Be Great for Your Mental Health
Focusing your attention on gardening and being outdoors is known to be good for your mental health. Taking some time out in natural settings can provide relief from mental fatigue by slowing down the heart rate, reducing blood pressure and generally making people feel less anxious. Building your own little indoor nature sanctuary by starting a greenhouse project and watching your hard work reap the rewards will also offer you a huge sense of satisfaction.
It's Great for the Environment
Not only is gardening known for being great in terms of a person's mental health, but it also has a positive effect on the environment. Homegrown fruit and vegetables tend to be pesticide-free. Having access to fresh produce right on your doorstep will save you a few drives to the supermarket. Furthermore, avoiding the supermarket will mean you won't need all those plastic or paper bags, which will limit unnecessary waste.
It Can Add Value to Your Property
Adding a functional element like a greenhouse adds value to your property. Landscaping your garden serves to make the property more appealing to potential buyers and a greenhouse takes things to another level by providing the perfect place to incubate new plants and more delicate seedlings. In turn, this allows you to upgrade your landscape garden for a much lower cost than purchasing these.
It's evident that there are plenty of good reasons to make the addition of a greenhouse your next big investment when it comes to improving your outdoor space. Not only can it be a thing of beauty, but a greenhouse is also very functional. While the decreasing size of gardens can make adding a traditional greenhouse a bit of a challenge, greenhouse kits are now being made available in smaller sizes, too.
Landscaping
9 Benefits of a Backyard Pond
Published
11 months ago
on
December 23, 2020

A backyard pond might look great on a magazine cover. But they require a lot of time and effort to create. So, are they worth it? To help you make up your mind, let's look at some of the benefits a pond can provide.
1. Visually Stunning
One of the biggest reasons why you might want to purchase a pond is to create a stunning feature in the backyard. There are plenty of ways that you'll be able to create a beautiful pond. For example, you might want to add some water-based plants. Things like lily pads and flowering plants can be a great choice, adding some color to the pool. Another great option is to add some fish. You might also want to put in a rock boundary. In some cases, you might want to put in a water feature. This can be something like a waterfall or fountain. The way you set-up your background pond can be as simple or elaborate as you like.
Another way to help your pond stand out is by adding lights. It's best to get some that are run on solar power, so you won't need to pay high electricity costs. There are many ways that you can use lights. For example, you might want to put them underwater to show the movement of the fish in the water. In other cases, you might want to put a spotlight on water features.
2. Environmental Benefits
While a pond can be great for humans, it can also be good for the planet. A pond can serve a few critical environmental features. First, you might be able to save money. Once a pond has been filled up, you'll be able to rely on rainwater to top it up. This can be compared to the lawn or garden, which require consistent inputs of water to grow. A pond will also support the local ecosystem. For example, birds and frogs will often visit the pond. This can be a great tool for teaching young children about biodiversity and the ecosystem.
3. Relaxing
It's important to look after your mental health. One of the best ways to do this is by taking the time to de-stress. A pond can be a great place to do this. You can sit back and watch the fishes swim. Or you can listen to the calming cascade of a waterfall. In some cases, you'll be able to enjoy watching the birds playing in the water.
It's easy to create a relaxing area around the pond. First, you'll want to get some bench seating. Pick an outdoor furniture unit, so it will be able to withstand the wind and rain. Then, you'll need to get some shade. This can be natural, placing the bench under a tree. In other cases, you might need to use an umbrella. If you want to go the extra mile, put in a sound system, so you can listen to your favorite music while watching the pond.
4. Mask Background Noise
No-one wants to sit in their backyard and listen to the traffic drive past. However, in some locations, you won't have a choice. Thankfully, there is a way to stop this problem. You'll need to install a waterfall in your pond. This will mask the noise coming from the street. It will also serve an important role, aerating the water so the fish will be able to use it. The good news is that there are plenty of water features for you to choose from.
5. Keep Cool
Another benefit of owning a pool is being able to stay cool during the warm summer months. On hot days, water will heat up. This results in evaporation. This process cools the surrounding air, similar to how the human body cools through sweating.
6. Create a New Hobby
Maintaining a backyard pond can be a lot of fun. For example, you'll need to care for the fish and plants. This can be a relaxing task, helping you connect with nature. There's also a sense of satisfaction that comes with watching the fish grow older, and the plants start to mature. In some cases, you might even be able to breed the fish, establishing future generations.
7. Break-up a Green Lawn
Some people want to put in a lawn to break up their yard. Looking out on a flat, featureless green lawn can be boring. Why not put in a pond to add some visual intrigue. As we mentioned, once installed, the pond will often be easier to maintain than a lawn.
8. Improve Property Values
When people are buying homes, one of the most important things they are looking for is an emotional connection. This creates strong memories, making them picture themselves living in your house. A pond can be a great way of forming an emotional connection. In this case, the buyer will imagine themselves relaxing by the pond, listening to the waterfall. Because of this, you'll be able to get a higher price for the property. It's also a good way of selling the home faster.
9. Create A Gathering Place
Finally, you'll often find that a pond becomes a natural place of congregation for friends and family. It can be a place to go to a party for a more private conversation. At other times, you might want to sit down and relax by the water with your friends.
Conclusion
As we've seen, there are plenty of reasons why you might want to consider building a backyard pond. The good news is that it doesn't need to be difficult. All you need is a few simple materials to get started, like pond liners. These will hold the water, stopping it from seeping into the soil. They'll also be tough enough to withstand damage, so your pond will last for a long time. For more information and to find the right ones for you, check out this pond liners compilation. So, start work on building your dream pond today to experience the joys that it can provide.
Greenhouses
How to Build a Garden House Without Breaking Your Bank?
Published
12 months ago
on
December 1, 2020

The year 2020 has brought many changes to our lives.
From making masks, gloves, and sanitizers everyday essentials to changing the way we live, socialize and work.
Out of the most changes that happened, changes to our work lives is the most important one.
Companies that enforced 8-5 office working earlier are now promoting work-from-home culture.
A 9-month long work-from-home study conducted by Stanford reported that employee performance rose by 13 percent in comparison to office working, thus giving about an extra day worth of work output in a week.
Moreover, quit-rates for employees dropped by 50 percent!
However, everything isn't sunshine when it comes to remote working.
Working from home can quickly get boring if there is no dedicated space or equipment.
Most people prefer setting up office space at home.
But, why do you have to follow the typical route?
Why don't you try to create a unique office space that makes you feel at ease and concentrate?
If you're looking to build such a space in your home, then building a garden house is the best option.
Nowadays, people are really interested in searching for ways to build garden rooms on their property. A simple online search like https://gardenofficerooms.co.uk/ will give you plenty of options to guide you in building a garden room just outside your home.
What is a Garden Room?
A garden room is a construction that is usually built using wood and is double-glazed and completely insulated.
You can attach a garden room as an extension to your house. However, most people prefer to build it as a standalone construction.
The best part is that you can tailor-create a garden room to fit as an office, studio, home gym, etc.
Why Are Garden Rooms Becoming Popular?
So, what makes garden rooms a better alternative to the typical home office space?
Below are some of the main reasons.
- No Special Permission Requirements: Special planning permissions are required when considering loft conversions or extensions to your house. In the case of building a garden room, permission from authorities is seldom required.
However, there are several restrictions to build a garden room without permission. For instance, the maximum height cannot exceed 2.5m, the garden room should not be located on the main front wall, etc.
- Cheaper to Build: As there are no permissions or paperwork requirements in most cases, you can build a garden room on a quite cheap budget, in comparison to home extensions.
There are no much groundwork requirements, which further decreases the funding you need to create a garden room.
- Multi-Functional Space: A garden room need not just be your office space. As mentioned above, the garden room can be your home gym, hangout place, or just a place where you can relax and feel at ease without going elsewhere.
How to Build a Cost-Effective Garden Room?
In these times of uncertainty, spending money on unessential home construction is the last thing you want.
However, there are ways by which you can save up quite a lot of money while building a garden room.
Below are some of the ways to build a cost-effective garden room in 2020.
- Install Ready-Made Garden Rooms: There are several ready-made garden rooms that you can purchase and install within your home space without any construction required.
If you choose to complete the installation yourself, then you can additionally save on costs which otherwise would be spent on hiring professionals.
- Hire a Professional Company: There are companies that provide designs to build a garden room.
As these professional companies deal with lots of clients, they can easily provide you with a garden room design that matches your property and home.
- Follow Guidelines: As discussed above, most garden rooms require no special permissions. No permission requirement means cheaper costs.
So, make sure to follow all the local guidelines in place while setting up / building a garden room to ensure that you do not have to spend any money on obtaining permissions.
Final Words
We hope you found this article on building a cost-effective garden room helpful and informative.
In case you have already built a garden room, do leave your suggestions and experiences as comments below to help others out.
General Gardening
Unique Gadgets Every Gardener Should Have
Published
12 months ago
on
November 18, 2020

Every experienced gardener knows that they must have the necessary gadgets to help them in their hobby. If you have a parent who loves gardening, you may realize that they may have everything they need when it comes to pots, fungicide, and other needs for their plants. Still, there are likely to be some gadgets that are missing from their arsenal. Here are a few that you should consider:
Thermal Weeder
Weeds are a gardener's worst enemy. A considerable part of maintaining their garden is often spent on weeding. Those who want to make sure that they can spend their time potting and repotting their plants should make sure they have a thermal weeder. This gadget helps to blast away weeds with a temperature that can reach up to 600 degrees Celsius. Even deep-rooted weeds are easily killed within minutes. Since it utilizes temperature, there's no need to use dangerous chemicals that can harm their plants.
Rolling Composter
Serious gardeners know how important it is to have their own compost pile at home. These compost piles can grow into compost heaps that will usually take several months of turning. Not only is this time-consuming, but it is also back-breaking. Having a rolling composter can get this job done within weeks. All you have to do is to place all your waste ingredients into the composter and roll it, cutting down on any back-breaking hours spent on your compost mounds.
Digital Soil Tester
Gardeners need to check the quality of their soil before planting anything always. Often, these gardeners will use an old-fashioned kit. Since soil quality will usually change, it can be a time-consuming activity. With a digital soil tester, it will be easier to check for soil quality with a simple touch of the button. The great thing about this tester is that it can also help them test their garden whenever they like.
Tool Sharpener
Most gardeners will have tools for pruning, hoeing, cutting, grafting, and even trimming, but most of them will never think about buying a sharpener, a special piece of gear that can help them sharpen a multitude of their tools. So if you have the same issue, you should consider having a multi-tool sharpener.
Mobile Potting Bench
A gardener will spend a lot of time potting and repotting their plants. When plants need to propagate, gardeners will need to put their little plant babies into their own little pots. To make the process as organized as possible, it needs to be done on an organized work station. For many gardeners, their potting areas often end up cluttered. One way to prevent this is to have a mobile potting bench that you can easily take around your garden.
Herb Aero Garden
If you are a gardener, you probably spend most of your time outdoors, perhaps even in extreme weather. If you want to be able to continue gardening while indoors, you should buy yourself an herb aero garden. It is a great alternative if your indoors do not have the appropriate lighting to accommodate most of your plants.
When you think of a gift for your parents, you always have to think about their hobbies. If they are avid gardeners and love to play with soil and plant many different species, gifting them with these gardening gadgets will surely be a hit.
DIY Projects
The Best Way to Stain Your Teak Furniture
Published
12 months ago
on
November 16, 2020

If you're unfamiliar with teak, it's a large tree that's grown in tropical forests. Its superior ability to resist elements in comparison to other woods is why it's often used to make outdoor furniture. While it's very resistant, it still has to be treated. If not treated, it can fade to a greyish color. Staining helps to prevent the fading from happening. It's a simple process that just requires the right tools and techniques. Here's how to properly stain your teak furniture.
1. Sanding
Before you stain your teak furniture, you have to sand and smooth out the wood first. Take a dry paper towel and brush off any dirt, dust, or debris. If some spots are a little harder to remove, use a wet rag to rub the area clean. Any grease, dust, or dirt left on the surface of your wood will cause the stain to not properly adhere. Avoid any use of cleaning products. It will make staining more difficult and also potentially damage your wood.
Move your hand over the furniture to locate rough spots in the wood. If there are areas that have to be sanded down to match the rest of the surface, use 120 grit sandpaper to do it. As you're sanding, frequently check to see if the spot has become even with the rest of the wood. When you're doing that, you'll need to ensure the surface is even and ready to absorb the wood stain. Use 220 grit sandpaper to sand the entire surface until it feels smooth and even.
It will open up the pores of the wood, allowing for the stain to more efficiently adhere to the surface. Be sure you're sanding along the grain, so you don't risk scratching up the wood. Afterward, wipe off any wood dust with a dry rag.
2. Smoothing
Take a foam brush to paint a layer of sanding sealer on the wood. It will make the surface smoother and help give your wood stain a better grip. Dilute your sealer with mineral spirits if you want to achieve a lighter color. After the sealer has started drying, grab a clean cloth, and wipe off any remaining sealer that's pooled atop the wood. Doing this will reduce the possibility of spots or blotches forming on the wood and keep your surface smooth. The sealer needs to be dried completely. It will likely only take a few hours for this to happen. When completely dry, sand the surface a few more times with 220 grit sandpaper. It will ensure any spots where your sealer didn't dry evenly are smoothed out. After sanding, wipe off any remaining residue with a rag.
3. Staining
Several tools are useful for painting on the stain. You can use a bristle, a foam, or even a cloth dipped in stain. You'll want to apply an even coat all over the wood. If there are parts of the furniture you want to avoid staining, you can use masking tape to protect those areas. Wood stain can come in a water-based formula or an oil-based formula. While water-based formulas tend to be more common, oil-based will potentially last longer.
After staining, wipe off any excess amounts not absorbed by the wood with a clean, dry rag. Make sure it's a rag you don't mind getting dirty, as the stain can be tough to get washed out. Keep in mind that the longer you leave the stain on before wiping, the darker it will be. The amount of time that it will take for your stain to dry completely depends on the thickness of the layer you used. You don't want to touch the stain too much if it's still wet. Otherwise, you could end up with a blotchy, uneven coat.
When the first coat of stain is dry, observe the wood's color and determine if you're satisfied with it. If you decide that you want the furniture to be darker, add a second coat of wood stain on top of the previous layer. Repeat the same process as before. After repeating the process, you can use a clean brush to paint the finish if you've got the desired color. Once the finish is applied, give it time to try. Be mindful that there are three main types of finish.
Oil finishes look the closest like wood. Unfortunately, this finish isn't the best for protecting wood and shouldn't be used on outdoor furniture. Lacquer finishes can give an attractive look while also providing durability to the wood. Be mindful that this finish will require multiple coats. Polyurethane finishes tend to be the best in protecting wood, as it's effective in even repelling water.
What brand and color match teak wood?
You can mix and match colors like cream and tan. With accent colors, pay attention to the undertones that are on the stain your teak has. Teak often has an orange undertone. If your goal is to bring out this color, go with the opposite color on a color wheel chart. The opposite one, in this case, would be blue.
Final Tips
If there are some gouges or rough areas in the furniture, try using a wood filler before you stain it. If you want some idea of what color you'll get from staining your teak furniture, use these steps on a plank of teak first. Then, you'll be able to know if you're using the right stain or finish to get the kind of color you want to achieve. It will also be good practice for doing these steps correctly. It's important to remember that wood stain can cause your skin to be irritated. It's best to wear rubber gloves whenever you're staining teak.
Teak furniture can be one of the most useful styles to consider selecting for your outdoor furniture. Properly maintaining it through staining is necessary to prevent fading. Following all of these tips will help you keep your outdoor furniture looking nice for a long time. Here's where you can learn more about Garden Furniture Teak.
Landscaping
5 Amazing Benefits of Hiring a Lawn Service
Published
1 year ago
on
September 16, 2020

Everyone wants to have a lawn that is the envy of the neighborhood. The problem is that many people simply don't have the time or the ability to keep their grass looking great all year long. With schedules getting busier every year, not everyone wants to spend their weekends mowing and fertilizing their lawns.
Having a great lawn takes more than just sticking to a regular mowing schedule. Every lawn is different and needs special attention to keep it looking its best. Proper watering, aerating, and feeding are essential to keeping your lawn healthy. Most people don't have the knowledge or experience to know how to handle lawn problems when they come up.
Hiring a lawn service like lawn.com.au mowing may seem unnecessary, but the benefits can be worth the money and the convenience. Let's take a look at some of the amazing benefits of hiring a lawn service.
Expertise
Most homeowners are genuinely lost when it comes to keeping their lawn healthy and looking great. Factors like how often their lawn needs watering and proper fertilization are a mystery to most people. If you don't have the proper knowledge or experience, you could do more damage than good by attempting to do it yourself.
When you hire a lawn service, you will have the advantage of working with professionals. Lawn care experts know what needs to be done to avoid damage.
Labor Free
Cutting the lawn is a manual labor chore that can be too much for a lot of homeowners. Many people end up with aches, pains or even injuries from cutting and maintaining the lawn.
Seniors are especially at risk for heat exhaustion or falling when left to manage their lawn. Anyone that struggles with mobility or health issues can benefit from bringing in a lawn service to take care of the labor.
Save Money
You may wonder how dishing out cash to bring in a lawn service can save you money, but it's true. When you add up the costs of mowing equipment, lawn fertilizers, seed, edgers, and your time every week, it becomes clear that you can save money by bringing in a lawn service. These professionals show up with all of their own equipment, chemicals and staff to take care of your lawn at no extra expense.
Consistency
Even with the most careful maintenance, it's inevitable for your lawn to have problem spots. The amount of time that needs to be invested in these areas can leave your grass looking less than perfect.
Professionals can spot small issues before they become unsightly problems. With a regular cutting and fertilizing schedule, you can count on your lawn looking great from week to week.
Curb Appeal
You can have the most unique and stylish home on the block, but without a well-maintained lawn, your property will struggle with curb appeal. A neat and lush lawn equals an attractive home. Impress your neighbors and bring up the value of your home with a great yard all year long.
Hiring a lawn service has more benefits than just relieving you of grass cutting duties on your precious weekends. If you want the best looking lawn in the neighborhood, give your property a neat and attractive appearance and consider a lawn service for your home today.
Home Care & Living
The Importance of a Rain Gutter in Your Garden: Be a Smart Homeowner
Published
2 years ago
on
September 13, 2019

Image Courtesy of : https://www.flickr.com/photos/132399483@N05/28248230051
If you're a fan of gardening, then occasional rainfall is always a pleasure to see. It saves you from having to water your garden the manual way, right? But everything in excess is never an ideal situation—and that includes rainfall.
Too much rain can do more harm than good to your plants and flowers. Excess rain water is likely to cause soil erosion. This is generally an undesirable situation whereby excess water is running over soil.
We'll discuss in detail to help you make the best decision for your garden this season.
What Are the Drawbacks of Soil Erosion?
Soil erosion will unfortunately strip soil of its most valuable nutrients, leaving it infertile. Your hopes of a beautiful garden with healthy flowers can become nearly impossible. Your only alternative in this regard will be to conduct expensive soil treatments to restore the fertility. We'll quickly add that it's no cheap exercise.
Aside from removing important soil nutrients, garden erosion will simply cause a muddy mess in your backyard.
The Solution
By installing a rain gutter system, you instantly avoid costly soil treatments and a messy garden. But we can't emphasize enough the importance of engaging the services of a professional in rain gutter installation such as the cityseamless.com team. This way the job is done properly the first time so you'll get your system to perform effectively.
Cleaning is Vital
Installing a rain gutter system on your property is only the first step. You need to carry out regular maintenance of the system to ensure that it's functioning optimally and prevent the problems we mentioned.
Part of regular maintenance includes cleaning the rain gutter. It's not uncommon for foreign objects—especially leaves—to get stuck in the rain gutter. This obstructs the proper flow of water, rendering the system ineffective.
If you have the tools and DIY skills, you can do this job yourself. It will also save you some money. Just be sure to do the following:
- Use a leaf blower or hose for the task. Make sure you wear a face mask to prevent debris from getting into your eyes while blowing.
- You'll need heavy duty gloves to protect your hands.
- You need to buy a gutter cleaning kit which you'll attach to your hose.
- Not all water can be removed by the blower. Keep a garden tool nearby to scoop out water by hand.
- Make sure you start blowing near the drainage outlet—at the low end of the gutter—for effective results.
- Use a bucket to gather all the leaves before disposing of them on your compost heap.
Wrapping Up
Installing a rain gutter system on your property should never be viewed as an unnecessary expense but rather an investment in your home. Your garden needs it and your resale value will soar. Everybody wins!
Greenhouses
How Temperature Control Helps Your Greenhouse Plants
Published
2 years ago
on
September 12, 2019

Photo by www.zanda. photography on Unsplash
If you're an enthusiastic gardener, it's amazing how you lose track of time while tending to your garden, right? It's such a satisfying feeling seeing your plants blossom and grow. But did you know you can do even more for your plants when controlling the temperatures in your greenhouse?
Identify Your Specific Greenhouse Needs
Not all greenhouses are identical. Each greenhouse has a unique design and structure. If you're a greenhouse manager, your first task is to ascertain the cooling and heating systems required for your specific greenhouse. If you're simply an enthusiast that turned your backyard shack into a greenhouse, the same applies.
Testing different cooling solutions is essential for your specific greenhouse to ensure you achieve the ideal temperature for optimal growth. Look at it as a trial and error exercise.
Do It On A Budget
You don't have to go to the extreme with expensive chillers and heating systems to get your greenhouse functioning efficiently. Keep it simple with low-cost cooling methods such as shade cloths and circulating fans.
Using Shade Cloths
Something as simple and inexpensive as a shade cloth or curtain can lower the temperature inside the greenhouse significantly. Use a smart cooling method for effective temperature control. The only drawback of using shade cloths is you'll have to consider light will be blocked out. Some plants in the greenhouse need light, so be careful of how much of this method you implement.
Ventilation Is Key
Accuserv air conditioning and repair services know all too well the benefits of ventilation; the same is true for greenhouse managers and owners. They know there are several ways to ventilate a greenhouse. You can either use an open roof or sidewalls that open up to allow air to flow to lower temperatures in your greenhouse.
If you decide to use the open roof or sidewall method, to maximize the cooling effect, make a note of the direction of the wind.
Keep The Air Flowing
If you pride yourself on being a respectable greenhouse manager, then you should know circulating fans are useful tools used to control temperatures. These fans allow the air to flow optimally inside the greenhouse.
The circulating fans work well to keep temperatures consistent. They push out warm air and hold cold air down to make sure the area doesn't overheat.
Conclusion
Continue to enjoy your time in your greenhouse when using these easy tips for controlling temperatures more effectively. The methods listed are cost-effective and straightforward so that you can implement them immediately. Let your fingers do the pruning and enjoy better-controlled temperatures for your green buds.
We want to hear if you have any other tips to share on controlling temperatures in a greenhouse. Leave a comment below and help others in your position.
Home Care & Living
The Danger Of Leaving Rotten Trees In Your Yard
Published
2 years ago
on
July 23, 2019

Having trees in your yard can provide a lot of benefits. For one, trees can improve the aesthetic value and curb appeal of your property. Trees can also utilize your outdoor space and provide better air quality.
However, when you're leaving rotten trees in your yard, that's another story. Rotten trees can be dangerous for you, your family, your property and everyone who's living around you.
Professional tree trimming services, such as Bellarine Tree Services, ensures that the trees on your property are healthy and well-maintained.
If you don't hire them and opt to leave rotten trees in your yard, you might experience the following dangers:
1. The Entire Household And Your Neighbors Can Be Susceptible To Injuries.
You saved a lot of money in order to afford a property for your family. You might even have taken out several loans just to buy a home. All of the things you've invested in your property will be useless if your family isn't safe in it.
When you leave rotten trees in your yard, you're increasing the chances of inflicting injuries to all of your family members.
Here's how:
- Trees are like human beings. They need certain nutrients and moisture in order to be strong and healthy. When trees are already rotten, it means that they're already brittle and can easily fall.
- When your area is prone to harsh weather conditions, strong winds can cause the branches and limbs to fall, which can result in bruises, cuts, and injuries to your family.
2. It Can Cause Damage To Property And Utility Lines.
Your house will be useless if you don't have electricity. How else can you use your appliances if you don't have any power? How can you make your home cool when your HVAC system isn't functioning?
Without a doubt, electricity plays a vital role in your own and your family's comfort at home. However, when you're leaving rotten trees in your yard, your electricity supply might be compromised.
To paint a clearer picture, consider the points below:
- As mentioned, rotten trees are already weak. When they fall, nearby power and utility lines can be affected, as well. In some cases, these can even fall altogether with the branches and limbs.
- Sure, having no electricity at home can be inconvenient; no one wants to fan themselves just to sleep well at night, right? Have you considered the effects of the situation to people who are dependent on electrical devices? How long do you think the seniors can survive without power?
Knowledge Is Power
There are a lot of tree trimming services operating across the globe. For you to find one that suits your needs and budget, take the time to scout for options. Ask for recommendations from your friends, and do your own research online. The more informed you are about a particular tree trimming service, the easier it'll be for you to choose.
Landscaping
Adding A Rustic Finish To Your Outdoor Furniture
Published
2 years ago
on
July 2, 2019

The rustic look has become extremely popular for interior and exterior home styles. Whether your entire look is completed using a historical flair or you have one or two central pieces that you want to show off, you can now apply a safe weather resistant finish to your outdoor furniture.
The techniques that are used by many DIY decorators involve stripping and distressing the wood using oxalic acid wood bleach, but sometimes they don't hold up to the elements. This has limited many people to keep their rustic pieces indoors only. But, not anymore.
Now, with the introduction of a protective additive, you can finish your benches, tables and other garden accents with ease. You won't have to worry about damage from rain, UV rays or wind when you protect your rustic finished items properly.
Let's take a look at this great new feature in creative paints and get you started.
Outdoor Additive
When you have worked so hard on a piece to create that perfect rustic worn look, the last thing that you want to do is have it ruined by the weather. If you love to use natural mediums like milk paint to decorate and style your pieces, you can now protect them all in one step. The outdoor additive is added directly to your mixed paint and not put on after. It is not meant to be used as a top coat to an already painted item.
Simply mix your paint with the additive solution and apply like you would normally. The additive has a borax base that helps protect your wood items from the elements and prevents your paint from prematurely aging and ruining the rustic effect. There is no lacquer needed when you use your milk paint with an additive included.
Benefits
When you are looking to complete an antique piece with a period appropriate finish, you can't go wrong by choosing a non-toxic product like milk paint. That being said, milk paint is not known to be durable when exposed to the elements. By adding this adapted borax compound you can now protect your wood and your finish from outdoor deterioration.
Although the outdoor additive has a borax compound complex, it still remains one of the most environmentally friendly finish options.
The outdoor additive acts as a powerful stain blocker. When you are using soft or sappy woods like cedar or pine, the outdoor additive will help to block tannins from bleeding through your rustic finish.
The borax based additive works as an excellent antibacterial agent and mold inhibitor. With unprotected items you may soon start to see spore buildup in areas that have absorbed too much moisture from being outdoors.
The outdoor additive will turn your pieces into flame retardant items. Although, being constructed of older wood in many cases, any item that is treated with milk paint with an outdoor additive will be resistant to heat and flame.
When you put your wood furniture outdoors the paint can quickly start to fade or peel from sun exposure. With the outdoor additive used with milk paint, you will get superior UV protection, keeping all of your outdoor projects looking great for many years.
Landscaping
A Complete Guide to Garden Design
Published
2 years ago
on
June 17, 2019

Spring graces us every year with blue skies, long days, green trees and flowers blooming everywhere. With these positive changes, many of us feel drawn to nature and awaits warm nights that will be perfect for a bonfire or a grill in the wild. It's also the perfect time to bring your dreamy garden to life as well. Are you going to add up the trees to the design or are you more of a flowers type of person? Will you focus on many species or you'd rather have the harmony and uniformity? Read our guide to see what can you do to make the design outstanding and enchanting. You don't have to be a professional to make the dream come true. Are you ready?
A well-kept base
When you see the painting, you don't only look at the focus area but at the background as well. The same rule applies to your garden. The most magnificent flowers and trees, the gorgeous design will look poorly if the loan won't be kept in its best shape. A lawn that's well taken care of is the garden's exceptional decoration. A green, carpet-like base is the perfect base for any vegetation. But why the lawn doesn't always look so perfect?
It all depends on how you take care of it. When seeding the lawn in the spring, you should make sure that you do it evenly at every part of the garden. If you have a large parcel, instead of spreading seeds manually, invest better in a spreader that will do it for you. With this device, you will also spread a fertilizer that will help your young grass to root and grow. It's not necessary, but it sure will make your life easier. If you need help or can't justify buying a professional spreader, contact those regularly recommended landscape gardeners from Edinburgh.
In the beginning, you have to water your lawn even twice a week. Later, when the grass start rooting, you can cool down the watering to 2 times a week. The best time for this is in the morning. Avoid using water in the warmest time of the day, as it damages the grass. Evening watering is not the best idea because of long-lasting moisture — this can lead to fungal diseases.
Keep the harmony
Full of colours, shapes and scents but easy to maintain. It does sound like a dream! If you're new to the gardening, you should know that maintaining the grass is easier and faster than taking care of the flowers. Maybe you're able to focus on your garden and spend the time necessary to keep it at order at all times, you can get loads of flowers and little trees. If you can't do that, make the flower space smaller.
When planning a garden, leave places where you can plant flowers. Pay attention to whether these are shaded or sunlit areas — it depends on what species of plants you can plant there, to bloom nicely. Separate the flowers from the lawn with a special ribbon, barriers or rocks.
Find the right area for your flowers
It's no secret that some flowers like to be in the sun all the time, while some fancy shadowy corners. Before you plant them, teach yourself on the preferred placement in the garden. Most of the flowers like the sunny areas, so if it's your first time in your own garden, choose those that are easy to plant. If you have a lot of shadows caused by the high-rise fence or old trees, go for azalea that is evergreen or David's harp, that grows fast and doesn't really need any additional time. Choose the flower placement wisely to get the most blooming effect possible. If you follow the direction, the flora will pay you back with an enchanting look.
Landscaping
Designing a Brand-New Garden – Five Tips That Will Help Ensure Your Design is a Success
Published
2 years ago
on
June 13, 2019

When improving the exterior of your home, gardens, and landscaping are an excellent way to add color, personality, character, and uniqueness to a home. But for many people, a garden is about more than just the aesthetics, it's also a hobby that they are passionate about and take pride in cultivating. The "perfect" garden isn't typically one that is thrown together without thought or planning, rather there is a real design behind it. That design needs to take into consideration a number of factors in order for it to thrive and be as lovely as you have envisioned.
To help ensure that your new garden is a success, here are five tips you can use during the design process.
Give the Garden Space
When you first plant your flowers and shrubs, it's hard to imagine just how big they will get, but this is essential to factor in your design. You always want to allow enough room for growth over the coming years, so that means keeping your garden or the plantings back from patio edges, fences, walkways, and more. If you don't give everything enough space to truly thrive, the garden will end up looking crowded and growth can be stunted.
Don't Over-Plant
This goes hand-in-hand with the abovementioned tip. Be careful not to over-plant and over-fill your brand-new space. Sure, the garden is going to look a little sparse for that first year or two, but with patience and proper garden maintenance, it will flourish and fill in.
Understand Your Soil and Light Conditions
When it comes to choosing what to plant, picking items you think look "pretty" just won't cut it. You need to be well aware of your soil and light conditions.
Choose a Mix of Perennials and Annuals
Another tip is to mix up what you're planting and pick a variety of perennials and annuals. Perennials will come back each year, typically getting bigger and fuller each year that passes.
Annuals are a great way to add that bright pop of color to your garden each year. You can change up the flowers you pick, the height, the fullness, the placement, and even the color scheme.
As for choosing flower colors for your annuals, KG Landscape suggests using the color wheel for inspiration and using color schemes. Some of the most common color schemes are white on white, warm colors, bright colors, cool colors, and pastels. Monochromatic color schemes can also be quite striking.
Prepare the Soil
Now before you go ahead and pop all your plants and flowers in the ground, you also want to prepare the soil. A proper air supply is essential so they may require fresh soil, compost, and even mulch.
All of these tips will help you to design the ultimate garden for your home.
General Gardening
How Hemp is Farmed and Turned into CBD Biomass
Published
2 years ago
on
June 13, 2019

If there was ever a perfect time to grow hemp in America, it is now. For the first time in over 80 years, farmers can play the hemp game without looking over their shoulders, thanks to the passage of the Farm Bill in 2018.
The legislation allows farmers to legally grow the cash crop for both personal and commercial use. Now, hemp wholesale companies, retailers, farmers, and many other entities would love to know more about growing hemp for various uses.
In this guide, we explore farming and commercial of CBD-hemp in detail. We will give you a rundown on the growing process right from the basics of growing the hemp cone until it is converted into CBD biomass.
Understanding Hemp Varieties
Firstly you need to understand that there are three categories of it: fiber, grain, and high-CBD varieties. Here's a succinct explanation of each variety:
- Fiber: This type of hemp produces long fibers and biomass and is primarily used in textiles, building materials, paper, composites, fuel, and more.
- Grain: Thanks to their high fatty acid, protein, and fiber content, grain hemp is utilized for food and nutritional needs. Essentially, these varieties produce low cannabinoid content than their counterparts.
- Cannabinoid (CBD) hemp: These are the most sought-after strains of hemp since they find use in pharmaceutical and nutraceutical industries. They are grown as female species for better yields and zero seed production. This is where the money is.
Growing a CBD hemp farm
Before growing cannabinoid hemp, it is always a good idea to find out what the law says about it. Once you understand the legalities and obtain the necessary approvals, the steps followed in growing the crop include the following:
- Choice of Equipment: The first thing is to select the farming equipment to use for planting, harvesting, and extraction the CBD.
- Planting and Weeding: Typically, the planting season begins the end of May till the first week of June. Hemp clones, provided by in-state processors, are transplanted into 40" rows on the ground. After planting, the hemp needs to have sufficient moisture to fix the roots. Weeding is done using hoes or row cultivation. No herbicides, fungicides, and insecticides are allowed.
- Harvesting: CBD hemp grows rapidly within the first 60 days. When it reaches maturity, the field will have to be inspected for male plants as these can cause pollination and a drop in the CBD concentration. After between 100 and 120 days, the female-only crop would be heavy with cannabinoid content both on its flowers and biomass, yet less than 0.3% THC. Once harvesting is done, the crop is dragged down to any available drying point—a rack, shed, tobacco barn, fan, dehumidifiers, mechanical dryers, and even straight to extraction.
CBD hemp farming is quite intensive but if done right, it can be a goldmine. The success of the process lies in understanding all the laws associated with hemp and choosing the right equipment. The rest is mostly trial and error alongside wit and instinct.
General Gardening
Easy-to-Grow Vegetables for Garden Neophytes
Published
2 years ago
on
June 5, 2019

As the cost of living and groceries continues to increase, many people are starting to think about growing their own vegetables at home. To do it right so you get a good yield of edible vegetables, you have to consider many things — the complexities of soil type, the amount of sunshine per day, what seeds or strains to use, and more. As a beginner, you will have a lot to learn a lot about gardening to make it worth your time.
If you want to get started you don't have to worry about it being a chore. Here are some of the best vegetables to try growing as a beginner.
Cucumbers
Cucumbers are excellent for beginners for a few reasons. First, you can use them in a variety of ways in your cooking — make pickles, add them to salads, to drinks, make cucumber loaf, and so on. Second, there are two varieties of cucumbers — vining and bush cucumbers — that are different enough that you can learn about how to alter your technique. Vining cucumbers crawl up a trellis, fence or on soil where they flaunt their lush, green leaves. On the other hand, bush cucumbers yield in small gardens and containers you can put them inside your custom barn homes.
Cucumbers can be seeded indoors or transplanted in the ground but should be done not earlier than two weeks after the last frost. Because these veggies adore sunshine, grow them where they can be soaked in the heat and the light of solar power and not under the shade of trees. Make sure the soil is fertile, moist, neutral or highly alkaline, well-drained and not soggy.
Onions and Garlic
Both onions and garlic spices are probably the easiest to take care of since they are better able to fight off diseases and can grow in certain climate conditions. Also, both are planted and grown in almost the same way and require almost the same types or level of soil, watering and sunlight. If you want to maximize the yield and want to get bigger bulbs or cloves, you can fertilize the soil with nitrogen every few weeks.
Others
Fresh lettuce of multiple varieties, like romaine or iceberg, can be harvested in large amounts when you plant them in mild temperature with frequent watering. However, they tend not to fare so well during the warmer parts of the summer. Potatoes can survive in containers so you can have them indoors if the garden is full. Just keep the soil moist by watering daily.
Having your own garden does not just make you self-reliant. Also, it brings you fun even when you're doing it while the sun strikes very hot or the cold temperature creeps in to your bones. For a start, you do not need to put pressure on yourself to get everything done impeccably. You just need to take it easy first, learn the ropes of gardening until you master it.
Grow Lights
8 Important Things To Check When Buying LED Grow Lights
Published
2 years ago
on
May 31, 2019

There was a time when we had to rely only on sunlight before our crops can grow. But with more studies and research, it has been discovered that, LED grow lights can help the plants grow naturally. Today, many farmers and agricultural professionals have come to embrace this latest trend.
And there is a reason for it though; LED lights offer you the following:
- Durability
- Energy efficiency
- Stimulated growth
- Compactness
- Adjustable wavelength
There are many LED grow lights that are on sale and not every one of them really works. You can easily get distracted by different models and end up choosing the wrong LED lights. Here are 8 things to look out for in LED Grow Lights
- Electricity capacity and consumption
If you have to run your LED grow light for up to 10 to 11 hours every day, make sure you choose a LED light within 300W to 500W with high output so that you get good result without having your electricity bill shooting up.
- Durable materials and built
Good quality LED grow light can last up to 10 years. Preferably, US products have more durable grow lights than many other products.
- Low heat production
Too much heat can damage your plant and give the adverse effect. You want to protect your plant even as they are encouraged to grow. Therefore, choose a LED grow light with balanced heat output that uses less energy.
- Full spectrum
Some plants do better with the blue and red spectrum light present. Full spectrum also includes ultraviolet and infrared lights too. With these present, your plant will have what it requires to really grow.
- Take your plant into consideration
There are different lights for different plants. You must make sure that the LED grow light you are going for is suitable for the plant you intend growing. Flowers need lesser grow lights than tomatoes. You also need to find out if the light will serve you for the first cycle or the total growing cycle.
- Flexibility and ease of use
A good quality LED grow light is easy to use and yet, very efficient. You won't need to spend the whole day trying to figure out how to best position it. Look for the one that its light intensity and wavelength can be adjusted.
- Warranty
LED grow lights are very durable when you get the good one. So, if yours if offering anything less than 10 years warranty, it could be an indication that the manufacturer is not sure of the quality of his product.
- Good semiconductor chip
Semiconductor chip in LED grow lights is what helps them convert electrical power to grow light and also determines the right wavelength. If the light's chip is at least up to 3 watts, you can be sure that it will give your plants enough illumination.
Greenhouses
The 6 Most Common Greenhouse Crops
Published
2 years ago
on
May 28, 2019

Are you living in or moving to Liberty Hill? While the area is great for luxury activities such as camping and hiking thanks to its natural beauty, you can also utilize the vast landscape and ideal climate with greenhouse farming.
We've taken the liberty to highlight some of the most common greenhouse crops you can plant that are highly profitable, so you can turn your hobby into a lucrative business.
Things to Consider When Picking Crops
Before deciding on which crops are the best for planting in a greenhouse farm, there are a few factors you to consider.
Single or Multiple Crops?
Do you want to grow single or multiple crops? Experts strongly recommend that you stick to a single crop so you can concentrate all your time, effort and resources to ensure it grows healthy and lush. This is because taking on different kinds of crops at the same time will require different and specialized needs with regards to:
- Water
- Attention
- Fertilization
- Shade
Are You a Beginner or Experienced Farmer?
If you're new to the greenhouse farming business – or farming altogether – it's advisable to start with a crop that's easier to grow and monitor until harvest time.
How Much Space do You Have?
You'll also need to determine exactly how much space you have in your backyard for a greenhouse. This is important for estimating the costs involved with a crop you are considering.
Types of Crops to Choose
Fruits and vegetables are the most common type of crop that can thrive in greenhouse environments. We list a few examples below.
Tomatoes
Tomatoes are among the common crops that many greenhouse farmers prefer planting because of how many you can grow. They're also very profitable, with almost every household using tomatoes in some fashion in their usual diet.
Lettuce
Lettuce is another favorite crop among greenhouse enthusiasts. It can be profitable, but it's also relatively easy to grow for beginners or casual farmers. There are also many different kinds of lettuce that you can grow.
Cucumbers
Cucumbers are a highly profitable vegetable to grow because of how versatile they are in catering and cooking. They are not as popular as tomatoes or lettuce, because they are not as easy to keep fresh after harvesting. Nonetheless, if you grow organic cucumbers they can fetch high prices.
Peppers
Have a few popular varieties and colors, but mainly red, yellow and green. We'll quickly point out that peppers aren't the easiest greenhouse crops to grow but they're still very profitable due to their use in popular cooking dishes like stir fry.
Spinach
Here is yet another vegetable that's best suited for greenhouse environment. Beginners will appreciate how fast it grows, but its growth depends on the environmental and climate conditions.
Conclusion
Now, from the above mentioned vegetables, which one will you grow in your greenhouse once you move into one of the new homes in Liberty Hill?
General Gardening
Green Waste Skip Tips On Disposing Your Garden Waste
Published
2 years ago
on
May 22, 2019

After cutting your grass, pruning your trees, and trimming your branches, you are now left with the question of what to do with all this green waste, as it can be quite a tedious thing to dispose of. One of the best ways for you to dispose of your garden waste is through green waste skip bins, which is common in Australia. These bins refer to garbage containers that are used specifically for domestic and commercial garden waste.
That said, here are 3 tips that can help with your garden waste disposal through skip bins:
1. Call your local sanitation or waste disposal department.
When you have a green waste skip bin filled up, you don't have to wait for the next time that the sanitation department will come to collect it. For example, if you've got a house party coming up and you want to clear your front lawn of your bin, you can call for a pick up today, or at the next earliest possible time. Doing this is also very helpful, especially if you've got big dogs who might dig through the skip bin and bring the twigs out. Imagine the time wasted having to clean up again!
2. Haul your garden waste and bring it to the local dump.
After you have completed clearing your garden, you can gather all these and haul them in your skip bin to deliver them to the local dump yourself. Just be sure that you are dumping it in the right place for biodegradable or green waste. Not only are you cleaning your house better and faster, but you are also helping out the load of the local waste disposal trucks. That is, of course, if you don't mind taking it yourself.
3. Pile the smaller twigs and leaves first.
Each skip bin has a limit of 150 kilos, which is a lot. But if you've done a huge clearing of your big garden, then the size might not be enough. To be more efficient, pile up the smaller twigs and messy leaves first in the skip bin, so you can put in as many green waste as you can. For the bigger logs, if they don't fit anymore, you can pile them close to the bin, ready for the truck to come pick them up. Not much of a worry for this, as logs don't easily create a mess, unlike leaves and twigs.
Conclusion
Green garden waste is actually one of the best waste materials in your house because of the very reason that they're biodegradable. However, ironically, it is also one of the hardest to dispose of, especially if you are dealing with larger quantities. With these tips to guide you, you can now feel happier cutting your grass, trees and branches, as disposing of these garden wastes now aren't so much of a hassle.
DIY Projects
How to Convert a Garden Shed into a Home Office
Published
2 years ago
on
May 15, 2019

Working from home can seem like the perfect set-up, but after a while having no boundaries between your downtime and work can become a problem. Everyone needs a dedicated space to work out of. However, if space is at a premium then you may have to get creative with your workspace. Converting a garden shed into a home office can be a great way to make a secure separated space for working without spending a lot.
With a home office for you can improve your productivity and that important work-life balance, all without leaving your home. Making a home office from a garden shed might be easier than you think, it can be achieved relatively quickly if you go about it in the right way. These are the steps for converting a garden shed into a home office the right way.
1. Planning
The first step to converting a garden shed into a home office is planning. You might be excited to start work, but this is the most important stage. There a few big decisions you're going to have to make. The first is if you want electricity running to your home office. This can be useful if you need to run a computer or charge a laptop. However, it will make your conversion a lot more complicated.
You also need to think about lighting. You will probably need some lighting in your home office for the darker months, but you can work around electricity if you don't want power sockets in your new office. You need to measure up the shed you already have and decide what sort of space you want to build. If you don't think you have enough of a foundation to turn your shed into an office, you can think about replacing your shed with one that's more fit for its new purpose.
2. Designing
Once you've taken stock of your resources and decided what type of home office you will be turning your shed into, it is time to design your home office. You will need to plan out how your shed is going to look when it is finished. If you're adding electricity, you need to plan out where you will run the wiring to your shed. You need to consider which section of your garden you can dig up to run it under since electrifying your shed is a major undertaking.
You also need to plan out windows to ensure your office will plenty of natural light. Natural light is really important for making a nice working environment, you should work in as many windows as you can.
3. Work with What You've Already Got
The good thing about converting a garden shed into a home office is that you have plenty already built. You should work with what you've already got rather than reinventing the wheel. Make sure that each wall is fully secure and that the roof will not drip. This is especially important for the rainy times of the year since you will have electronics in there.
The wood used for the shed should be checked for rot or instability and replaced if necessary. Since you're going to be building on this to add insulation, you need to have a secure and solid wall to start with. You should then add in the windows as you planned in your designing stage.
4. Insulating your shed
With a working home office, you need to ensure it stays warm. You can achieve this using insulation to keep your home office warm no matter the weather. Insulating your shed is relatively simple compared with hooking up the electricity. You need to purchase the necessary materials for the insulation and additional wood to cover up the insulation so you're still working in a nice environment. A coat of paint after installation can be done when you're adding in your new floor to give you a nice environment during the working day. This guide will run you through insulating a shed to make sure you get it right.
5. Adding Lighting and Power
This is by far the most complicated step. If you only need electricity for lighting, then you can make this a bit simpler. Solar panelled lighting can be powered from a panel attached to the side of the shed for adequate lighting.
However, if you need power sockets to run things in your home office then you won't be able to use this workaround. A generator might work, but this isn't a great long-term solution. If you're going to get a lot of use out of your home office, then wiring in power is the best solution. You will need to dig a trench from your home to the shed to run the power through. You should consult an electrician and ensure this is done correctly.
Converting a shed into a home office can take some time, but it will be rewarding. Once you're finished you will have a comfy and secure working space away from all those distractions in the home. With a strong enough Wi-Fi connection, you've got a dedicated environment to stay productive even when you're working at home.
Landscaping
Tips on Using a Strimmer Effectively
Published
3 years ago
on
May 9, 2019

Not only are these great for border edges, but they are also perfect for cutting unruly grass and weeds in those difficult to reach areas of your garden, thus making them a must-have for many garden enthusiasts.
On the face of it, a strimmer is very different from a lawnmower despite the similarities of the 2 garden pieces. A strimmer has a rapidly rotating head, with a hard trimming line in the end; this makes quick work of weeds and long grasses without too much effort.
However, with any piece of equipment, if used inappropriately, you can create more work and risk damaging your new strimmer without getting much use out of it.
Here are some top tips on how to use your garden strimmer effectively.
- Protect yourself; as with any piece of garden equipment, you must ensure you take safety seriously when operating it. Though that piece of nylon line may not look like much, though put it too close to the skin or feet and you may end up needing a trip to your emergency department! Ensure you wear eye and head protection to eliminate injury from flying debris. Make sure you are wearing a sturdy pair of shoes, gloves, and regardless of the weather, always wear full-length trousers. Avoid loose-fitting clothes and to protect your ears from the inevitable noise, wear a pair of ear defenders or earplugs.
- Watch out for the cable; if you are using a mains powered strimmer, one key risk is that you may trip over the wire. Similarly, ensure you keep the cutting end away from any wires too; you really don't want to have to replace a damaged cable!
- Flying debris; though we touched on this earlier, the context is different. Even if your garden is worthy of winning the Best Kept Garden Award from the RHS, there is always the potential that when using a strimmer, you may hit something seemingly benign, like a stone, and inadvertently turn it into a projectile. This is bad news if there are other unprotected people in the vicinity and can be very bad for your windows! To avoid this, check all areas you will be strimming for such objects and remove them from a safe distance. This will also avoid damage to the strimmer.
- Take a break; if you have a large area to strim, you will need to schedule in breaks- not just to give yourself a rest but also to prevent your strimmer from becoming overheated, which can cause damage in the long run. Keep your posture straight and if your body begins to ache, stop and leave it for another time; if you are exhausted, you risk dropping your strimmer, damaging it and yourself.
To prolong your strimmer lifespan, keep it in a cool, dry shed or garage; if you are worried about anything, get it checked by a gardening tools expert.
Home Care & Living
Mom's Field Guide To Choosing a New Neighborhood
Published
3 years ago
on
May 2, 2019

There are a few things that are more important than a secure home. After all, it's our little place of respite from a busy, stressful world. Home is where the heart and mind are rested, just as much as the body.
It's these little things that define a home. And it's in those definitions that we see how important it is to secure a good home.
What factors should you look at when choosing a neighborhood?
The Right Market Conditions and Affordability
In the simplest of terms, this refers to the value of the property you purchase. That value is going to be determined in part by the neighborhood it's located in. It's this aspect of home buying that requires a lot of research, or the help of a real estate agent, to help you determine whether a certain neighborhood's value is rising or declining, or simply stagnant.
Neighborhood-Lifestyle Compatibility
This usually comes down to personal preference. It's a combination of a dozen choices. You could be between a rural neighborhood versus a suburban neighborhood or a neighborhood that's near water (if you're fond of walks on the beach) or if you prefer an area that has a lot of greenery. Your decision here is going to be dependent on the things you like to do as well as the things you need in order for you to function on a daily basis. You could live in a simple farmland neighborhood or in a high-end neighborhood like this McKinney gated community.
Distance and Availability of Amenities and Conveniences
Conveniences include grocery stores, convenience stores, laundromats, gas stations, and health centers. These are all essentials that provide goods and services that you need on a regular basis.
Amenities, on the other hand, include places like the park, a local gym, museums, and many other points of interest. These are places that allow for some rest and recreation and are where you're going to spend your leisure time.
Crime Rate
This should be one of the most obvious factors to consider. While you could say that it's frivolous to even mention it, it's one of those things that can get overlooked, especially when it's easy to get distracted with all the other factors. A low crime rate in a neighborhood not only grants you peace of mind, it also means that investors are more likely to move into the neighborhood.
And when there are investors, the neighborhood is more likely to get developed. Remember that a low crime rate is important, especially because this is also where your kids are going to grow up.
And there you have it. These are some of the most important factors to consider when you're looking for a new neighborhood to live in. Remember that having a comfortable life doesn't solely depend on choosing a house. Taking the bigger picture into consideration is going to save you a lot of money and heartache in the long run.
General Gardening
Tips for Students for Gardening in a Small Backyard as a Stay at Home Mom
Published
3 years ago
on
April 12, 2019

Nowadays, tight space can't be a restriction to have with herbs, flowers and garden veggies around you. You can use small containers or make garden bends in available space. A backyard garden can help you to reap several benefits. Gardening is an engaging and moderate exercise for students. They can develop analytical abilities with their gardening exercise. Try to get some time out of your routine for gardening. Gardening allows children to breathe fresh air and relieve their stress. If you are worried about some lengthy assignment, feel free to get the advantage of reliable research proposal writing services.
Consistent gardening may contribute to social skills, cognitive abilities, and alertness. If you are ready to set up a small backyard garden, here are some tips for your assistance.
Look for Sunlight
Before starting your backyard gardening, you have to figure out the right place with lots of sunlight. You will buy bushes, plants, flowers, herbs and veggies based on the duration of the sun in your backyard. Feel free to set up a shade garden in a deck with little sunlight. For a veggie garden, you must have sunshine for almost 6 to 8 hours.
Several flowers need sunlight too. You have to sunmap your backyard gardening by observing the number of sunlight's hour in your garden. Tall bushes, trees, and even your house can increase shade and decrease light for backyard gardening.
Choose Suitable Containers
In your small garden, you can plant your favorite herbs, veggies, and flowers in containers. You have to provide proper water, sunlight, and air to your containers. These may dry out quicker than gardening beds, so you have to pay special attention.
In a restricted space, you can try square foot gardening. In this method, you will plant things as close as possible. Instead of creating long rows, you can divide every garden bed by 1-foot x 1-foot squares. Each square will have one kind of crop.
Add Contrast and Colors
You can make your containers beautiful by adding different textures and colors. Try to combine veggie or ornamental plants. For instance, purple veggies look good with greens. Frilly leaves like dill, celeriac, parsnip, celery, and carrot make a beautiful contrast with lettuce, beets, and greens. You can add a nice variation with garlic, onions, and leeks.
Arrangement of Containers
Carefully arrange containers around your courtyard for a pleasing ambiance in a backyard garden. Plant on edges to increase growing space by leaving the middle of the garden for play or patio area. Northside can be an excellent place to plant trees.
You can use vertical space by growing upwards. In this way, you can get most out of your backyard garden. A vertical garden can add layers and height to your garden for additional oomph of function and beauty. By using upward space, you can increase your space for gardening and get better yields.
Indoor Gardening
What Indoor Growing Equipment Canada Should You Buy For Your Indoor Garden Setup
Published
3 years ago
on
April 10, 2019

When you have no space to set up a garden in your backyard, you can still do it with indoor gardening. Whether for growing herbs, organic vegetables, or flowers, indoor gardening can accommodate this endeavor of yours. But you need the following equipment to set up a successful indoor garden:
1. Grow Kits
One of the advantages you can have with indoor gardening is an easy and fun way of growing your plants. Without extra tools and a green thumb, grow kits are a must for your indoor garden. These kits are ready to grow, and all you need is to choose the type of method you'll use for cultivation.
For soil cultivation, you need containers and soil to grow your seedlings, while hydroponics don't require soil. What hydroponics need are a solution of nutrients and mostly water. Hydroponics are much popular nowadays because it doesn't take up too much space, not messy, and the nutrients are easily absorbed, thereby, producing healthy plants. These Canadian indoor kits are available in stores like Canada Grows Indoors LLC.
2. Grow Lights
To grow sun-loving plants like vegetables up to their maturity, use grow lights. You can choose a fluorescent, LED, or HID grow lights. Fluorescent bulbs are good for seedlings, LED for growing larger quantities of plants, and HID for lemon bushes or tomatoes and other large plants. You can avail of discounted high-quality grow lights by following the Canada Grows Indoors Facebook page.
3. Grow Tents
A grow tent is an enclosed space that increases the grow lights' effectiveness. It has a sturdy canvas exterior and is a reusable and portable grow room. Some grow tents have built-in grow lights that are suitable for a hydroponic kind of cultivation. Moreover, it stimulates the growth of plants and sustains the heat because of its insulation system.
Here are some tips when choosing a grow tent:
- Height – If you're planning to grow tall plants, choose a grow tent that can adjust up to 9′ tall. Some grow tents have adjustable features. But if you'll only grow small or medium-sized plants, then you can opt for a smaller indoor grow tent, which is up to 6′ in height.
- Durability – It's recommended to purchase grow tents with metallic poles and frames with fasteners. The fasteners will secure the tent's structure while the metallic poles are sturdier than the ordinary tents. Also, choose the ones with durable fabric and zippers, tight seals, and thick viewing windows so that it can last longer.
- Thickness – Most grow tents only have 190D-600D that can result in easy ripping and leaking of light. But a 1680D fabric is thicker than the ordinary ones that allow a stronger and safer environment for your indoor garden.
Conclusion
Indoor gardening in Canada is popular nowadays. And with the availability of growing equipment, indoor gardening is made easy. Invest in your equipment so that you don't waste your efforts in gardening.
Growing Tips
What Are Some of the Best Eco-Friendly Apps that can Help You Go Green?
Published
3 years ago
on
April 9, 2019

Going green can have major benefits for the environment and for your health. However, it can be difficult to make some of the major changes that come with going green and focusing on sustainability, even if you believe in the cause.
So, what can you do to make going green easier? There are a number of tools right at your fingertips that can help. Let's go over some of the best eco-friendly apps that can help you go green right here.
General Eco-Friendly Apps
We're going to break our eco-friendly app suggestions into categories. Some apps offer a well-rounded focus on all things green. You can check out:
- BrightNest
- JouleBug
- Oroeco
These apps focus on your lifestyle choices and actions around the home as a whole, allowing you to focus on going green in all aspects of your life. Some of these apps, like Oroeco, offer you personalized tips that can make going green even easier.
Recycling Eco-Friendly Apps
If you want to focus specifically on recycling as you go green, you may want to focus on apps like:
- iRecycle
- RecycleNation
These apps can help you improve your recycling habits and they're both free. You can get information about where to recycle in your area and about what items can be recycled.
Energy Usage Eco-Friendly Apps
Energy usage – and the kind of energy you use – is a big part of going green. You can monitor your carbon footprint with apps like:
- greenMeter
- Energy Cost Calculator
These apps can help you determine areas where you can lower your carbon footprint, perhaps by deciding to drive an energy-efficient car or by deciding to purchase energy-efficient light bulbs. You can even check out Light Bulb Finder if you need help selecting the eco-friendliest lightbulbs for you.
Shopping Eco-Friendly Apps
Going green can mean making some big changes to your shopping habits. Fortunately, there are some apps you can turn to if you need help focusing on sustainability while you're out doing your shopping. You can check out:
- GoodGuide
- EWG's Food Scores
- Locavore
These apps can help you compare products to determine which ones are the most environmentally friendly, or to find local food in your area.
Additional Eco-Friendly Apps
Some of the best eco-friendly apps are very highly focused on specific aspects of going green. For example, you can use Dropcountr to monitor your water consumption on a daily, weekly, monthly, or yearly basis to decrease your water usage.
You can also cut down on paper waste in your life with PaperKarma. This app can remove you from mailing lists that end up with you dealing with mountains of junk mail, reducing the overall strain on the planet.
Start Using Eco-Friendly Apps in Your Life
You don't have to figure out how to go green all on your own. There options out there that can help you shift to an eco-friendlier lifestyle.
Landscaping
How to Start Your Own Landscaping Business
Published
3 years ago
on
April 5, 2019

According to the Wall Street Journal, over 100,000 new small businesses are opened every year. Many workers are growing tired of toiling day after day to make someone else's dreams come true. With independent contractors and freelancers taking over the world of commerce, it might be time to think about starting your own private enterprise.
Landscaping businesses can be as lucrative as they are rewarding. With busy schedules, there is a growing demand for companies to come in and take care of people's property. Give your creative green thumb an outlet to thrive while creating and maintaining some beautiful landscapes.
From a simple mowing business to a more complex landscape design, the choice is yours. Take advantage of the tools of your trade including creative landscape design software to help you make your clients' dreams come true.
As with any new venture, it's always best to start with a plan. Opening your own business can be a challenge, so having a picture of what you want to accomplish and how you will do it is the best place to start.
Make A Business Plan
If you have no experience running your own business, you will need to start by doing your homework. To bring in interest for financing, you will need to create a comprehensive business plan to present to lenders. There are many online tools that can help you with a business plan template to get you prepared.
It's a good idea to consult with an accountant to get advice about setting up your bookkeeping system and taxes before you get started.
Set Your Pricing
The best place to start when deciding what your fees will be is to investigate your direct competition. You may be able to cut some corners when you are just starting out, as your overhead will be slightly lower than the more established companies. Consider your time invested, cost of materials, labor, equipment, and tools, and your overhead costs before calculating your best price.
Licensing
Every state will have different licensing requirements. In a landscaping business, you may need to obtain special certification to use chemicals and fertilizers. You should also check your local bylaws regarding waste management and local irrigation.
You will be required to sit for the Landscape Architect Registration Exam before you will be issued an official business license. The exam will cover the basics of land management, maintenance, and safety. You can write the exam for a one-time cost of $150.
Taxes
Consult your accountant about setting up an EIN (Employer Identification Number) that will connect you to the IRS. Visit the IRS website and fill out the standard SS-4 forms to receive your State Tax I.D. number.
Gain Customers
Start by advertising locally and pick up a few of your first clients by offering services to your neighbors and family. Take advantage of the incredible reach that social media can offer by establishing a company website and a dedicated page on Facebook or an Instagram account.
Create a portfolio of your past work as you gain more experience. Being able to display examples of your work directly to your clients can show them that you have a great experience as well as talent.
Hire Staff
With a small landscaping business you may start out as an independent contractor, but with luck, you may soon have to hire extra staff to keep up with the demand. To protect your business, you should always have a rigid interviewing and hiring process. Check references and past experience before making any hasty decisions. You should expect to provide training for all of your new employees.
General Gardening
4 Gardening Scenarios Where It's Best to Call In the Pros
Published
3 years ago
on
March 27, 2019

DIY is a popular word, and YouTube videos can teach you almost anything these days. But is that always the best route to go?
While we respect your willingness to try it yourself and we understand the importance of managing your budget, certain scenarios require some skill & expert advice.
If you face one of the following scenarios, it may be time to ask for some help from your local gardening professionals.
Anything Relating to Your Power Lines
This is a rule you should teach everyone in your household: if gardening takes you near the power lines, you need to outsource.
This is often the case when it's time to trim your trees. You may not have realized just how quickly those branches are growing, and at the end of the summer they're almost touching the power lines.
First of all it's probably the local authorities' and power line workers' responsibility to cut them down anyway. Secondly, it only takes one misstep and you can end up falling against the live wires. Don't do this yourself!
Damaged Trees
Even a general trimming of trees can quickly turn dangerous if you're working on damaged trees. A vicious storm or parasites may have weakened trees in your garden. Many plants may never recover.
With a weakened structure, you have no idea where that tree will fall or which branches are still strong enough to support you. Call in the pros on this one. With their knowledge and proper safety harnesses, they will remove the damaged growth piece by piece.
Problems With the Pipes
The idea of having your gas or water pipes dug up is enough to put most homeowners in a bad mood. Important tip: don't wait for a small problem to become a big one.
A telltale sign of plumbing problems is when water collects in a certain grassy area or you see your paving is wet. It could be the roots of a tree that damaged the pipes, but removing the cause won't fix the problem. And don't think you'll fix it all yourself. You need pros with handy tools such as inflatable pipe plugs that will locate the problem and repair it with the least amount of damage to the surrounding area.
Pests Require the Pros
Another unwelcome sight is when you realize you have pests that are chewing on your plants or contaminating the garden. You'll find many DIY solutions at the store for rats, bugs and other pests, but they often only minimize the plague; it's rarely destroyed completely.
A better solution is to call a pest control company that knows how to track down the nest and eliminate the problem.
Final Thoughts
You know how to look after your property, but more often than not DIY projects lead to temporary fixes, not long-term solutions. Know when you've reached your limits and call in the professionals so you can enjoy your garden again.
Home Care & Living
6 of the Best Ways to Store Your Bike
Published
3 years ago
on
March 26, 2019

Are you an avid cyclist with quite the collection of impressive bikes?
Luckily, there are some great ways to store your bike, in your home and out of it. With these tricks, you'll be able to walk through your hallway without sustaining any injuries and your walls will be safe from chain grease and wheel dirt!
Wall display
Bikes come in all shapes and sizes, colors and patterns, and can work as a great piece of (removable and useable) contemporary artwork for your home.
The market is filled with snazzy hooks and racks to hoist your precious bicycle onto the wall. You're spoilt for choice when it comes to materials and designs. Maybe you're into the industrial look and fancy a grungy steel rack. Or perhaps you're like the rustic, wholesome feel of a nice pine hook?
Just be sure that you can easily remove and remount your bike when you decide to go for a cycle!
Hang it from the ceiling
It might seem like a strange solution, but hanging your bike from the ceiling is perfect when you are tight on both floor and wall space.
Get your hands on a simple pulley system to hoist your bike on to the ceiling. This is perfect if you live in a small flat with particularly high ceilings, and is very reminiscent of the clothes pulleys that are characteristic of Victorian homes!
Using this gap is the ideal way to work towards full optimization of every square inch of your property.
Turn it upside down
The awkwardly-shaped gap underneath your stairs isn't exactly the most practical spot for storage, but if you're inventive, it can be a great location to stash your bicycle.
All you need to do is screw some basic hooks onto the sloping underside of the steps – they don't need to be anything fancy, they just need to be strong enough to hold the weight of your bike!
Depending on the height and width of your stairs, you could potentially store two bikes in this nifty little gap.
Store it in the shed
If it's going to prove too tight a squeeze to fit a bulky bicycle in your home, you might need to look outside of your house for your bike storage solutions.
If you have the luxury of a garden shed or garage, this is a fantastic option! Before you store it inside, make sure that the structure can protect your bike from the elements, bugs and pests, and thieves!
Stow it in a self-storage unit
By far the most secure way to store your bike is in a well-maintained self-storage unit with tight security.
If you're not a daily cyclist, reserving it for special adventures in the countryside on the weekends, a storage unit is the ideal to keep your bike out of sight and out of mind, but still safe and sound.
Home Care & Living
The Benefits Of Baking Soda: How To Freshen Up Your Home
Published
3 years ago
on
March 23, 2019

Keeping your home clean can seem a mammoth task with a seemingly endless array of information and advice. From the arsenal of chemical options available on the market and different opinions about the best cleaning methods, it can be hard to know where to start.
In addition, there is also a growing move towards environmentally-friendly options, and this can be hard to reconcile with the different cleaning products available. With different sprats, potions and lotions available for everything from the bathroom to the stove, it seems you will need a new cupboard merely to hold your new products!
If this all sounds overwhelming, the good news is that there is a simple solution to your cleaning woes, and chances are you already have some on hand—baking soda. Before you seek the help of Alpha Bed Bug Exterminator NYC to battle critters in the bedroom, why not give this magic product a try. Here are just a few of the miracles it can perform.
Eliminate Odor
Forget fancy air fresheners. Baking soda is ideal for eliminating unpleasant smells. From carpets to furniture, fabrics to microwaves, you can give your home a new lease of life with a simple sprinkle of baking soda.
Clean Jewelry
There is no need for expensive jewelry cleaning kits. Just make a paste of one part water to three parts baking soda, and apply it to your silver with a lint-free cloth and rinse. Be careful not to use paper cloth, as this can cause scratches.
Freshen Up Patio Furniture
Patio furniture can often be affected by the weather during the wet winter months. Before bringing your chairs out ready for the summer season, give them a quick wipe with water and baking soda to restore them to their full glory and ensure they are prepared for your summer socializing. Once the winter comes, you can also place baking soda inside the bags used to store the cushion pads to keep them fresh.
Clean Up Oil Spills
Oil can be tricky to clean, as water tends to merely make it spread and stain. It can also be dangerous and lead to slips. If you have spilled oil on the floor of your garage, you can sprinkle on a little baking soda and scrub with a stiff brush to pick up any traces and keep the ground safe and clean.
Brighten Your Whites
If your whites are looking a little faded and grey, you can bring them back to life by adding a cup of baking soda to your washing machine, alongside your usual laundry detergent. This will help bring new life to your white shirts and other clothing items, leaving them looking and feeling bright, white and fresh.
Cleaning your home doesn't have to be a tiresome chore involving hundreds of chemicals. Instead, replace the multiple products with one single, simple solution which will do a fantastic job and help save you cash.
Home Care & Living
How to Provide a Sense of Nature and the Outdoors to a Screened Porch
Published
3 years ago
on
March 20, 2019

Is this the year that you have decided to build a screened porch in your yard providing you with the perfect spot to enjoy a little shade, and escape all the pesky bugs that flourish during the warm summer months? If so, then there's no doubt that you are excited about your big project and the many ways in which it will transform how you use your yard. With that said, even though you are building a screened porch, it doesn't mean you want it to feel like you are indoors.
Here are some simple tips you can use that will help provide that sense of nature and the outdoors to your screened porch, so even though you will be sitting under a covered room, and behind screened windows, you'll still feel as though you're outdoors.
Choose a Design with Plenty of Windows and Screening
The first tip has to do with the design you choose. The best way to make your porch feel like the outdoors is to allow for plenty of light. Choose a model that offers a number of windows and screening so that your view isn't skewed and you'll still be able to see all angles of your yard.
The pros at Architectural Landscape Design also suggest that you pick a screened porch design that fits and flows with the roofline of your home so that it feels natural and organic, rather than a wholly separate entity.
Plan a Nearby Garden
While it's impossible to have a garden inside your porch, you can have one in very close proximity. Plan out a garden that borders the porch or that is close by to provide you with that lovely scenery. If you are planting things up against the base of the porch, be sure you pick shrubs and bushes that do well in those particular lighting conditions.
Add a Water Feature to the Yard
One of the best ways to impart a sense of nature and relaxation to your yard is to install some sort of water feature. This could be a fountain or a pond. Again, plan to place the feature near the porch so that when you're sitting in the screened area you'll still be able to hear the soothing water sounds.
Hang Bird Feeders from the Porch
You can also install hooks on the roofline of the porch that are strong enough to hold bird feeders. You'll be able to enjoy nature up close and personal as you attract all kinds of incredible bird varieties to your yard.
Use Indoor Plants for Greenery
Lastly, there is nothing wrong with using standard indoor plants in your screened in porch to give that sense of greenery and nature. You can pick varying heights, colors, and sizes to add interest.
A Lovely and Inviting Porch
By using each of these tips, you'll be able to design a screened porch that is not only lovely to look at but relaxing and enjoyable to use.
General Gardening
Why Should You Learn About Gardening: The Benefits
Published
3 years ago
on
March 19, 2019

Most of us enjoy the experience of a tranquil, relaxing garden. Beautifully planned and professionally planted, these spaces offer a fantastic sense of peace and calm, with perfectly selected aromas and a dazzling display of colors, all of which seamlessly fit together as though by magic.
While we may enjoy the end result, the truth is that many of us are clueless when it comes to the fundamentals of gardening. It can be a subject which seems overwhelming, with jargon such as 'soil pH' and 'seasonal planting' making this sound like a dry and theoretical bore, as opposed to a fundamental basic. In truth, learning about gardening can be a huge benefit for your home and life, changing the way you relax, exercise, and even eat. Whether you are keen to grow your own veggies or learn more about lawn care.
You are what you eat
Gardening is not merely restricted to beautiful flowers; it is a fundamental part of the food chain. Leaning to grow and harvest your own food is not only a hugely satisfying experience, but it could also help you cut your food budget. In addition, growing your own fruit and vegetables helps you to develop a better understanding of what you are putting in your body, and can provide inspiration for creative new meal ideas.
Extend your home
If you are a homeowner, gardening offers a chance to extend your living space at a little extra cost. By learning the basics of gardening, you can identify things that will thrive in your garden, and use this knowledge to create a relaxing and stunning space which is perfect for late-night entertaining, chilled summer barbeques, and informal family picnics. Make the most of every inch of your home by transforming the outside.
Improve your health
As well as helping to change your diet, gardening is also an excellent form of exercise. The bending, stooping, and squatting required can provide a full-body workout, and burn more calories than a traditional gym session! As a bonus, you can feel satisfied that you are doing something productive while exercising, whether that is pruning, weeding, or digging a brand new bed. By having visible results, you will increase your motivation, helping to turn a workout from a necessary evil to a productive and genuinely useful task.
Save the planet
Having a good knowledge of plants and flowers is also beneficial in helping save the planet. Plants provide the oxygen which keeps us alive, and so learning to respect and maintain them is essential. In addition, you can help attract bees and insects to your garden with the right combination of foliage. These are creatures that are in danger of being lost, and so we need to invite them in at any opportunity. By maintaining a garden, you will be doing your bit to generate a whole new ecosystem, and play a valuable part in the lifecycle of many creatures—not merely humans.
Home Care & Living
Features to Consider When Selecting a Water Dispenser
Published
3 years ago
on
March 14, 2019

There are numerous benefits of investing in a water dispenser for your home, business, or office. The quality of water is outstanding, eliminates wastage of water, and also contributes to a reduction of your carbon footprint through less use of bottled water. While some may opt for a water dispenser for personal preferential reasons, others may require a dispenser because of lack of healthy and hygienic drinking water.
A few things to consider when deciding to invest in a water dispenser include:
Do you require it for an area with limited space, or contrastingly, do you need a large capacity-dispensing system with a filtration mechanism for your business or office? You could choose between a water cooler or water dispenser subject to your needs. While both dispense water, the only difference is a water cooler utilizes electricity to cool the water, and water dispensers just dispense water at room temperature.
Kinds of Water Coolers
Point of use: These are the most expensive to install and are useful if there's an existing water line or tap to connect. These help to cut down on costs without the need of attaching water bottles and getting replacements.
Top load bottled water cooler: These are lower in cost than point-of-use and easier to set up. There's no need to tap into a water source, and all it requires is to attach a water bottle on the top. The size of the bottle is subject to the amount of water you'll need to use.
Bottom load bottled cooler: For those that prefer the taste of bottled water, but don't want a bottle plugged in at the top of the cooler, the alternative is a bottom load cooler. In this model, the bottle is placed in a concealed cabinet in the bottom section of the cooler.
Countertop water cooler: For those living in an apartment with limited space or any location that doesn't offer access to potable water, this is the perfect option. These save money and space.
Countertop water dispenser: These are also economical in cost, save money, and are suited for areas where there's no need to cool the water or when electricity is unavailable or very expensive.
Other aspects to take into consideration:
Apart from the kind of water cooler you require and its features, some of the other factors that need to be taken into consideration include:
How you intend to utilize it: Would you be okay with buying and replacing the water bottles, or would you prefer a point-of-use model that taps directly into the water source?
The area you plan to install: Some smaller models can be installed in limited spaces or even bigger models for use in offices, businesses, etc.
Home Care & Living
Key Tips On How To Prepare For A Swimming Pool Deck
Published
3 years ago
on
March 14, 2019

Having a swimming pool is an excellent addition to your home. With that comes the deck, which is the area surrounding your pool. A properly planned swimming pool deck is essential to ensure that your landscaping is functional. It also creates a transition from one area of your backyard to another. Here are tips so that you can have your dream backyard pool area:
1. Think of your space
The size of your space will often influence the kind of deck that you can build. It's important that you're keen about your area because your design, budget, materials, and others, can then be planned accordingly. For most homeowners, there's one spot in the property where you can build the deck, and those with larger areas are fortunate to be able to choose as they please. Some of the factors affecting your deck are the lot size, view, shade and sun, proximity to the house, and privacy. Here are a few other considerations:
- Small areas can have a multi-level deck that utilizes vertical space. Consult with local building codes for requirements when planning to do this in your property.
- Irregular spaces can still have amazing deck designs. Talk to swimming pool experts for the best options to maximize your space.
- Larger spaces have more options like a gazebo, dining area, and so on. Don't cram everything just because you have space; think about functionality, too.
2. Re-evaluate its uses and functions
Besides aesthetics, you need to know what the pool deck is going to be used for. This is essential to dictate the functionality of the design, the safety measures, and other options for your swimming pool decking. Brainstorm for ideas with your family and include each member who will be using the pool as much as possible. This way, you will know where balance or compromise is needed. Homeowners can use a pool deck for:
- Hosting pool parties
- Privacy and relaxation
- Dining and grilling with family and friends
- Quality time with kids
- Spa surround
3. Choose the materials
A swimming pool deck can be made of various materials, and it's vital that you've evaluated your options as part of the preparation. Choosing the decking materials is an important step to ensure that you can afford the project, it's suitable for your space, and it can serve its purpose. Typical materials are concrete, brick, pavers, stone, wood, tile, turf, synthetic, or a mix of these. When choosing materials:
- Opt for materials that blend with other areas and elements in your yard, including container gardens.
- Consider how safety fences can be installed.
- Choose materials that are resistant to frost, mold, mildew, algae, and other chemicals.
- Go for those that aren't slippery when wet.
Final thoughts
Building a pool deck is an exciting project. As long as you've done the necessary preparations, you're swimming pool decking will look stunning. Use the tips above as a guide to your planning and preparation.
Home Care & Living
Stop! Make Sure You Really Need a Surveyor or Architect for That Site Plan
Published
3 years ago
on
March 13, 2019
If you're planning or managing a home improvement project, it's likely your jurisdiction requires a site plan before you can get the necessary permit. But don't rush to hire a surveyor or architect just yet!
What Is a Site Plan?
Let's start by explaining what a site plan is and how it is used for home improvement projects.
A site plan shows what structures exist on the property, as well as the proposed improvements. Many counties have specific development code requirements for particular projects, such as:
- Driveways
- Sidewalks
- Sheds
- Gazebos
- Retaining walls
- Fences
- Ponds
- Etc.
The local building department will look at your site plan to determine whether your development project meets the necessary development code requirements. If it does, you'll get the okay to move ahead. If not, you will need a new site plan..
I Need a Site Plan – Where Can I Get One?
Before you jump into creating a site plan from scratch, one thing that can be helpful to do is to check to see if one already exists.
Where exactly would you check for this?
- Check your own files and see if you can find a site plan that reflects the current status of your property.
- Reach out to your title company to see if they have a copy.
- Your local development office that is asking you for a site plan may have one on file.
If you can't find an existing site plan, you may consider hiring someone to create a plan for you- Architects, Engineers, and Surveyors can be used. They will be professional, thorough, and detail-oriented, but also charge you upwards of $1,000.
Are There Alternatives to Hiring a Professional?
Contact your local development office and ask if you are required to submit a site plan that has been stamped by a certified architect, engineer, or surveyor.
If it is not required, then you have a viable alternative in usingonline site plan providers. They use satellite imagery, GIS information, county parcel maps, and other sources to produce site plans.
These site plans are as accurate and detailed as those produced by certified professionals. Moreover, they can do it quickly (some offer a 24-hour turnaround), and at a mere fraction of the cost – around $100 to $200, depending on the level of detail required.
How Do I Know If I Have to Get My Site Plan Stamped?
There are a number of different types of projects that do not require a certified professional to stamp them. These include:
- Conditional Use Permits
- Construction Permits
- Demolition Permits
- Exterior Home Renovation Permits (many of them)
- HOA Permitting
- Residential and Commercial Site Plans
- Sign Permits
- Swimming Pool Removal Permits
- Tree Removal Permits
If you need a permit to make one of these improvements, there's a good chance you will not have to pay for a certified professional to create your site plan. That being said, though, there's only one way to know for sure: ask your local development office.
General Gardening
How to get Electricity to your Garden
Published
3 years ago
on
February 22, 2019
An electrical connection to the garden adds a whole new level of usefulness, comfort as well as improving security. A constant electrical source in the garden is ideal if you're looking to add some flare to the backyard garden with a fountain, speakers, a projector for a party or extra lighting to run along footpaths or beside stools.
Aussie's today are using their gardens for more than just somewhere to grow vegetables and that means electricity is essentially required to get the most out of the garden. Below we'll take a look at a few of the easiest ways to get electricity running to your garden.
Solar Panels and Batteries
The most environmentally friendly option for getting electricity to the garden will be through investing in an array of solar panels paired with rechargeable batteries and an inverter. This way you'll have a near-constant source of free electricity that your garden's lights and other accessories can connect to.
Keep in mind that depending on the size of your solar panels and your battery's voltage output you might not be able to power everything you'd like to. These solar solutions are fantastic for lower electricity use, but if you're wanting to power other appliances, tools and more then it's best to consider a generator. More on that below.
Portable, Low-cost Generators
If you're looking for a solution a little more permanent then it might be a good idea to consider a generator. This way, when the time comes to switch on all of your home's garden lighting and other accessories like pool lighting, outdoor speakers and more, you'll be able to start your generator and be done with it. There's very little that a generator can't power in the garden and that means you'll have no cap on what you could do.
You might want to consider smaller, more portable generators for your garden as these will be easy to conceal but will also be virtually silent. Generators from retailers like Outbaxcamping are perfect solutions for at-home garden electricity requirements as they're affordable and incredibly efficient.
Temporary Extension Cables from the House
One of the easiest, quick fixes to getting electricity in the garden is running an extension cable form the house to whatever you need to be powered in the garden. Whether it's a temporary water feature, lighting, bug zapper or just about anything else, an extension cable should do the trick on a temporary basis. Just be sure to use more heavy duty extension cables for appliances or tools that require higher amperages.
It's important to remember that an extension cord isn't designed to be a permanent solution. You're still able to use these cables to temporarily power appliances, tools and lighting in your backyard. Just be sure it's not forecast to rain and make absolutely certain no children or pets will be able to mess around with it.
General Gardening
Why There Is a Need for Wheelie Bin Storage
Published
3 years ago
on
February 19, 2019

Wheelie bin storage is the best way to keep your bin out of sight before the next collection pickup. There are many reasons why you need storage for your wheelie bins.
Wheelie bins are essential on collection day. They are the perfect size for holding rubbish, and their use makes it easy for collection workers to remove your garbage. However, these large bins are also quite unattractive.
- More Attractive
The colors of your wheelie bins more than likely do not compliment the exterior of your home. The bold colors of these bins are designed to make it easy for the refuse collector to know what type of garbage is inside. This is especially helpful for recycling.
A wheelie bin storage container keeps these unsightly bins out of sight until collection day. Storage containers come in a variety of materials and colors, so it's possible to find something that looks attractive next to your home.
- Less Mess
If you've ever picked up the rubbish after a wheelie bin has been knocked over, you know how much of a hassle it is. All it takes is a large gust of wind, and your wheelie bin may topple over. Everything inside may blow onto your property. You're entirely responsible for cleaning up the mess.
Locking your wheelie bin in a bin store, however, will prevent it from falling over. This means you no longer need to worry about chasing rubbish down the street.
- No Theft
Wheelie bins are often targeted by thieves. This is very sad but true. While you may not initially miss your stolen wheelie bin, you will have to replace it. In many instances, you will have to pay to obtain another wheelie bin. If you had a storage area for your bin, you would no longer have to worry about it being stolen by desperate thieves.
- Fewer Pests
Stray animals and rodents love to scavenge for garbage. They may be looking for bits of food in your wheelie bin. Unfortunately, if an animal tries to get inside the wheelie bin, they will most likely end up knocking it over. Once again, this means you'll be responsible for picking up all the garbage. Locking the wheelie bin up in a bin store will ensure four-legged creatures are unable to feast inside your bin.
If you're ready to get a bin store, you can easily make one yourself. Those who are not handy can purchase a pre-made one from a home improvement shop. Keep your rubbish covered and out of sight by storing your wheelie bin in a closed bin store.
General Gardening
6 Expert Tips to Find the Right Lawn Mower
Published
3 years ago
on
February 13, 2019

Planning to buy a lawn mower for your garden? It will be wise to think of a few factors before you invest on a lawn mower. Starting from the size of the garden to the frequency of mowing, everything has to be taken into consideration because lawn mowers can be quite expensive. In addition to the brand, features, and the price of the mower, you should also keep an eye on the shape and size of the topography. But there are three main factors that will help you decide the best lawn mower for your garden: the level of terrain, the number of obstacles in the garden such as plants, flower beds, trees, etc, and the size of the garden. Here are some of the lawn mowers that will be suitable for you:
1. Walk-behind mowers
Probably the most popular of all the lawn mowers is the walk-behind variant that will give you plenty of options to mow your lawn. These are generally two-stroked mowers that have the ability to cut yards of lawn continuously without any interruption. Moreover, these mowers can run for years and they require very low maintenance too. The ideal size of the walk-behind mowers is 20" to 22". You should always measure the length and width of the garden along with the size of the yard gate so that you don't have any problem while using the mower.
2. Zero-turn mowers
These mowers are hugely popular when it comes to mowing golf courses and landscapes. They are easy to use as they offer high-speed cutting and can turn very precisely. There will be two lap bars that you will act as the driving wheel. You have to maneuver the bars carefully to make sure that you are mowing the right areas of the lawn. If you have a huge lawn that has got big obstacles such as ponds or trees, then a zero-turn mower will be the right choice. With the fast mowing capability, it will be easier to cut down the grass in a relatively short period of time. This will allow you to mow a large area very quickly.
3. Push mowers
Push mowers are the most common in houses that have a small garden in front with grass in it. These mowers are small in size and you have to push them manually to cut the grass. The blades are attached between the two wheels and they are appropriate for mowing small patches of grass in the garden. There is no engine to operate this mower. So, you will have to push it around the areas that you want to clean. The standard size of these mowers is 16" but you can get a bigger variant that measures 20" or even a smaller variant that measures 14". One of the benefits of the push mowers is that they are really affordable. Their price varies from $80 to $110 because of their manual operation and size.
4. Gas or electric motor-powered mowers
There are various pros and cons of buying a gas or electric motor-powered mower. First of all, electric mowers are absolutely a gem because of their precision and cleanliness. They are easier to operate and do not create any mess while you mow. However, they can run out of power if you don't have two batteries. The corded mowers are still okay but the size of the cord will be a challenge. But if you are using cordless mowers, then you need to have a couple of extra batteries charged up.
Gas mowers, on the other hand, can be more powerful and precise and electric mowers. According to Discover Ziehler, they have the ability to last longer but there are a couple of factors that can get in their way. First, they require frequent maintenance so that the gas does not run out. You have to constantly check the level of gas left in the mower so that it does not stop working all of a sudden. The second thing is it creates a lot of mess while cutting the grass. That is something that the electric mowers do not have. You will have to keep cleaning the grass after mowing for a few minutes so that the blades can cut through better and quicker.
5. Self-propelled mowers
These are all-wheel mowers that are quite heavy to drive around. They have the capability to cut through grass quickly but their weight can be a challenge when you are going uphill. Make sure that you buy this model only when you are planning to mow a flat lawn because, with so much weight, it will be difficult to maneuver the mower on various parts of the lawn.
6. Riding mowers
Those who find it extremely difficult to use a push mower or take a lot of time to mow a small lawn, it will be better to buy a riding mower. This type of mower will offer the basic facilities of mowing. They are just push mowers with an electric motor in the rear end so that you can drive the mower instead of having to push it around the lawn. In fact, this can be a cost-effective solution if you don't want to spend a huge amount on a mower but want to get the job done somehow. They are easy to operate and can mow small gardens very quickly. Depending on the size of the mower, you can look to spend between $600 and $1000 to get one of these mowers for your garden.
Buying a lawn mower can be a big investment. You will have to decide what the priorities are and then find the right type of mower according to the different features given above. There are several varieties of mowers from different brands that you can get but the size of the lawn and the comfort that you want to get while cutting the grass can be two big factors to decide which type of mower will be best suited for your garden.
General Gardening
House Cleaning 101: 5 Tips to Maintain Cleanliness in the Garden
Published
3 years ago
on
February 12, 2019

It's so nice to relax in your outdoor living space and spend time bonding with kids in your garden with fresh air, colorful flowers, trees, and green grass around. While it's crucial to water the plants and mow the lawn, a beautiful garden should be organized and clean. So, let's check these helpful tips to maintain the cleanliness in your garden!
1. Remove Leaves and Branches
During the fall season, dried leaves, stems, and branches usually accumulate in the garden. It's important to clear your garden with these things and human-made rubbish to maintain a beautiful garden. Removing dry leaves also reduces pests from attacking fresh leaves during spring. Here are some helpful tips:
- You can remove leaves by cleaning the garden yourself. You can also hire a rubbish removal service, like 1300 Rubbish Removal, if you can't manage to do it due to your busy schedule or you have no appropriate tools available.
- Pruning damaged branches and stems is a good practice to prevent plant diseases from spreading or damaging the whole plant.
2. Keep the Land Clear
While it's crucial to keep your garden clear of fallen leaves or twigs, you also need to ensure that:
- You store garden tools, such as spades and rakes, in your garden shed to avoid accidents and keep your garden clutter-free.
- Dispose of leaves, stems, and branches into a compost heap or separate bin. You can recycle them and use it as fertilizer for your plants.
3. Prevent Soil Erosion
Soil erosion can extremely mess up your great garden design, including its layout and your plants, too. The soil gets eroded because of heavy rainfall and winds. You can prevent soil erosion by:
- Growing plants that can protect the soil against wind or water movement (e.g., yellow foxtail, blue fescue)
- Building raised plant beds
- Using rocks as resistance for loosening the soil
- Hiring a professional garden landscape designer
4. Clean Hardscape Elements
Don't miss to clean your garden décor. The hardscape elements of your garden include statues, fountains, pathways, and other human-made structures. You need to ensure you don't miss cleaning them. Here are some tips:
- Garden gnomes or statues can promote mold and moss growth and can easily collect dust during hot seasons. Clean them regularly.
- Garden fountains and ponds should be cleaned. Fill them with clear water. Don't keep stagnant water in them.
5. Get a Garden Hose Reel
A garden hose can be a huge mess. It's a smart idea to invest in a garden hose reel to keep the hose neatly gathered, making your yard feel instantly more organized and preventing slip accidents.
Conclusion
Maintaining a beautiful and clean garden shouldn't be stressful. You can dedicate 10 to 15 minutes a day or every other day to clear the garden of rubbish and clutter as a way of relaxing and as a bonding activity with your family.
Landscaping
6 Budget-Friendly Landscaping Ideas for Homeowners
Published
3 years ago
on
February 12, 2019

Landscaping in a particular area gives you more than a pleasant sight as it also relieves stress. A simple house with a beautiful landscape looks elegant. You don't need a professional gardener or a massive budget to achieve a beautiful landscape. You can make your beautiful backyard without spending too much.
All you need are the following tips:
1. Determine the space and topography of the area for landscaping
The space and topography for landscaping should be considered first. It'll give you a hint of how many and what type of plants to select, arrange and grow in your backyard. It will also serve as a basis for your layout. When you have a small yard, you can include flowering plants or potted plants in your layout to optimize the space.
If you have a wide yard, you can plant large fruit-bearing trees. If you have trees and you need to decorate it, use scaffolding. Check this link for cheap scaffolding.
2. Make a simple layout or landscaping plan
Aside from visualizing how your yard would look beforehand, making a layout will save you a lot of time, effort and money at the end of the day. Planning and putting everything you have in mind on a piece of paper can create a good outcome.
It helps you determine the available plants in your area and the kind of plants that best grow in your target site. Moreover, you'll know what tools to buy instead of buying every tool.
3. Recycle used containers
Bottles whether plastic or glass could save you from pot needs. Today, a lot of home-gardeners create a sophisticated arrangement of containers blending well with the plants. For instance, big plastic bottles can be carefully cut into an artistic feature and could serve as pots for small plants or those with shallow roots. Aside from keeping you a lot from spending, you are helping the environment, too.
5. Choose low maintenance shrubs and perennials
Since landscaping is intended for a long-term plant arrangement, shrubs or perennials are ideal for it. Some plants look good for just a few months and eventually wither and die. Some plants need to be watered most of the time and require the right amount of fertilizers to grow well. To save energy, time and even money, choose plants that can live for more than a year while growing beautifully as they age. When you have perennials, you can save so much from buying plants again and again.
Conclusion
If you're a homeowner, you can create a beautiful sight right in the backyard without following all the conventional and expensive landscaping models. Your creativity, determination, and action are the best capital for a low-cost yet elegant landscape. Remember that the key to successful landscaping is utilizing most of the available resources with careful planning with the right implementation. As long as you're happy and satisfied with the outcome, nobody can question the quality of your landscape.
Pest Control
How to Kill Vegetable Garden Pests with Ease
Published
3 years ago
on
February 12, 2019

When it comes to harvesting the vegetables from your garden, you don't want to find out they've been destroyed by insects or pests. Luckily, it's quite simple to kill any pests that may be damaging your crops.
- Slugs and Snails
Both slugs and snails are commonly found in gardens, but unfortunately, these pests are notorious for damaging crops. Not only do they feed on crops, but they also only come out at night, making it tricky to kill them during the day. Slugs and snails also lay many eggs, which can lay dormant for several years before they hatch.
If you're struggling with a slug and snail infestation, try a beer bath. Simply place small vats of beer around your garden. Slugs and snails are drawn to the yeast in beer. However, once they try to drink this yeasty beverage, they will fall in and drown.
- Aphids
Perhaps one of the most destructive insects, aphids love to drink the sap out of any plant in your vegetable garden. They even spread diseases. If you notice signs of an aphid outbreak, then you should make an organic insecticide out of dish soap.
Simply mix a few tablespoons of organic dish soap with a quart of water. Add a couple drops of orange or lemon essential oil. Spray this concoction directly onto your plants, making sure to fully saturate the leaves. This dish soap insecticide is also effective at killing other vegetable garden pests, including mites, mealybugs, and whiteflies.
- Cabbage Root Fly
The cabbage root fly is known for destroying vegetables by damaging the roots. These pests lay their eggs at the base of plants. When the eggs hatch, the maggots burrow deep down to the roots, where they feast. This can quickly kill your vegetable garden.
If you notice damage to the roots of your crops or you find maggots on the roots, you can quickly remedy the situation by placing a cabbage collar around the base of your plants. This will prevent any newly hatched maggots from reaching the roots.
- Rodents
Rodents, including mice, rabbits, moles, and squirrels, are always looking for their next meal. However, you don't want them feeding on your vegetable garden. Spraying a mixture of soap, chili powder, and garlic onto your vegetables is one of the best ways to deter these pests. It even works to repel beetles, slugs, leafhoppers, and borers. This mixture will also keep your family pets out of your garden without harming them.
It doesn't take very much effort to keep your vegetable garden healthy and free of insects and other pests. Natural and organic products are often all that's needed to deter or kill these unwanted visitors.
Be proactive all year long to ensure your vegetable garden thrives and kill garden pests organically.
General Gardening
6 Essential Tools For Your Garden Maintenance
Published
3 years ago
on
January 28, 2019

Working in a garden is not possible without any tools at hand. It requires a lot of tasks and having the right tools will make your garden maintenance plain sailing. Since there are a lot of gardening tools available, you might be confused about which ones are essential or not.
Here are some necessary tools that you will need to keep your garden looking at its best:
1. Cutting Tools
A huge part of gardening maintenance involves cutting and trimming small trees, bushes, and other perennials. Hand pruners and loppers are essential for these tasks. Pruners can be used for cutting stems and branches with a small diameter. Loppers are intended for larger branches.
These tools can be used for deadheading or regular trimming activities. Pruning your bushes regularly will initiate healthy plant growth and will make it grow to your desired shape. Cutting tools is also essential during harvesting season if you grow fruit trees and vegetables in your garden.
2. Lawnmower
Grasses usually grow fast, most especially during the rainy season. Proper maintenance of your lawn is essential in every well-maintained garden. You can avoid it being bushy by investing in a lawnmower.
Getting an affordable lawnmower is enough for your garden maintenance needs. Usually, these are the convenient types where you can easily use and store the equipment.
3. Garden Hose and Water Sprinkler
Water is essential in every gardening activity. Garden hose can facilitate, bringing the water supply to any area of your garden which makes it easier for you. However, having a water sprinkler is good when you are working in planters, plant boxes, and flower pots with delicate herbs and flowers.
4. Wheelbarrow or Garden Cart
Having a wheelbarrow in your garden will make it easier for you, especially if you do not have anyone to help you out. Garden maintenance also involves moving and lifting objects such as garden soil, fertilizers, and pots. Investing in a wheelbarrow will help you accomplish these tasks in a breeze.
5. Shovel and Spades
Shovels and spades are useful when digging soil, edging, and even moving mud and large debris in your garden. Investing in a good one with high-quality material will provide better garden maintenance. Make sure that you get it with a handle that is comfortable on your hands and has a length that will provide good leverage.
6. Hand Trowel
Another garden essential is a hand trowel where you can use for various purposes such as transplanting seedlings in pots or trays, distributing soil in pots, and getting fertilizer in sacks. Having a well-made trowel will make your garden maintenance a stroll in the park.
Now that you know the essential tools needed to have a well-maintained garden, it's now time to buy and gather them in stores. By investing in the right tools, you will avoid overcrowding your garden shed, and at the same time, you can accomplish your gardening tasks in no time.
Home Care & Living
Electric Fly Swatters
Published
3 years ago
on
January 28, 2019

The future of killing insects is bright with use of electric fly swatters, just hit with the rackets as the insect get electrocuted.
How is this possible then?
One would wonder why waste energy looking for insect and then hit? Why can't one use a traditional one? Okay, as aforementioned, the equipment uses electricity, when one runs a pest; it has no chance of surviving as it is electrocuted in coming into contact. Using this machine is fun, one can set a tournament with friends; the winner kills more!
Pros and cons of electric fly swatters
If one is wondering why it should bother him or her to have the machine; firstly, it is a better way to do exercise. The scientific approach shows that the practice calms the nerves, relaxes and relieves tension. Additionally, it is a game; one does not get bored all the way!
However, the smelly nature of the fried mosquitos is not pleasant at all and the sound produced when mosquitos are on the grid is annoying!
Caution! The machine is electrified, handle with great care! Safety comes first!
The Best 5 Best Electric Fly Swatters
Black Flag Handheld Bug Zapper Racket
The machine boosts on its size that makes it suitable for women to use. Also, it is a powerful machine having the ability to produce 2750v. The alkaline batteries used are purchased separately. The pros side is that it provides no sound when hitting an insect. Furthermore, it has been made in a manner that guards the fingers of the user.
Zap-It! Electric Mosquito Racket
They have enjoyed a monopoly in the market for long. It is expensive and more feature packed, but it is not as heavy as one would finally think. It is powerful too, producing 3, 000v. The machine operates on the rechargeable batteries unlike the latter. It is more improved in a manner that the light fitted on it can attract insect, thus trapping them. The reviews from the customer are pretty encouraging!
Zap-It! Mini Electric Mosquito Racket
It is light with a weight of 0.2 pounds making it possible for children to use. It has similar features as those of other swatters.
Koramzi Electric Fly Swatter
The light produced can serve as a torch; thus the rate of killing insect during night-time is improved. The technical specification is weak, but it has the lower price than the latter. Its batteries produce lower volts, 2,600v as compared to the previous swatters. Also, it is heavy making its usage hard for poorly exercised muscles.
PreciShock Electric Fly Swatter
The client's reviews have placed it to be the best among the swatters. It has 3,000 volts and can be used against large bugs. The product lacks 3-layer mesh, unlike the previous swatters. It operates on alkaline batteries, and it is much heavy with the weight of 0.7 pounds Electric Fly Swatters
Do not waste time with insects in your house; get rid of them by electric fly swatters.
General Gardening
How to Choose Garden Furniture: 5 Factors to Consider
Published
3 years ago
on
January 24, 2019

In buying outdoor garden furniture, there are certain factors you need to check for first to ensure that you spend your money on furniture pieces that will truly answer your needs. Budget is of course an important factor that you need to consider in shopping for your home and outdoor furnishings, but aside from that, the other factors where you could use more helpful information about include furniture material, style, size versus available space, comfort, and maintenance requirements. These five factors are further discussed in this simple but essential guide to buying the right outdoor furniture.
Material
Outdoor furniture is typically made of materials that can resist the elements better, such as rattan, timber, wrought-iron, aluminum, and stainless steel. Choose natural plant materials for an easy outdoorsy feel, or more modern metal materials for added character and spunk.
Style
Furniture style largely depends on material. Small wrought-iron chairs, for instance, usually have intricate designs that reflect the French style with an antique touch. Chunky timber benches inspire a more rustic ambience, while sleek stainless steel chairs offer sophisticated elegance.
Space
Take out that measuring tape and work out how much space you actually have for your garden furniture. Take care to leave ample space over for walkways and enough room for other movement; you don't want your furniture to look like they've been crammed in too tightly without enough elbow room left over. Note down the measurements you have made and refer to it while shopping for your outdoor furniture, whether you're just looking at online catalogs or visiting physical furniture showrooms. Do not commit to buying furniture without checking whether its dimensions will comfortably fit your available space. No matter how elegant the design or high-quality the material, if the piece doesn't actually fit the area, it will be of no practical use to you and you'll end up wasting time, money, and effort.
Comfort
Your garden furniture will not be there for mere display; they need to be functional pieces you can not only use, but actually enjoy using. The key to this is checking for comfort before purchasing furniture pieces such as sofa sets, chairs, sun loungers, daybeds, and deck chairs. If you're buying a rattan chair, for instance, sit in it and get a feel for fit and comfort. Is the chair seat roomy enough to fit you front to back and side to side, but without having you feel dwarfed by its size? If it comes with a cushion—which is recommended, to prevent sagging over time—does it have ample padding? If you're shopping for a rattan dining set, check that the seat heights are appropriate for the table height, and that the table's legs give the sitters plenty of clearance.
Maintenance
Maintenance needs are determined by furniture material. All-weather wicker rattan furniture will need a simple routine cleaning involving a soapy but not wet wiping using a soft cloth, and air-drying it afterwards. You may use a small toothbrush dipped in soapsuds to reach the small crevices in woven furniture, but you would need to be careful not to soak rattan furniture. As for aluminum, stainless steel, or plastic furniture, you can hose them down with warm water to clear away airborne dust and dirt. With wrought-iron metal chairs made of more traditional heavy cast iron, you will need to protect them from rust by protecting them from rain exposure and performing routine repainting.
For more information visit https://poshh.co.uk/
General Gardening
How to Do a Tree Removal Process in 5 Easy Steps
Published
3 years ago
on
January 15, 2019

Removing a dying or dead tree can be a very challenging task, especially because safety is a significant concern in the whole scenario. It is best to leave it up to the pros who have been doing this for a while.
The process is tree removal can be tricky, but the five steps mentioned below could make it easy for you. So here are few things you need to keep in mind.
Steps Involved in the Removal Process
After examining the tree to check whether it is diseased, dying, or dead, there are specific steps that need to be kept in mind. These steps may seem easy for homeowners, but it is always better to hire professionals to do the job.
1. Clearing the Area – When you plan on removing a large tree, you will require a significant amount of space to let the tree lay flat after it is removed. Therefore, you will have to estimate the height and accordingly clear the immediate area in the vicinity.
In order to do so, you will have to sift through the tree. You need to see in which direction is the tree leaning naturally. It will be of great help in determining the best direction for the fall. If there are signs of decay, there are high chances that the tree may collapse and not fall where it was previously intended.
2. Picking Up an Escape Route – Sometimes the tree may fall out of control, and in such situations, you will require a clear path to scape and run in the other direction. Keep a tab on the areas near the tree that does not have any obstacles. All in all, you have to be prepared for everything.
3. Gathering the Right Equipment – when The size of the tree will determine the kind of equipment you will need for cutting the tree down. You can either go with a handsaw, but in case of larger trees, you will need a chainsaw. If you do not have the right equipment with you just go for tree removal services within your location. For example if you are based in NSW, Sydney you can search for phrases like tree pruning Sydney, NSW to find services near to your location.
4. Starting the Undercut and Backcut – After scoping the area out, you will have a pretty good idea of the fall's direction. You will have to cut a 45-degree angle V-shape near the bottom then to induce the fall. After it is done, a cut must be made from the opposite side as well.
5. Moving away – Right after cutting the tree, you will have to walk away and alert others around you about the falling tree.
After the tree has fallen on the ground, you will be able to remove the branches very easily. You can also cut the log into several pieces for transporting it away from the site.
General Gardening
Practical and Affordable Home Improvement
Published
3 years ago
on
January 14, 2019

Social life in Australia involves quite a few outdoor events, blessed as we are with such a wonderful climate for much of the year, though the weather isn't perfect every day, which is why so many homes and businesses are adding some cover for their outdoor areas. A shower of rain can really put a dampener on your barbecue, or have customers trying to grab their bits and pieces, along with their lunch, to scurry inside quickly. And of course, sometimes the weather is just too good, with a clear blue sky, without a cloud in sight, with you and your guests cooking almost as fast as the food on the grill. Once mostly seen on camping sites, attached to the caravan or tent, the awning has found a new lease of life not only to provide shade and shelter in the back yard, but for many of our favourite eateries too.
Functional and Simple
One of the beauties of an awning, is that it provides an excellent level of cover from the sun's rays, and will keep everyone dry in all but very nasty and blustery storms. There is nothing really complicated about them and even the kids can extend or retract them simply. While many choose the retractable type operated by a simple crank handle, the motor operated variety sees it slide out smoothly, providing cover in seconds.
Aesthetics and Style
Awnings are available in an immensely wide range of colours and styles, so you can choose one which fits in perfectly with your home and surroundings, or choose something bright and vibrant, to catch the eye and reflect your mood. Restaurants and cafes can similarly use them for advertising themselves, or key brands available within, providing marketing opportunities as well as protection.H
Simple to Install
Fixed and retracting folding awnings in Melbourne and across the country are finding themselves in more and more places around the home and business. We have come to think of them as jutting out from a building to provide cover for the garden deck, or the café, but are more frequently being used in other areas too. Many a balcony now sports an awning, to provide shade and cover, while people enjoy the elevated views. Freestanding models also offer the same great looks and protection for the swimming pool or an extended garden patio.
Fitting an awning to your property is an extremely simple and fairly cheap home improvement, with the majority of installations installed in a very short period of time, especially when fitted to the side of a building. Any of your outdoor areas where you seek an extension to the natural shade provided can be inexpensively achieved. Not only do you have the benefit of the cover right now, to keep everyone protected while you are in the property, it can also be beneficial when it comes time to sell, by providing extra style and flare, though you also have the option of swiftly uninstalling it and taking it with you. Such is its versatility, it's pretty likely to be able to be swiftly refitted to your new home too.
With remote control options, as well as sensors for sun, rain, wind and even timers, making the property look good while controlling the outdoor environment has never been so easy.
General Gardening
Smart Home Improvements That Boost the Value of your Property
Published
3 years ago
on
January 14, 2019

If you enjoy improving your home and are looking to add value to the property, while also providing a new level of comfort, there are many ways to do this. Of course, you can't do everything at once and by prioritising your projects, you can gradually add features, as and when you are ready. If you are planning for next year's home improvement projects, here are a few great ideas that will boost the value of your home, while providing you with a new level of comfort.
Permanent Shading Solutions
The garden is an integral part of the living space for most of the year and shading is an essential requirement. Rather than mess around with that old rope and pulley system, why not install a state of the art folding arm awning? There are established suppliers of folding arm awnings in Melbourne who tailor the units to fit perfectly and with motorised solutions, you have effortless adjustment. A wide range of rich fabrics offer stylish and elegant shading that blends in with your home, and as the units are fabricated to fit the terrace, you can be sure of a first-class installation.
Plantation Shutters
If you want to add some character to your home, made to measure plantation shutters will do the trick. With a choice of real timber or composite materials, plantation shutters allow you to decide how much shade and privacy you want, and by dealing with an established provider, you can examine the many design options. Aluminium shutters are an ideal choice; easy to keep clean and there are some stunning powder coated colours to enhance your interior. If you would like to explore the potential that plantation shutters offer, there are online companies that can easily be found with a Google search, and they would likely send a technician to your home to discuss the many options.
Aluminium Roller Shutters
The ultimate in home security, made to measure aluminium roller shutters offer the homeowner a whole host of benefits – aside from the obvious security – roller shutters greatly improve thermal and sound insulation, and storm damage is a thing of the past once you have roller shutters installed on the windows and doors. With a choice of motorised or hand cranked units, roller shutters are designed to blend in with the surroundings, with slimline frames and the internal mechanism protected in aluminium casing. Auto locking ensures you don't go out and forget to fasten the shutters, and whenever you are away on holiday, you can rest assured that your home is safe.
These are just a few ways in which you can improve the home, and by searching online for local suppliers, you can quickly get the ball rolling. Permanent shading in the form of a folding arm awning would be high on the list of priorities, and once that is covered, window shutters would complete the look.
General Gardening
Super Easy Homegrown Foods You Should Plant Now
Published
3 years ago
on
January 4, 2019
Introduction:
We are all caught eating junk and fast food almost all the time. The toll it takes on our health and bills are significant if you look at the accumulated costs at the end of the year. Going green is the best option we have these days. Given the nature of the planet's health along with our individual health, we ought to start taking better care of ourselves. The benefits and profits are far more than the effort required. Like growing your own food. Imagine saving all the costs you could on food and be sure of its quality because it literally grew on your own backyard.
Top Tips for Homegrown Food Items:
You can have a long list of items that you can grow in your own home. You just need to get a sense of what it takes to be a good gardener and you'll be eating your homegrown delicious vegetables in no time. You can also have a digital setup with smart devices that can take care of the plantation for you. For which, you can also have apps on your phones that allow you to monitor their growth and health so you can leave them without a worry.
Items to Grow:
Potatoes:
When you are planting potatoes, make sure you do so in February or March. Potatoes are healthy and they can make for a great side vegetable that can be added to any dish to make it worthwhile. Potatoes are grown in potato bags. Add compost to the bag and keep adding compost when you see buds shooting up from the ground. Patience is the key with all vegetables and after 10-20 weeks, you will start to see the foliage die back. That's the time you should dig up the soil and get your potatoes.
Peas:
If you are looking for an evergreen veggie, you should try Peas. Not only are they available all through the year, they only take 2-3 months to grow. Although some experts would advise a chicken wire or something similar to make the stem erect. Peas are nutritious, tasty and go well with other ingredients.
Spring Onions:
Spring onions are known for making any salad crunchy and enjoyable. One problem with Spring Onion plants is that they can be a target of onion fly but if you plant mint near it, that should resolve the issue. These plants can be grown in pots as well as under the ground. Try sowing them in March to provide favorable conditions. You can expect the onions to be ripe in about 8 weeks. You should let them flower before you harvest.
Conclusion:
Use enhanced tech to help you grow your own food. You can search online for smart sprinklers and monitor systems and read reviews like mobicip to get a better understanding of the kind of tech that's available these days. Let's use our tools to save ourselves rather than to amuse ourselves.
Indoor Gardening
Easy Ways To Incorporate Plants Inside Your Home
Published
3 years ago
on
December 28, 2018

More homeowners these days are discovering the benefits of decorating with plants, and literally greening the home has been on trend in recent years. Besides adding glam and color to your home's aesthetics, another advantage it provides is wellness. They give off oxygen while absorbing carbon dioxide, and helps purify the indoor air you breathe.
When decorating with plants, it's worth keeping these five tips in mind:

- Group pots of greenery in odd numbers for a casual look. The symmetry of an even-numbered grouping makes the arrangement appear more formal.
- To add interest, mix plants of various shapes, heights and widths.
- Color choice depends on your preference. Similar hues provide cohesiveness but if you're aiming for variety in your décor, opt for foliage featuring different colors.
- Like plant color, pots can be expressions of your design taste. You can have a set arrangement using plant containers of the same color and texture, or use variety to lend a more eclectic ambiance.
- As living things, plants have preferred conditions. Be aware of these needs and make them part of your houseplant care routine. Some thrive in a moist environment while others like lots of light.
Decorating with houseplants
Incorporating plants in your décor is not that difficult to do. Try bringing nature inside your home with these simple but stylish suggestions.
- Empty corners in your home can be tricky to decorate, and plants provide a way for you to get creative. Putting indoor trees like yucca and ficus in colorful Huge Commercial Planters takes care of the awkward space.
- Don't throw away old dinnerware. Instead, use these to create tiny indoor gardens in your home. Arrange different kinds of succulents in a soup tureen, teacup or glass and top the soil with colored marbles to add more charm.
- Think of indoor plants as living sculptures or artwork. Let them cascade over vessels to lend a sense of movement to your living room.
Alternatively, mimic a still life painting with an assembly of tiny succulents. Combine round and pointy shapes with shiny and matte surfaces, tying them together using a specific color scheme.
- Create a green haven within your bedroom by trading one of your bedside lamps with a pot of fern or peace lily. Adding a sturdy plant in a sunny corner provides freshness. Greenery in the bedroom can help absorb pollutants from the air so that you breathe in purer air every time you get your beauty sleep.
Plants are an affordable way to freshen up your interiors. Whether your style preference is modern, traditional, minimalist, or eclectic; there is greenery to match it. Different species provide you with a range of colors, textures, and shapes to choose from. When you incorporate plants in your design, you not only breathe more life into your home but also enjoy the healing properties they provide.
General Gardening
Ways You Can Protect Your Garden and Keep It Healthy
Published
3 years ago
on
December 25, 2018

There are so many wrongs things that can happen to your garden. You will lose all you have worked hard to build if you are not careful enough. You need to take some precautions to keep your garden healthy and productive.
You also need to protect your garden from pests, frost and freeze on winters. This article will give you general tips to help you take care and protect your garden:
1. Weed Control
Weeds compete for nutrients with your crops, thus your crops might not do well. They also make your garden look untidy. There are several methods you can use to keep weeds off your garden. Some of the methods include mulching, use of chemicals or you can use the weed control fabric. The weed control fabric may not apply in all situations but it will surely help. There are other natural methods of removing and controlling weeds from your garden. Pick one that is effective and affordable for you.
2. Apply Well Decomposed Manure
Always ensure that the manure you use for your garden is fully composted. The benefits of using well composted manure is that it produces high temperatures that help kill pathogens in the soil. When it is not fully composted, it may introduce bacteria or diseases to the soil that may harm your crops. For example, when an infected plant is not fully decomposed, the infection is carried back to the soil.
3. Water Regularly
It is important that you water your garden regularly to keep your plants healthy and lush. However, you need to ensure that you are doing it well. The pathogens and bacteria in the soil also need water to grow and multiply. You should water your crops at the root level only.
4. Use the Row Cover
Having a garden row cover is a clever move for your garden. It helps shield and protect your garden in so many ways. The original use of the row cover is to protect your garden from frost and freeze during winter. The thick fabric is used to protect the garden from frost and freeze. It can be used to shield your garden from pest and insects. You can use the lighter fabric row cover to keep off the insects. In summer, the garden row cover is used as sun screen for crops. Remember to leave the garden with enough air circulation when using the row covers. Additionally, they help prevent instances of cross pollination. This is important if you are keen on the variety of crops you grow.
5. Always Apply the Right Fertilizer
Applying too much or the wrong fertilizer will not only damage the soil, but it might damage the roots of the crops. This affects their ability to absorb water causing low yields. Know the type of soil in your garden and the suitable fertilizer to apply.
Proper care and maintenance of your garden will give you great yields. Most of these methods and tips are inexpensive. These tips will help you to take care of your garden.
Pest Control
Mosquito Foggers
Published
3 years ago
on
December 25, 2018

Nasty mosquitos can be one of the problems in a home. When they sting its itchy and may cause diseases. The foggers are handy in ridding them. They create a fog when the insecticide solution is sprinkled. The fog is able to penetrate into the depth of grass, trees and bushes making them the best alternative. Here are foggers worth trying; –
Burgess 1443 40-ounces Outdoor Propane Insect Fogger
This propane fogger is a reliable product. It is a thermal fogger making it suitable for outdoor use. It is effective in killing even in damp and marshy regions. It holds up to 40 Oz and uses the insecticide without wastage. The fog does not damage trees or shrubs when droplets fall on them.
Tri Jet ULV Non-Thermal Flogger
The fogger is easy to set up and use and operates using electricity. Though it has not become very popular the few customers have expresses satisfaction in its effectiveness. The fogger can be used for both indoors and outdoors purposes. It is effective in eradicating mosquitoes, molds, spiders, roaches and bugs. It sprays 4000 sq. ft of territory and has a tank volume of 1 gallon, the approximate insecticide needed for 1000 sq feet is 1 quart of the insecticide. The fogger sprinkles up to thirty feet. After spraying the fog covers the area to up to 25 to 30 mins. One defect is that it is expensive.
Bonide420 Fog-Rx Propane Insect Fogger
This propane powered fogger is effective in getting rid of mosquitoes and midges. It is easy to operate and fast acting giving up to 4 days of mosquito-free time. However, it requires safety measures as the flogging fluid can shoot flames mosquito foggers.
Burgess 960 40 oz. Outdoor Electric Insect Flogger
It the successor of burgess 1443 however it uses electricity instead of propane. Very effective for outdoor use. A compatible insecticide is recommended for use. Treatment may last 3 to 5 hours or longer offering protection by vaporizing the insecticide killing mosquitos and other biting insects. Dissatisfaction by the users has been expressed, stating that it does not have any effect on the number of mosquitos.
BEAMNOVA Mist Duster Blower Spray Gasoline Powered Mosquito Powered Cold-Fogger Backpack Sprayer
Its engine operates using petrol. Not only can it be used as a fogger but also can also be used in pest control. It can also be used with both liquids and dust. Users feedback is positive, it is highly recommended for its speed and works without any mechanical issues. However, it is expensive and assembly manuals, to others, may not be so helpful.
Aerosol fogger
Are simple and easy to use. There are very effective outdoors and kills mosquitos on contact when sprayed effectively.

Black Flag 190255 fogging insecticide works with a variety of foggers such as black flag, burgess, and repel thermal fogger. When sprayed it kills the mosquitos and offer protection few hours up to 3 days. It's well for use.
Hope the information above helps!
Greenhouses
Greenhouse 101: 3 Useful Tips Every Beginner Should Know
Published
3 years ago
on
December 19, 2018

Invest in the correct seed starting supplies for your greenhouse.
If you're looking for a gratifying hobby, cultivating your own plants in a greenhouse may be right for you. To ensure your success as a beginner, checkout the following tips:
Before you get a start plotting out your growing schedule, buy the correct materials. For starters, purchase the following basics:
- Seeds or starters
Seeds are the most cost-efficient option for newbies. You may also avail of starters that are sold at plant nurseries.
Make sure that you're choosing durable and disease-resistant plants. Cultivate plants that are easy to care for and won't die easily. Here are a few examples:
- Amaranthus
- Aster
- Basil
- Cabbage
- Carnation
- Cucumber
- Roses
- Containers
You need suitable containers for growing your plants. Check that the containers you choose are deep enough to contain the plant's root system. Otherwise, your plants won't thrive. Additionally, make sure you sterilize your containers properly before using them.
- Sterile soil
Do not plant on unsterilized soil as it may contain parasites and bacteria that will harm your seedlings. If you still prefer to use soil that's collected straight from the ground or used before, sterilize it. The best option, however, is to invest your money and buy fresh sterile soil.
- Fertilizer
You'll need fertilizer to boost the growth of your plants. Note that most of the commercial soil being sold in stores already have nutrients in them to feed plants for approximately three weeks. So, be careful not to overuse fertilizer when you're beginning. To be safe, give fertilizer a little bit at a time. You may start by giving a diluted fertilizer solution and then slowly strengthen the solution per week.
- Wear appropriate clothes and footwear for gardening.
Make sure to choose clothes that are fit for gardening chores. Interestingly, you have to avoid wearing bright-colored outfits because these attract insects that will follow you inside your greenhouse.
Make sure you wear gardening boots that properly protect your feet while you work in your greenhouse. Check out online sites such as workboothub.com for a list of the best gardening boots you can choose from.
- Install an adequate lighting system inside your greenhouse.
In late spring up to the summer months, sufficient light will reach your plants in the greenhouse. If you want to plant year-round, you need to invest in a supplementary lighting system so that you can continue to cultivate healthy plants all throughout autumn and winter.
When you're starting out and have a small crop, a regular fluorescent strip hung 3 to 7 inches over your plants will be enough. Once you have a bigger area, upgrade your lighting system to LED grow lights. These are quite the popular choice as they conserve energy while lighting up larger areas.
Follow these basic tips and continue to research the best practices for making your greenhouse thrive. The effort you put into your very own greenhouse will definitely be worth it!
General Gardening
Tips for Gardening During the Colder Months
Published
3 years ago
on
December 11, 2018

If you thought your gardening skills would be put to rest during the winter, you were wrong. Your plants need you more than ever in order to survive Winter. While some plants are sturdy and capable of surviving a freeze, others cannot. Give everything in your garden a fighting chance to make it through even the coldest winter.
Keep Your Plants Warm
When plants freeze, their cellular design is damaged. This often results in death. Avoid this from happening by keeping your plants as warm as possible. At night, consider covering your plants with straw or fleece. Uncover them during the day so they absorb plenty of sunlight.
Trees, especially those designed to survive cold weather, are still susceptible to damage. Instead of worrying about their leaves, it's more important to keep their roots warm by pouring a thick layer of mulch around the base of each tree.
If you have especially tender plants in your garden, they should be transplanted to a pot. This way, you can easily move them indoors to a warmer environment such as a winter greenhouse until the temperatures outside rise once again.
Prepare the Lawn
During the winter, your lawn becomes very vulnerable. Avoid running and playing on it as it may damage the surface. Instead, make winter a time when your lawn gets to rest.
It's also important to fertilize your lawn during the winter so that it gets enough nutrients to thrive. If you saved all of the leaves and trimmings from autumn, then you should have a hefty compost pile. You can also bring in additional loam to ensure your lawn is properly cared for.
Bring in More Trees
Plant new varieties of trees and shrubs in your garden. The soil should be perfectly moist for new roots to grow deep into the ground. Choose species that are known for being hardy during the cold months, like evergreens.
Add mulch around the seedlings to keep them warm and protected. If the weather gets too windy, it may be necessary to tie the tree to a stake for additional support. Any snow or ice should be gently removed from the branches as soon as possible.
Care for the Birds
Birds and other wildlife are vital to the health of your garden. Beautiful to watch, they also eat insects that may otherwise damage your plants. That's why you should place some feeders around your property. You'll be pleasantly surprised by the assortment of winter birds flying into your garden for a meal every day.
Temperatures are dropping so do not ignore your garden. In fact, you need to spend even more time tending to the needs of your plants to ensure they survive until spring.
By taking the necessary steps to carefor your garden now, you're sure to have a beautiful, blossoming garden comewarmer weather. If you need any tips, look for a local tradesman skilled at gardening.
Click Here for a Free Garden & Greenhouse Magazine Subscription
Click Here for a Free Garden & Greenhouse Email Newsletter Subscription
Indoor Gardening
5 Reasons Why You Need an HVAC System for Your Grow Room
Published
3 years ago
on
December 6, 2018

If you have decided to flex your green thumb on an indoor basis rather than outside, you've likely given a great deal of thought already to the prospect of building a grow room. This can be conducted in various spaces throughout the home, depending on the size that you need. Some people are fully satisfied with a closet-sized space, while others require an entire master bedroom to conduct their growing operations.
One thing that remains consistent in any of these situations, however, is the necessity of recreating a natural environment for one's plants. This includes lights and water sources, and also a fair amount of HVAC-related tech. While the necessity for ventilation is well-known in these circumstances, what's lesser known is exactly why this is.
Airflow
You've probably been in a room with no airflow before. No windows to open, no fans to run, making the air stifling and thick. This isn't fun to deal with, and it's no fun for your plants, either. Adequate airflow mimics the air that they would receive if they were growing naturally (i.e. outdoors), which can strengthen the stems of plants as they grow.
Temperature
When growing indoors to keep your business private or simply to produce a greater yield than you could with whatever outdoor space is available to you, monitoring the temperature of your grow room is key. Grow lights throw a substantial amount of heat, but it's important that the room not be made too hot by the temperatures produced by your lighting-system. This can be alleviated, to a degree, with the implementation of lights that throw a bit less heat.
Humidity
The humidity in the air is another thing that you will need to pay diligent attention toward if you are trying to grow anything inside. Excess moisture in the air, paired with the heat given off by your growing equipment, can result in mold and completely ruin your crop. A properly installed HVAC-system will remove extra humidity in the air and make it easier to keep track of the humidity levels in your grow room.
Ventilation
Chances are, you want to avoid making the outside of your house reek like the inside of your grow room. The most effective way to minimize or even eliminate this issue is to install a ventilation system that will filter out the smell of your growing crop. You'll also want an HVAC-system with a high-quality MERV 13 filter that will keep the air in your grow room as healthy as possible-a plus for you and your plants.
Technology
Growing-indoors means that there are a lot of specific steps that you must take to ensure a proper growing environment. Essentially, one must synthesize the environment of the outdoors (particularly from a region wherein the plant grows especially well). This means that there is a lot of tech going into this project, and you want to get the most out of it.
General Gardening
Essential Heavy Equipment For Your Garden Maintenance
Published
3 years ago
on
December 3, 2018

 Do you find yourself always tending to your lawn and keeping it neat? Gardening is one of the most therapeutic hobbies you can do at home. Some people even level up their landscaping hobby by purchasing tools and types of machinery to grow and cultivate their plants properly. Gardening can be tedious if you get into it seriously and you'll need some extra help using heavy equipment to maintain your garden.
Here are some of the essential heavy-duty equipment you might want to start using:
-
Skid-steer Loader

A skid-steer loader consists of heavy equipment parts like wheel bearings and loader-arms. It can also have various attachments depending on the kind of work you want to do – if it's snowing, you can clear out the snow in your yard with a snowblower attachment or if you need to do excavating jobs you can attach a backhoe to it.
For a typical homeowner, a small-frame skid steer is best in doing landscaping, hauling, and moving garden materials. Since it is lightweight and compact, it's easy to maneuver around. It's a base motor equipment for several heavy-duty tasks and its versatility can save you more money in the long run.
-
Landscape Tiller
Having a cultivated soil is always best for making a great garden for your backyard. Your soil is the foundation for creating planting beds to growing your vegetation by having it neatly leveled, graded, and pulverized.
You will need a landscape tiller to make your soil ready for planting – it needs to be broken apart due to rocks, weeds and mostly compacted soil that's hard to tackle. The tiller will do the heavy labor for you; it will also mix up the compost so that your land will be conducive to planting your flowers, vegetables, or even Bermuda grass.
Seasons change, and you need to grow several different kinds of plants that go with it, and tilling the soil makes it easier for your plants to grow abundantly.
-
Lawn Tractor
Mowing is an activity you need to do to keep your yards neat and trimmed. If you're just starting to landscape your residence, you may want to purchase a small lawn tractor. These are often called ride-on lawnmowers which are motorized and are suitable for medium-sized lawns going up to an acre.
These types of mowing tractors have advanced features, a wide-array of adjustable cutting decks, and come with better engines. Research on what kind of tractors are right for your area and this will definitely be an excellent investment for you.
Conclusion
Your garden, an outdoor space in your house, is in need of tender loving care throughout the year. Weather changes from time to time and it may affect your soil and plants; you need to prepare yourself in doing hard labor for a number of times to maintain your landscape. Gardening is not a simple task, but it's worth doing when you see your flowers bloom in your backyard.
General Gardening
A Homeowner's Guide To Shed Organization: The Do's And Don'ts
Published
3 years ago
on
November 26, 2018

 Your shed is a beneficial part of your property, but it is usually overlooked and undervalued. It is where homeowners store unused items, tools, supplies, and anything that won't fit inside the house, so things get quickly out of control if you're not aware of the do's and don'ts of shed organization. Let's get started!
Shed Organization – Do's
-
Determine If DIY Or Ready-Made Garden Sheds Are Right For You
While you can save creating your DIY shed, why not look at great garden sheds online? These are ready-made are now available to make your life a lot easier. It is crucial to have a well-designed garden shed because it usually stores dangerous substances. Ready-made garden sheds are engineered and built by professionals to ensure that homeowners will have less hassle organizing their stuff. If you're ready to get organized, make sure that your existing shed can handle order. If not, invest in a new one.
-
Organize With Shed Shelving

Shelving is an essential aspect of shed organization. Before you start piling things in your shed, be sure to have an adequate number of shelves. Organize the items according to what you use the most. For example, you can store everyday tools within easy reach and somewhere where you can easily see them. Stow rarely used items on top. To prevent nasty incidents, put bulky or heavy items at floor level.
-
Declutter Your Home
In your free time, it would be nice to declutter your home to get rid of the things you need to throw away. Sometimes we store unwanted items in our shed thinking that they can still be used in the future. However, they may get damaged over time, rendering them unusable. Remove residential rubbish as early as possible to prevent accumulating trash in your shed. You can always repurpose old cupboards and shed furniture to save money.
-
Use Shovel Racks
Your hardware and cleaning tools, like forks, spades, hoes, and brooms are all necessary, so you need to organize them in a shovel rack. You can create a shovel rack from a piece of plywood with slots or using an old pallet. Attach the shovel rack securely on the wall.
-
Use Pegboard

Attaching pegboard on the walls enable you to hang all types of tools, making them accessible and also saving space. You can hang your power tools, hand tools, sprinklers, hoses, paintbrushes, and gardening shears. Make your pegboards fun and bright by painting them with different colors which also serve as codes for tool organization.
-
Use Household Items For Storage
Small metal items, such as screws, clips, pins, nails, bolts, and other hardware bits can be stored in repurposed mason jars. A door shoe organizer is a good place to store your seed packets.
-
Use Hooks
Hooks are your best buddies in your garden shed. You can use them to hang tools such as secateurs and  trowels. Hook your tools on a shower curtain rail, old palette, or a window frame.
-
Use The Ceiling
Convert ply boards into a useful space or shelving up top. You can hang your big bikes from the ceiling so that you can reclaim some floor space. You can even use an old PVC pipe as a fishing rod holder.
-
Use Magnets
Magnets can do wonders for shed organizing. A magnetic tool holder and magnetic knife rack can store pliers, files, screwdrivers, and other metal tools.
-
Hang Your Garden Hose
You can make a perfect hose hanger out of an old bucket or cable-spool. A wall-mounted cylinder or an old car wheel can be converted into a hose hanger. By doing so, your garden hose is accessible and ready whenever you need to water your geraniums, organic veggies, and all sorts of your plants in your greenhouse or garden.
Shed Organization – Don'ts
-
Store Paint
Storing paint in your shed will leave it unusable over time due to temperature fluctuations. Store paint in dry places where the temperatures are low, such as closet indoors or basements. Contact your local recycling agency to dispose of old paint.
-
Store Pet Food And Paper Products
Paper products, such as napkins and paper towels, and pet food can attract rodents and bugs. Store these products separately and away from high temperatures.
-
Use Your Shed As A Dumping Area
Immediately dispose of trash and don't dump unused items in your shed. If you're 100% sure that items are not usable anymore, it is best to get rid of them.
Conclusion
Organizing your shed can be fun and exciting, allowing you to use your resourcefulness and creativity. There are many things you can find at home that can be repurposed as shed organizers. While you can create your DIY garden shed, you can always purchase ready-made garden sheds online if you're too busy or don't have the interest to build one. Every home repair and maintenance activity is made easier and faster if you have a well-designed and organized shed. Happy organizing!
Home Care & Living
Care & Maintenance for Outdoor Furniture
Published
3 years ago
on
October 29, 2018

 If you've invested a lot of money in outdoor furniture, or you are thinking about buying a new outdoor item, you should know how to maintain and care for it to ensure its longevity. Due to its location, outdoor furniture is more prone to deterioration. If you keep to a schedule and clean your furniture on a monthly basis, it helps maintain a good appearance and makes your furniture last a lot longer.
Wicker Furniture
You'll find some lovely pieces of outdoor furniture made from wicker, to ensure you keep these items looking great, you must maintain them in the best way possible. Outdoor wicker furniture can be easily cleaned using a garden hose or pressure washer. All you have to do is remove the cushions and spray away excess dirt. There may be some stubborn stains on the furniture, so it is advisable to use warm water and soap to tackle these areas. Once the wicker has dried, you can apply a wax to the frame to protect the furniture, if your wicker isn't water-resistant, you'll need an added layer of protection.
Metal Furniture
Metal furniture is very easy to care for and maintain, it is highly durable and simple to keep clean. Most types of outdoor metal furniture like wrought iron and aluminium can be cleaned using soap and water, they don't require any special type of cleaning solution.
Modern outdoor metal furniture is coated with a protective adhesive, this is designed to protect the material from rust and corrosion. If you purchase outdoor furniture in Melbourne from a reputable supplier, the items should be rust-free and rust-resistant. If the metal isn't, you'll need to buy a wax adhesive from your local hardware store to protect the material. If you don't take steps to protect the metal, it will start to corrode and lose its visual appeal. Corrosion can affect your furniture's structural integrity, making it dangerous to use.
Fabric Furniture
This type of outdoor furniture does require a little extra attention, it isn't as durable as other items on the market. Some types of cushions gather mildew, while others are mildew resistant, it all depends on where you buy your products. If you need to clean them, you'll have to use bleach and solution to keep them looking new.
Umbrellas
Many homeowners forget that umbrellas need to be cleaned and maintained on a regular basis. Umbrellas are great for several reasons, they help to protect other outdoor furniture by providing cover from the sun during the hot summer months. If they've been in storage, they'll need to be thoroughly cleaned once opened out. It is important to oil the joints and wash the cover using a soft-bristled brush.
If you plan on looking after your outdoor furniture and keeping it looking great well into the future, you must clean and maintain each part. Outdoor furniture is a great investment, especially during the summer months when you can really enjoy the weather. If you fail to maintain your furniture, it will quickly degrade and lose its visual appeal.
Greenhouses
Deep Clean Your Greenhouse
Published
3 years ago
on
October 25, 2018

Plants love the warm, humid, cozy protection of a greenhouse. The problem is that pests and diseases do also. We have to get rid of them to keep our precious plants healthy. A deep cleaning does not only that but also improves the overall aesthetics of the greenhouse. It's a job—there's no doubt about that, but it helps if you break the chore down into the simple steps below rather than careen from one task to another and back again. Luckily enough, the folks at HousewaresInsider.com have compiled a short list of handy steps to follow.
Clear Out
That would be everything: plants, soil, weeds, debris of any kind, containers, equipment, clutter that somehow made its way into your greenhouse. There can be no place for any creepy crawlers or pathogens to hide
Sweep
"Shop vac" or sweep down walls, internal structures and peripherals, such as tables, benches and containers. Start at the top where dangerous organisms lurk in such places as rafters and window ledges. Clean the floor of the assorted debris that gathers there: soil, organic matter, weeds, broken pottery shards.
Scrub
Now scrub or power wash everything. If you use soap, be sure that it is a gentle, natural soap that leaves no residue. Otherwise, rinse very thoroughly to remove any residue. Hydrogen peroxide-based products are both user- and environment-friendly. Garden disinfectants work fine, as do specialty greenhouse cleaners combining sulfuric acid and wetting agents. Whatever you use, it is of utmost importance that you follow manufacturer's directions.
Wood tables and benches and any concrete areas (and, actually, any textured surface) need special attention. They are favorite places for root rot diseases, algae and insects to breed. If you are going to reuse containers, clean thoroughly to remove all soil and debris even if there has been no problems with disease.
Let the Sun In
Plants need all the sunlight they can get. Keeping the glass clean is a "must do." Begin by lifting of any moss or algae with any utensil that won't scratch the glass, but you really can't beat those plastic plant labels that can get into every crack and crevice. Wash the glass with a firm brush and a mild all-purpose liquid cleaner that doesn't need rinsing. Open the windows to speed up drying and give the hinges a quick fix of WD-40 while you're at it.
Clean Gutters and Water Butts
To clean the gutters, put on rubber gloves and scoop out the accumulated debris. Use a wire coat hanger to "ream out" the top of fall pipes. Then use the hose to sluice away the remaining dirt.
To clean water butts, tip over to drain out any standing water. Scrub out the inside with a coarse brush and rinse with clean water.
Maintain
Are you ready to resolve to keep the greenhouse clean? Not only to save yourself work but also because it's easier and less expensive to prevent insect infestation and diseases than to deal with them once they have settled in. Some routine preventive measures:
- Sanitize tools, containers and equipment immediately after use,
- Wash your hands prior to contact with plants, soil or equipment,
- Wash your gardening gloves after use,
- Keep a pair of shoes or boots to be used only in the greenhouse,
- Keep plants (and the floor) free of weeds,
- Toss diseased plants immediately, and (believe it or not)
- Avoid bright-colored clothing, especially yellow or blue—you'll attract insects who will "stalk" you right into the greenhouse.
Landscaping
Why Tree Lopping Should Be Avoided
Published
3 years ago
on
October 16, 2018

Trees are an essential component to any outdoor area, as they provide essential shading and screening, not to mention a healthy dose of greenery that gives the garden texture and depth. Most Australian homeowners are familiar with the term "tree lopping" and while you might think that lopping is something to be carried out at certain times of a tree's life, research suggests that this practice is actually harmful to the tree.
Definition of the Term "Lopping"
For many people, tree lopping can mean any of the following:
- Tree Pruning
- Branch Trimming
- Tree Shaping
According to the Tree Protection Act of 2005, it is illegal to lop a tree, and their definition of lopping is to make cuts at the fork of a tree between the branch unions, while the correct practice, pruning, is to cut branches after the union, which allows the tree to develop in a healthy way. Lopping a tree is likely to cause severe xylem dysfunction and decay in the major branches of the tree and this will result in the tree forming a layer of new wood around a decaying core, which can be very dangerous.
Mature Trees and Lopping
If a mature tree actually survives the lopping process, it will require very careful management as the tree develops, with extra weight being added by the new growth, while the dysfunctional inner core is not able to hold this extra weight. Rather than cutting off a main branch, the branches that run off the main bough can be trimmed back to a point just after the branch union and this achieves the objective, yet does not harm the core sections of the tree.
Eco-Friendly Tree Care
If you think your garden trees need some attention, source an eco-friendly arborist and one that understands that tree lopping is not advisable under any circumstances. If the tree is in a bad condition, perhaps removal is the best solution and with stump grinding, all remnants will be removed and you can use that patch of ground for something else. While there might be many companies offering tree lopping in Perth, look for one that complies with the Tree Protection Act and therefore does not practice tree lopping – which is also known as tree topping.
Tree Pruning & Shaping
A qualified arborist will employ pruning techniques to reshape a tree or remove dead branches, which is not harmful, in fact, correct pruning promotes healthy growth. An arborist would know how a tree can be cut back without causing damage and always has the tree's best interests at heart. Shaping can be carried out in such a way that the removed branches will not hinder healthy growth and rather than simply taking away branches to achieve the desire shape and size, the arborist will only remove what he can without harming the tree.
Specific Exceptions
There are cases when tree removal is not the best solution and if the tree is old, then lopping is a manageable way to help the tree finish its lifecycle. The lopping would be a precursor to removal, which might be scheduled a few years from now, yet the instances when tree lopping is suitable are rare indeed.
Safety First
Large trees can weigh anything up to 50 tonnes and lopping such a tree could very easily put people and property at serious risk. There would be no outer signs of a problem, as the core timber is decaying slowly, and with so much weight to support, some species simply crack under the strain, sending a bough of a few tonnes crashing to the ground.
Once you have managed to locate a qualified arborist, it is advisable to let him schedule any tree work that needs to be done. He would know the best time of the year to prune back and would ensure a balance of natural beauty and good health.
General Gardening
Is it Safe to Garden Near your Septic System?
Published
3 years ago
on
October 10, 2018

Food is the source of survival for every living thing. Yet, if contaminated, it can become the foundation of sickness, caused by bacteria. This can happen when food is grown in contaminated soil. Is it safe to garden near your septic system? No, it is not safe for vegetables. The water and wastewater measurement are too difficult for the non professional gardener.

Illnesses caused by foods planted near or on septic systems:
- Cryptosporidiosis
- Shigellosis
- coli
- Campylobacteriosis
- Gastroenteritis
- Encephalitis
- Hepatitis A
- Giardiasis
- Leptospirosis
- Salmonellosis
- Typhoid Fever
What are some problems that might develop from vegetables planted around or on a septic system?
Too many of these illnesses have occurred throughout history to ignore them, or the environment that causes them. Vegetables may flourish with any kind of fertilizer. Yet, that does not mean it is good for the body. Pollutants grow into food and food goes into the body. Therefore, you want to keep the food healthy from the seed.
Plants can get rain-splashed soil from the contaminated area. It is necessary to wash any plant before cooking. However, a plant touched by septic bacteria may not respond to washing and bacteria may spread to other parts of the home.
Some plants help septic system absorption. Plants that are not deep-rooted assist the system without choking septic lines. Plants take nutrients, and this helps the soil absorb better. However, choose plants carefully in order to avoid destroying the septic system, which will cause expensive repairs.
Will Plants Become Infected by Contamination?
This is something home gardeners are usually not equipped to decide. Clay soil provides good absorption. Therefore, a bacterium is unable to move very far from the septic area. However, sandy soil is not as accommodating, and contaminated materials move further. Since sandy soil does not provide the same level of absorption that clay, soil does. Contamination danger is increased. There are few people planting gardens who are soil experts. However, some are just beginning to try at gardening and need assistance with finding the right spot to plant vegetables.
Will septic chemicals harm plants near the septic tank?
If plants are kept above the ground, and there is no danger of splash. You can grow them in a septic system area. It is possible to put mulch around the plant so there will be no splash. However, rather than risk contamination, it is better not to grow leafy veggies. Plants placed on structures that keep them above the ground can be grown. However, if you are a lazy gardener and let plants grow any way they like, it would be better if you kept vegetables away from septic system areas.
Grocery stores and cooking shows are filled with beautiful produce. They make growing vegetables look so easy. Nevertheless, bacteria catch the professionals off guard while growing vegetables. This is even more reason to stay away from planting vegetables near septic systems.
Home Care & Living
Building your Dream Home? 5 Reasons to Choose Hybrid Flooring
Published
3 years ago
on
September 27, 2018
If you are planning on building your dream home anytime soon, your thoughts will invariably turn to flooring materials sooner or later. You might prefer solid hardwood floors or perhaps Italian marble, but if the budget simply won't stretch to top end flooring, the next best thing is hybrid flooring, which is a combination of vinyl and laminate. Hybrid flooring is fast becoming the floor material of choice for Australian homeowners and when you consider the many benefits, it's hardly surprising.
- Stunning Range of Finishes – Technology allows for a high-resolution digital image to be digitally printed onto a very thin membrane, which is just under the outer protective layer of the hybrid flooring. The wide range of finishes includes many timber grains, such as oak, ash, pine and walnut, while marble, granite and travertine finishes are ideal for lovers of stone. The finish is scratch proof and waterproof and very easy to keep clean, making it an obvious choice for Australian homeowners.
- Completely Waterproof – The core of the hybrid flooring plank is made from a mixture of resin, bamboo dust, limestone and virgin PVC. With a solid timber floor, one is always worried about a liquid spillage, yet with hybrid flooring, you can absorb all of the liquid with a sponge or some thick tissue.
- Soft and Silent – Thanks to a thin cork underlay that is attached to the underside of the hybrid plank, the flooring is both soft and silent, making for the perfect walking experience. This cork layer absorbs any slight movement and also acts as an insulator, preventing moisture rising up from the substrate. Once the floor has been professionally laid, there will be zero movement and sound, and with super scratch resistance, you have an elegant, yet extremely durable floor surface.
- Great Value for Money – When you consider that you can have the looks and durability of solid timber or stone for a fraction of the cost, it isn't hard to understand why hybrid flooring has taken the market by storm. The surface is protected by a specially formulated, scratch resistant outer membrane and the material is incredibly durable.
- Easy Installation – Hybrid flooring can be laid on any substrate and it comes in plank form, which is as easy to cut as timber, and with every length having a special cork backing affixed, there is no need for underlay. It is advisable to order from a supplier who will install the flooring, thus ensuring a smooth and trouble-free installation.
Hybrid flooring is ideal for high traffic areas like the kitchen and hallway and as the flooring is completely waterproof, it is the perfect choice for the bathroom. If you would like to know more about hybrid flooring, an online search will help you to locate a local supplier and with their help, your dream home will be complete.
Landscaping
3 Essential Steps to Keep Your Lawn in Great Condition
Published
3 years ago
on
August 31, 2018

Creating and maintaining a beautiful garden takes hard work and dedication, but the results are certainly worth it. Great gardens come in all shapes and sizes, and contain a number of elements, but at their heart is always one thing of especial importance: the lawn. Your garden lawn should always be the centerpiece of your garden, so if it looks damaged or out of shape, the garden as a whole won't be seen at its best. Don't worry, we've come up with this handy three-point guide that will help you get a lawn you'll be proud of all year round.

Optimal Watering
We all know that lawns need watering, especially during the hot, dry months of summer, but just how much should you water them and exactly how should you water your lawn? The first thing to note is that the soil type will determine just how much watering it needs, with sandy clay soils needing less watering per session than heavy clay soils, but as it holds less water it will need watering more frequently. Generally speaking, your lawn will need at least an inch of water per week during cooler months and an inch and a half per week at the height of summer. It's also best to water your lawn in the early morning hours, particularly during the summer when hot temperatures can cause water evaporation before it sinks into the clay beneath the grass.
Lawn Aeration
Aerating your lawn is a simple process, but when done correctly the results can be spectacular. Put simply, aeration is the act of punching holes in your lawn, and this is especially important if your lawn sees heavy usage. Over time, a lawn's soil becomes increasingly compact, making it difficult for water to drain away and for it to receive the air and nutrients it needs to thrive. By making holes of approximately three inches in depth, the soil has room to move and breathe, and this leads to a much healthier and vibrant lawn. Aeration can be done by hand or via a special aerating machine, and it should be done at least once a year to soil that's relatively dry.
Use Organic Fertilizers
It's important to fertilize your lawn if you want it to stay looking great throughout the seasons, but some fertilizers contain harsh chemicals which can be harmful to you and your family, wildlife, and plants. That's why we recommend the use of natural, organic fertilizers, and as an added bonus a recent study into the effectiveness of lawn fertilizers by the prestigious Texas A&M University found that organic materials worked better than synthetic ones.
When your lawn looks good, you'll enjoy spending time there even more, and it will also be a great place to meet and greet house guests. Lawn care and maintenance can be as simple as watering it correctly, using organic fertilizer and aerating it on an annual basis.
Click Here for a Free Garden & Greenhouse Magazine Subscription
Click Here for a Free Garden & Greenhouse Email Newsletter Subscription
Home Care & Living
Reasons Why You Really Should hire a Skip for Your Rubbish Needs
Published
3 years ago
on
August 20, 2018
Many of us like to work in the garden in the UK and sometimes, we like to do some home renovations as well. As with all work, there is always stuff left over that we don't want anymore, but there is nowhere to put it. The laws in the UK are quite strict regarding the dumping of unwanted rubbish, so it makes sense to take all the stress away and give it to a company who want to deal with such things. These companies come in the shape of skip hire companies and they have proven themselves to be invaluable.
Great Selection
There are a number of different skips available for hire and they range from small mini skips to large skip hire in Milton Keynes and surrounding areas. There are skips available that you can just walk your rubbish into them and others that have a lockable lid to keep undesirables out. Whatever you need, it is very likely that these skip hire companies will have the skip for you. The ease in which you can get one is great. You just make a simple phone call, tell them what kind of rubbish you want to dispose of and they will send the right skip around to you immediately.
Choosing Correctly
When it comes to choosing the right size of skip for your job, this can be a little difficult. Choose one that's too small and they will have to come back again and again. Choose one that's too big and you end up paying money for something that you don't need. The best way is to describe the type of job you are intending to do and the people at the skip hire company will advise you best. Be sure to make sure that there is an area where the skip can be put down quite easily.
Very Affordable
For those of you that may think that hiring a skip is expensive, you couldn't be more wrong. Hiring a skip has never been cheaper and when you think of the alternatives, then you know you are getting good value for money. Try to do it yourself and you are getting yourself into territory you really don't want to be in. You need to find transport, load it all up and then unload it all again at the dumping site and maybe have to do it numerous times until it's all gone. The alternative is to pick up the phone, order a skip and they take it away when it's full. It's easy.
Environmentally Friendly
Not only are you getting rid of your rubbish responsibly, but you are also doing your bit to reduce your carbon footprint and to protect Mother Earth. These skip bin companies do all they can do to recycle everything that they pick up and they will only dispatch it to the dumping site when they have exhausted all avenues.
Hiring a skip has never been easier or cheaper and there is really no excuse for not hiring one, and getting all your rubbish taken away responsibly.
Pest Control
Get Control Of Your Garden By First Knowing Who The Enemy Is
Published
3 years ago
on
July 27, 2018

 Every now and then, people encounter intruders in their gardens and they don't know how to react. Unfortunately, there are many different animal species that can infest your garden and live off of your vegetables, fruits, or even flowers. The thing is, it's kind of impossible to expect that everyone will know everything about potential infestations and pests.
That's why people aren't strangers to exterminators and wildlife experts, depending on what type of animal we're talking about. Although, something can be said which I think most people would love to hear. In short, you're entirely capable of dealing with an infestation yourself. You don't need any expensive services and people that'll deal with the infestation instead of you (of course, if you tried everything and nothing works, the exterminators are a good option).
In this article, we'll be talking about how you can gain control over your garden and what's in it by identifying what type of animal is bothering you. We'll also mention something about how to get rid of mice in the garden (as they're also a type of pest that may annoy you).
Identify the Enemy
Each pest can be dealt with as long as you know what you're doing. But before you actually start researching about the various methods to get rid of vermin from your garden, you'll need to figure out what exactly is ruining it.
The most common pests found in the garden are raccoons, mice, rats, and others. With the exception of mice and rats, killing wildlife isn't exactly allowed (unless you have a permit, and some US states don't allow those either).
You best hope that you're dealing with mice or rats because it will take a bit more effort for anything else.
Prepare your Defenses
Once you've identified the enemy, you'll be entirely capable of setting up your defenses. When talking about mice or rats, your best bet would be to get traps. And, luckily for everyone, there are many different traps available. For example, snap traps are great against mice but not very effective against rats.
Then again, there are specific rat traps as well. But, if we're talking about raccoons, squirrels, or even moles – you won't exactly be able to kill them. Just to be safe, make sure you use live traps (otherwise called catch & release traps). Also, bait choice is very important so be sure to educate yourself on this as well. Peanut butter should work great for most pests, but again, knowledge is everything.
Conclusion
And that's basically it. Place your traps in potent trap locations such as entry points (doors, windows…), and throughout your garden. Also, make sure you keep your garden clean and without clutter. Most pests will have to find shelter, water, and food. The entire process isn't difficult, but if you, for whatever reason, can't clear out your garden – call the professionals. Additionally, ask them for some tips so if there's another infestation, you have a bit more knowledge with you!
Read More Articles
Natural Pest Control for Greenhouses and Indoor Gardens
Natural Pest Control for the Garden
Landscaping
A Guide to End of Summer Garden Maintenance
Published
3 years ago
on
July 27, 2018

 The British summer can be unpredictable at the best of times and this year we seem to be enjoying an ongoing heatwave of epic proportions and as the summer draws to an end, it is time to think about some pre-winter gardening. It is natural for all plants and fauna to sleep during the colder months and there are some important jobs to get out of the way before autumn sets in, which will help your flowers, trees and shrubs better deal with the onset of winter.
- Heavy Dose of Watering – In the heat of the summer, your lawn and border plants will require a healthy regular dose of water, especially the lawn and this helps to prepare for the winter. This should begin when the temperature starts to climb and should be ongoing, right up until the sun loses its power and the light evenings recede. If your water sprinkler system and hose have seen better days, it might be time for a replacement and with online garden suppliers, you can order from the comfort of your own home.
- End of Summer Pruning – When all of the flowering varieties have finished blooming, you should prune back a little and not too radical, especially for younger plants and shrubs. Remove all dead branches and the pruning will add some shape to the bushes and shrubs and help them to prepare for the winter shutdown. Trees should also be pruned at this time and if you are not confident working at heights, it might be an idea to call in your local landscape gardener, who is fully equipped to safely prune and trim even large trees.
- Halt Fertilization – It is never a good idea to fertilize past the end of August, as this will stimulate new growth at a time when the plants should be doing the opposite. While fertilization is important in the spring and summer, it should be ceased before the cold weather sets in.
- Spike the Lawn – This can be done effectively with a garden fork, if you don't have a separate tool and this will ensure that the grass receives the right amount of nourishment. This is especially important if your lawn has bad drainage and don't forget a liberal watering once the spiking has been completed.
- Cut the Lawn Higher than Normal – As the warm weather recedes, you should raise the lawnmower cutters a notch or two, as the extra grass length will aid the lawn to deal with the impending frost.
If you are lacking in gardening tools, there are online suppliers of all things horticultural and they typically have end of summer sales, so purchasing tools and other essentials at this time is a god idea. The harsh UK climate does mean your plants, trees and shrubs are well equipped to deal with the winter and by including all of the above as the summer draws to an end, you are helping your garden to prepare for the cold season.
Home Care & Living
Stylish and Elegant Shading Solutions for the Modern Home
Published
3 years ago
on
July 25, 2018

 If your home is just how you want it, you'll no doubt have spent a lot of time and money transforming your living space into the perfect place for rest and relaxation and, of course, like every Australian homeowner, the outdoor area is an important part of that. With such glorious summers, shading is an obvious requirement and finding something in keeping with the overall concept can be more than a challenge. It isn't only about keeping the sun at bay, there is also aesthetics to consider and with the latest generation of retractable awnings, you can create an attractive shading solution that complements the property.
Bespoke Shading Solutions
Whether you require an awning attached to the side of your home or have a special stand-alone area you want shaded, talking to an established outdoor awnings supplier is the best solution. They would have many years of hands-on experience in supplying and installing customized shading in both domestic and commercial settings. There are no off the shelf solutions for exterior shading and it very much depends on the setting as to the system that is best suited. Retractable awnings offer the ultimate choice as you can enjoy as much or as little of the sun as you choose and with motorised units, there's no effort required for adjustment.
Choose a Profile that Works for You
There are several tried and tested retractable awning systems, each with its own advantages, and by enlisting the help of an experienced supplier, you can be sure to select the most suitable for your needs. Folding arm systems are very popular, as they open and close with ease and are not obtrusive in any way, while drop arm awnings are ideal for balconies and large windows that require shading. There's something for every setting and with made to measure units, you are sure of a perfect fit.
Stunning Fabrics that Won't Fade
The wide range of rich colours and patterns allow you to be creative and with the highest quality acrylic fabric, you can be sure of a long lasting solution. Awning coverings are typically tested in harsh desert environments where the sun beats down relentlessly all day, so you can be sure the fabric is more than a match for the Australian climate.
Permanent Shading at Affordable Prices
Installing a retractable roofing system really does give you all the choices and the system is under a long warranty and with a little maintenance here and there, your shading will provide you with many years of trouble-free use. You would be forgiven for thinking you'll need to take out a second mortgage, but in reality, even the best quality retractable roofing system is affordable for all. An online search will bring up a list of local suppliers and with some browsing, you can select a suitable company and invite them to inspect your outdoor area.
Stylish and attractive shading is now possible and with made to measure solutions, you are certain to be impressed with the outcome.
Landscaping
4 Good Reasons To Hire A Lawn Care Company
Published
3 years ago
on
July 23, 2018

 People often lack the time or resources needed to engage in Do-It-Yourself lawn care. In such
cases, great lawn care companies come in to help with proper lawn maintenance. Good lawn
care companies offer local residential and commercial lawn care services. Here are some good
reasons to hire a lawn care professional:
Top 4 Reasons To Hiring A Lawn Care Company
1. Hiring A Lawn Care Company Saves Time
One of the major reasons why people hire lawn care companies is always to save time. For
instance, people who want to practice Do-It-Yourself always experience breakdowns. This is
because they always have to sit down and do some research on lawn care as they plan on what
needs to be done.
Time will also need to be invested on when driving to different stores to purchase seeds,
fertilizers, equipment and different tools that can be necessary for such processes. A lot of time
will also be needed during mowing and maintaining the lawn.
Comparing the time it takes to engage in Do-It-Yourself against contacting a lawn care
company, the latter saves time. Professionals already have the tools and equipment necessary
for lawn care.
2. They Have Professionally Trained Expertise
One doing their lawn on their own doesn't guarantee that there won't be any mess made on the
lawn. Professionally trained expertise have the necessary skills to care for the lawn without
messing around. Experts always know what they are doing because it is something they have
done for several years and have a good experience of it.
Hiring a lawn care company for their services is the best thing to do since one's expectations
are always high for better results in the end. This is usually of their knowledge, experience,
expertise, and skills they have.
3. Cost-Effective
Due to the volume of work lawn care companies do, they have their costs subsidized. This
means that when one wants to try Do-It-Yourself, they always have to purchase expensive tools
and equipment required for the job which might cost them a lot of money. Unlike when one hires
a professional lawn care company, the money they would have used to buy the tools will be
saved and used something else.
Most lawn care companies can always take equipment loans and pay them incrementally
through contracting work. Ordinary individuals would take a fortune to pay off such loans as
equipment used for lawn care are costly. This means that money will be saved by using it on a
lawn care company.
4. Lawn Care Company Are Liable For Damages And Injuries They Cause
A good lawn care company should be insured and licensed to prevent one from being liable for
injuries or damages cost by lawn care companies. This means their clients won't have to worry
about proper storage of chemicals such as fertilizers and pesticides or how to apply or dispose
of these chemicals. When inexperienced technicians handle these chemicals incorrectly, they
can cause harmful effects to the environment.
our services and how we can be of help.
Home Care & Living
Understanding Skip Hires
Published
3 years ago
on
July 17, 2018
Skip Hire and Recycling Materials
The days of filling a skip up with just about everything you can think of, and it being taken away and thrown in a landfill have long gone, and today, skip hire companies have become serious professionals in recycling. Most skip hire companies already recycle more than 90% of everything that comes their way, and some even offer a discount when you are filling a skip with certain materials only, where a 100% recycle is possible, and also if you pre-sort the waste before putting it into the skips. In fact a skip hire company today, is able to provide recycled building products, at very competitive prices, in addition to its main line of work. If you have a building project and are going to be needing a skip, it may pay to have it delivered full of materials you can use in your building works and save even more money.
Skip Hire Documentation
The days of parking a skip anywhere you like are gone too, as council and Government regulations on just about everything continue to tighten. If your skip is going to be parked on the street, rather than private property, you will require a license from the council and will have to adhere to several regulations, regarding having it lit at night and be placed where it will not cause interference to emergency vehicles, or other traffic. If you hire a skip in Doncaster or Dover, you will also probably be required to fill out documentation, declaring exactly what the skips contents are, with further restrictions, if any of it is potentially hazardous.
Getting the Right Sized Skip
It is very easy to underestimate the amount of material you are going to generate when working on a project. Whether it be a renovation, a landscaping project, or even just a good old fashioned spring clean and clearing out of the garage, it is advisable to talk to your local skip hire company. They have lots of experience and will be able to advise you on which size to choose. Remember, that as recycling is important and discounts may be offered for certain materials, you may find it more cost effective to hire more than one in smaller sizes. Either way, it pays to talk about what you are doing and listen to the advice.
Choosing the Right Skip Hire Company
Skip hire is generally very competitive, so many of the quotes you are given will likely be quite similar, with how far the company has to travel to drop it off, and pick it up, being key influencing factors. However, it is important to choose a company that has experience and multiple vehicles and skip sizes available, especially at short notice, so always ask if they can do same day delivery. The last thing you need is for a full skip to be sat at the bottom of your driveway, not only looking like an eyesore, but slowing up the work on your project.
Someone entering the business with a single lorry, might offer attractive rates, which is great until the vehicle breaks down or has an accident. Many work diligently to recycle, so do your bit for the environment and rent from those who keep things green.
Home Care & Living
How Skip Hire Can Help with a Garden Revamp
Published
3 years ago
on
July 6, 2018

 Once winter has passed and the first hint of summer arrives, it is time to turn your thoughts to the garden and whether a basic tidy up or a full on revamp, you will generate a lot of waste. There is lots to do to keep a garden looking good and well maintained, like cutting the grass, weeding, pruning and generally clearing up dead leaves and twigs and rather than heaping it in a corner, hiring a suitable size skip ensures that your garden waste is responsibly removed. Garden waste is not classed as general domestic waste and therefore cannot be put into bags and left for the dustman and if you are soon to be sorting out your garden, here are a few reasons why skip hire is recommended.
- So Easy to Hire – Getting a skip delivered to your home couldn't be any easier and if you are wondering, "Is there skip hire near me?" An online search will reveal the whereabouts of a local provider who will ask you questions in relation to your needs. Once they know what you need a skip for, they can best advise you on the kind of skip that would be most suitable and also the size. Once you are happy with their recommendation, the skip will be delivered to your home. When it's full, give them a call and they will come pick it up and take it away. It really is that easy.
- Available in Many Sizes – Depending on your project, skip bin hire companies can offer you a number of sizes and types of skip bin. For the small garden jobs where there isn't much to take away, there are mini skips that would be very suitable. However, if you have decided to undertake a big landscaping job for your garden then you are going to want to rip out a lot of plants and trees to make way for your new plants. This is when the bigger skips come into play and you can even get a skip that you can just walk into and dump your garden rubbish. No lifting over the side, just walk right in with your wheelbarrow. You can also get them with lockable lids to keep dogs and critters out.
- Reduces Your Carbon Footprint – By hiring a skip bin, you are doing your bit for the environment. If it is tree cuttings and other wood debris that you are dumping, the skip company will be able to recycle this material and maybe have it ground and mulched down to provide fertiliser for distribution to someone else. Nothing is wasted and they are experts in green waste and they know exactly how to deal with it. You get all your garden rubbish taken away and Mother Nature gets a break. It's a win-win situation.
Next time you have some garden waste to dispose of, give your local skip bin hire company a call and let them do take away the hard work!
General Gardening
Attract Wildlife to Your Garden with These Tips
Published
4 years ago
on
November 22, 2017

 It's not just humans who enjoy gardens, in the right conditions they can also draw in a whole host of wildlife. There's nothing more pleasurable than quietly watching animals go about their business right in your back garden, and taking in the wonder of nature. The following tips will help you to make your garden a much more attractive place for wildlife, and turn it into a haven for all sorts of different animals.
Choose Your Flowers Carefully
First things first, you'll want to carefully plan the flowers that you grow in your garden. If you want your garden to be full of wildlife, then you should opt for flowers which provide pollen and nectar for a long period of time. So-called "double flowers", and flowers which are big and over-blown due to years of cultivation, are a definite no-no. On the other hand, choosing a mixture of flowers that bloom in the spring, such as crocuses, to those which bloom well into the autumn, like Michaelmas daisies and ivy, will ensure that your garden is always a hub for bees and other insects. What's more, it will also bring a splash of color to your garden for a longer period of time- giving you more pleasure from your garden, and making it more attractive to birds, too.
 Invest in a Bird Feeder
By far the easiest way to attract wildlife to your garden is to invest in a bird feeder and to put out food for birds. This will bring them in all year round, especially in winter, when your food could mean the difference between life and death for them. The great thing about a bird table or bird feeder is that it's impossible to miss the birds that come swooping down to have a nibble at what's on offer. A bird bath is another good addition to any garden, since you'll be able to see the visiting birds rinse themselves off, which is always a treat.
Two things to bear in mind with bird feeders: firstly, make sure that the feeder is high up enough that no neighborhood cats will be able to jump up at the birds when they come to eat. Secondly, you'll want to put out a mixture of foods such as sunflower seeds, fat balls, and peanuts to supplement the birds' natural diet of berries and nuts. If you're lucky, you might even see the odd squirrel pop up for a bite to eat!
Add a Water Feature
A simple pond is an excellent way of attracting all sorts of animals, such as frogs and newts, to your garden. This doesn't have to be particularly big- in a pinch, a mere container of water will do. While it can be tempting to put fish in the pond, these will scare off any smaller creatures, and may be eaten by larger birds like herons, so think carefully before you head to the pet shop. You'll also want to ensure there's a sloping side to the pond, so frogs and the like can easily get in and out. Finally, be patient and allow water plants to grow naturally- creating a mini-ecosystem that will draw in a whole host of creatures.
Let Nature Take Its Course
Those of us who love our gardens will naturally want them to look their best. However, consider easing back on that cleaning if you want to see more animals in your garden. By leaving out piles of leaves and twigs, you will be giving creatures a tempting place to live, as well as food for the winter months. So, let those perennials grow, and perhaps tuck a pile of stones away in the corner of your garden to give amphibians somewhere to hibernate safely.
Information for this article was provided by LawnMowerHut.com.
Click Here for a Free Garden & Greenhouse Magazine Subscription
Click Here for a Free Garden & Greenhouse Email Newsletter Subscription
Greenhouses
Preventing Pest Infestations in a Greenhouse
Published
4 years ago
on
May 25, 2017

The spring season brings new beginnings for plant growth. The landscape becomes green again and multitudes of colors and fragrances fill the air as flowers break through the ground's surface. The new life brought on by spring is rejuvenating for horticulturists. It is not just plants and flowers that "come alive" during this time of year. Just as new plant life emerges all around us in spring, new life for pest insects is also resurrected. As temperatures rise and the summer months approach, more and more insects leave dormancy and begin new life cycles. This is why it is so important for greenhouse gardeners to be aware of and take counter measures against pest insects during the spring and early summer seasons. In many cases, a few simple preventative steps can reduce the likelihood of a devastating pest insect attack.
Sanitation
Sanitation is the number one defense against pest insect infestations. Keeping the greenhouse and the plants clean and tidy can do wonders in preventing pest insects and pathogens. Periodically wiping down the surface of the greenhouse and removing dead or dying vegetation will greatly reduce the possibility of pest insects. Plants should be closely monitored for pest insects on a weekly basis (at the very least).
It is a good idea to set up a quarantine area in the greenhouse. Whenever a new plant is purchased or gifted, it should be quarantined immediately for a week or two to ensure it does not harbor pest insects. After the quarantine period is over and the plant has received a clean bill of health, it may join the other plants in the greenhouse. Bringing new plants into a greenhouse is the most common way a greenhouse gardener will introduce pest insects into his or her own garden. If pest insects are observed on any new plant, it should be thoroughly treated before being introduced to the other plants in the greenhouse.
Monitoring for Pests
As previously mentioned, it is important for greenhouse growers to monitor their gardens for any signs of pest insects. Yellow sticky traps are great tools for monitoring a greenhouse. Yellow sticky traps are similar to fly paper in that they "catch" flying insects in a glue-like substance. By closely examining the yellow sticky trap, a gardener can see if and what types of pest insects are present in the garden. Yellow sticky traps allow a horticulturist to identify potential problems before they get out of hand.
Identifying the Pest Insect
Identifying the pest insect early and accurately is vital to stopping a few pest insects from becoming an infestation. When monitoring the plants, there are some tell-tale signs that will indicate which pest insect a gardener may be dealing with.
Spider Mites
The first sign of a spider mite problem usually shows up in the form of yellow speckling on the surface of the leaves, which is caused by the insects sucking nutrients from the underside of the plant leaves. The speckling from spider mite damage will resemble light yellow spray paint misted on the leaves. Closer examination of the bottom of the leaves will reveal clusters of very tiny red mites and their eggs. A magnifying glass may be necessary to see them. In more extreme infestations, webbing may be found in-between or on the tips of branches and leaves. This webbing looks very much like a spider web and is how these nasty bugs received their name. Spider mites are difficult to get rid of and require a miticide for treatment.
Mealybugs
The first sign of mealybugs is normally cotton-like, fluffy masses found in the crotches or joints of the plant, typically near young tender growth. These tiny "cotton balls" are actually clusters of the slow moving mealybugs. These bugs can reproduce and lay eggs every seven days, so they should be treated immediately to reduce any possible contaminations. It's difficult to kill the eggs, often in the soil, so it's important to treat for live mealy bugs every five to seven days for three to four weeks to terminate all adults before they become mature enough to lay eggs.
Fungus Gnats
The first sign of a fungus gnat problem is typically the small, mosquito-like, black or gray insects that fly around aimlessly. They are most prevalent right after a watering or when the soil is disturbed. Fungus gnat larvae look like tiny, light-colored worms that wiggle around in the top layer of soil. They can sometimes be seen "dancing" in standing water after a feeding.
Thrips
The first sign of a thrip issue is usually "shiny streaks" that show up on the surface of the leaves. The shiny trails are actually the areas of the leaf where the thrip larvae have been feeding. Gardeners may also notice tiny black specs on the leaf surface; this is actually the larvae's fecal matter. To the naked eye, thrip larvae resemble fast moving grains of rice. The larvae can be many different colors, but are usually yellowish-green.
Scale
The first sign of scale is usually a protective covering or bumps on the stems and stalks of the plants. The females lay eggs underneath the protective covering, which will hatch in one to three weeks. The newly hatched nymphs leave the protective covering as tiny white specs and move around the plant to feed. Nymphs insert their piercing mouthparts into the plant and begin to feed, gradually developing their own protective covering as they turn into immobile adults. Scale do not pupate and may have several overlapping generations in one season. A scale infestation is difficult to eliminate and requires a systemic insecticide.
Treatment and Control
Early detection and treatment diligence are the keys to eradicating pest insects. A gardener can start treatment with an organic or all-natural insecticide that is designed for the particular pest insect he or she is battling. Yellow sticky traps are effective in capturing most flying insects, such as fungus gnats and white flies. Denatured alcohol is highly effective as a combatant against mealy bugs and scale by wiping it on the infected areas with a cotton swab or small paint brush. Pyrethrum is an organic derivative of the chrysanthemum plant and is extremely effective against many greenhouse pest insects. Pyrethrum is the primary ingredient in several commercial spray products commonly available at most garden centers. In some cases, a pest insect (scale and mites), cannot be controlled with an organic or all-natural approach.
When this occurs, the gardener may need to implement a systemic chemical control. Systemic pesticides, such as Orthene, are effective against pest insects because they enter the plant's tissue and kill the bugs as they feed on the plant tissue. Regardless of the treatment program, horticulturists should always use caution and be sure to read the manufacturer's directions for application.
For more information visit ArcadiaGlasshouse.com
Vertical Gardens
Make Indoor Vertical Gardening Convenient and Fun
Published
5 years ago
on
May 12, 2017

It is always fun and fascinating to transform one of the walls of your home into an indoor vertical garden. It is not only easy and convenient to create one of these but it also never fails to add a little bit of color and fragrance to your room.
The vertical indoor gardens take up very small space when you make use of best bench top jointer. By making an indoor vertical garden in your room will add fresh blossom and also a splash of bright colors in your room.
There are various advantages of making your indoor vertical garden that will boost you in making one. Some of the benefits are as below:
- Clean air: Plants are the best way to purify the air that surrounds you. The plants that you will plant in the vertical garden will help in the collection of dust, which is one of the greatest health benefits.
- Great artwork: The gardens that hang upside down on the walls not only look beautiful but also attract the eyes of every person that enters the home. When you make a vertical indoor garden you make a great artwork on your wall without much difficulty.
- Reduction of clutter: The plantation of vertical gardens reduces the stress and difficulty that you have to face in cluttering the pot plants. Also, the vertical gardens are more convenient and render great health benefits.
It is sure that by now even you want to make an indoor vertical garden in your home, right? Now the next question that arises is how to make it? There are different ways in which you make the best garden without much hustle. The various ways that you can make your home wall even more fascinating are as below:
- Grand Living Wall
To get a perfect, fascinating look on your wall, you can always rely on making vertical gardens on a grand living wall of your home. It is always advisable to use 100% recyclable plastic free modular systems when you start making your garden. This way you can have flourishing flowers that in your home without any side effect.
You can also grow wall vertical gardening system that makes use of great creativity in designing your grand wall and giving it a completely new look. You can also flourish them with best insulators that will help to keep your room cool in summer and warm in winter.
- Simple and Pretty Solutions
If you do not wish to plant the garden on the grand wall of your home, you can always start with making simple, stylish and small garden alike greenery on your wall. For instance, you can make use of recyclable plastic to make a small and stylish modular system that is easy to clean and much fascinating. The rustic frame is one of the best frames that come from reclaimed wood, and you can hang the frame anywhere you want in your home.
 Lastly, you can add a blackboard frame with the plants. It will help you to know the names of the plants and give them water accordingly.
- Beautiful Alternatives
When you are adding beautiful flora on your walls, it is advisable to even add some fauna to it. The addition of fauna to flora will add beauty to the fascinating walls. You can pick some of them from hippo, elephant or even rhino.
Also, you can grow vegetables or herbs on the walls and then later transport them in your meals, and by doing so, you get to eat fresh and healthy. You can make Stands for your small plants with the old milk bottles. Lastly, you can also use the DIY plant stands as a décor on your dining table.
How can you build your Indoor Vertical Garden without any Difficulty?
By simply following the basic five steps you can do your indoor vertical gardening without much hustle.
Step 1: Hanging the pocket planter at a place where it gets sufficient amount of sunlight.
Step 2: Properly measure the distance from the wall and then space the gourmets accordingly.
Step 3: Drill the necessary holes.
Step 4: After you drill the holes, slide the fasteners into them.
Step 5: Lastly, just screw the pocket planters into the fasteners with proper care and start the plantation.
 "To plant a garden is to believe in tomorrow."
Gardening is one of those activities that need much hard work and labor. To have the indoor vertical gardens is one of the best things when to comes to eat fresh and healthy food. Also, it helps in purifying the air and catching all dust surrounding it. There are various ways to decorate the walls of your home by using the mix and match technique with the different plants, herbs, and flowers.
Author Bio: Victor loves to contribute towards the eco-friendly environment. He tries to share as much information possible online to ensure how to use the woodworking tools in the best manner possible for gardening and wood landscaping.
Greenhouses
Hardening Off Your Seedlings
Published
5 years ago
on
March 27, 2017

When seedlings are started indoors or in a greenhouse, they become acclimated to an environment that is much less severe than the outdoors. It is sometimes hard for novice gardeners to comprehend that direct sunlight, strong winds, and cooler nighttime temperatures are simply too much for many seedlings or small plants to handle. The process of hardening off is meant to reduce the shock of transitioning from a sheltered environment to outdoor conditions. The three biggest factors affecting a plant's transition from an indoor environment to an outdoor environment are direct sunlight, wind and temperature.
Direct Sunlight
Many gardeners do not realize how much more intense the sun is than an artificial light source. Even plants grown under high intensity discharge lighting will have a hard time transitioning into the intensity of direct sunlight. Tender seedlings and young plants grown indoors on a window sill or under a grow light must be gradually transitioned into direct sunlight. Start by placing the tender seedlings in a shaded area. After a couple of days in the shade, the seedlings can be introduced to direct sunlight. Remember, gradual increases are the key to success in the hardening off process. Each day a grower can increase the amount of time the seedlings receive direct sunlight. Depending on the particular plant variety, the grower can usually increase the duration of time in direct sunlight by 1-2 hours per day. Typically, seedlings should be acclimated to the direct sunlight in about a week's time.
Wind
Many seedlings and young plants get accustomed to a high humidity environment. When placed outdoors, the wind and dry air can quickly dry out the medium and/or the seedlings themselves. If there is a strong wind present when a gardener is hardening off his or her plants, it is a good idea to create some sort of wind block for the seedlings. Cold frames or mini hoop houses are valuable tools for the hardening off process and can offer additional wind protection for transitioning plants.
Temperature
Many gardeners start the hardening off process when the night temperatures are still too cold for the seedlings. It may be necessary to bring the seedlings back inside each evening until the temperature at night increases or the plants become acclimated to the colder temperatures. Cold frames or other temporary structures that offer cover can be used to protect the seedlings from the lower nighttime temperatures.
Cold Frames

A cold frame is an unheated greenhouse, usually used to temporarily house plants during the spring or early summer. Cold frames are a valuable tool for hardening off seedlings and young plants before planting them in the garden. A cold frame works great for sheltering young plants while allowing them a "taste" of life outdoors. The most common type of cold frame used by home hobbyists is a box-style cold frame.
A box-style cold frame is nothing more than a bottomless box with an angled, transparent top. Box-style cold frames come in different styles and sizes and can be purchased or built from various materials. Some cold frames are as basic as a box made of cinderblocks with an old sheet of glass on top, while other cold frames are more advanced composite structures complete with a thermostatic auto-opener. Manufactured cold frames built from aluminum and polycarbonate offer the advantage of longevity and are backed by a manufacturer's warranty.
Seedlings and young plants that are hardened off properly will transition more seamlessly into outdoor conditions. It only takes one bad experience for a horticulturist to realize how important the hardening off process really is. After all, the last thing a gardener wants is to have to replant all of his or her seeds and play catch-up for the rest of the growing season. Hardening off is most effective when done in incremental steps. When in doubt, take the slow route. In other words, rushing the hardening off process can be extremely counterproductive. A hobbyist who properly hardens off his or her plants will not only have healthier plants and a smoother transition to the outdoors, but will also have a more enjoyable experience in the garden.
For more information, please visit ArcadiaGlasshouse.com.
Free Garden & Greenhouse Magazine Subscription
Free Garden & Greenhouse Email Newsletter Subscription
Greenhouses
Starting Seeds Indoors or in a Greenhouse
Published
5 years ago
on
February 23, 2017

Spring is approaching and, for gardeners, this means a fresh start to another growing season. Many horticulturists choose to start seeds indoors or in a greenhouse in order to have plants ready to grow in the upcoming season. There are a few considerations every horticulturist should make before starting his or her seeds. Following a few simple guidelines will help make the seed starting experience both enjoyable and effective.
Timing
As with most things in life, timing is everything. It is important for a horticulturist to take into consideration his or her geographical location's average last frost date. A quick search on the internet or call to a local greenhouse can help a gardener determine in which zone he or she lives. Here are the zones and their corresponding average last frost date:
Zone 1 – June 15th
Zone 2 – May 15th
Zone 3 – May 15th
Zone 4 – May 15th
Zone 5 – April 15th
Zone 6 – April 15th
Zone 7 – April 15th
Zone 8 – March 15th
Zone 9 – February 15th
A good rule of thumb for starting seeds is to begin the germination process 6-8 weeks before your zone's average last frost date. It is also important to consider the particular plant varieties being grown. For example, many ornamental flowers can be started earlier, around 8-10 weeks before the average last frost date. Cold sensitive plants that require warmer temperatures to grow properly, like tomatoes, basil and peppers, should be started a little later, around 6-8 weeks before the average last frost date.
Grow Medium and Planting Containers
It is very important to make or buy a seed starting medium that is specific for starting seeds. Regular potting soil is too heavy and potent for most seeds. Plug trays or peat pellets are great for starting seeds, but will require transplanting after the seedling has developed its second set of true leaves. I personally prefer using small plastic cups with small holes poked in the bottom for drainage. These small cups are big enough for the plant to establish a heathy root structure and can usually be used until the plant is placed outdoors or into its finishing planting container. Filling a tray with medium and planting multiple seeds should be avoided, if possible. Not only does this create a less than desirable root structure, it also makes it difficult to separate the seedlings without damaging them.
Some seeds are very small and are extremely difficult to plant individually. One technique is to use the eraser end of a pencil to pick up and gently bury the seed into the medium.
Temperature and Humidity
Proper temperature and humidity are necessary for healthy seedling development. A heat mat is a great way to supply heat to the seedling bed, which helps initiate the germination process. Not only do heat mats provide the warmth necessary for germination, they also help keep the temperature more consistent around the seedlings. All plants, especially seedlings, thrive on consistency. Although not completely necessary, many gardeners like to use a humidity dome on their seedling trays. Generally speaking, seedlings prefer a higher humidity than the ambient air. Humidity domes are an inexpensive and simple way to maintain higher humidity for the seedlings. Humidity domes, like heat mats, will also help maintain consistent atmospheric conditions.
Lighting
If they are being grown indoors, seedlings should be placed as close to a window as possible. If they are being grown in a greenhouse, try to position the seedlings in an area that receives the most light. Many growers use an artificial light source for starting seeds indoors or in a greenhouse. If you have ever experienced leggy, stretched stems on seedlings, you have seen the results of inadequate lighting. An artificial light source above the seedlings will keep them compact and healthy. There are many different artificial light sources that can be used for seedlings, but T5 fluorescents are highly effective and relatively inexpensive. A light for starting seeds is a valuable tool and is well worth the investment.
Starting seeds in a greenhouse or indoors is a fun and easy way to get a head start on the growing season. Hobbyists who start their seeds at the right time, while also supplying the proper medium, atmospheric conditions and lighting will not only have higher germination success, but will also have many healthy seedlings ready to take on the upcoming growing season.
For more information visit ArcadiaGlasshouse.com
Vertical Gardens
Introduction to Vertical Gardening Within a Greenhouse
Published
5 years ago
on
January 26, 2017

Vertical gardening is quickly becoming one of the most popular methods for maximizing the space within a greenhouse. Vertical gardening is exactly what it sounds like: gardening in vertical rows instead of horizontally. In other words, the plants are, in various configurations, stacked one on top of another. For greenhouse horticulturists, vertical gardening opens up the possibility of filling the greenhouse from the bottom to the top with foliage. There are many different ways a greenhouse horticulturist can utilize vertical gardening techniques, but shelving, vertical planters, and vertical hydroponic systems are the most popular methods.
Shelving
Believe it or not, greenhouse shelving is a form of vertical gardening. The shelving used in a greenhouse allows a gardener to stack plants on top of each other and better utilize the given floor space. There are many different ways greenhouse shelving can be set up in a greenhouse. Generally speaking, the shelving should be set up in multiple tiers with the highest tier on the wall that is opposite the side of the greenhouse that receives the most light. By doing this, the plants on the higher shelving will not shade out the other plants located lower in the garden.

Vertical Planters
Vertical planters are either manufactured or homemade planting structures designed to house plants in a vertical manner. An example of a homemade vertical planter is a plastic 55 gallon drum with holes cut into the side where the plants can be placed. Vertical planters are usually designed to be used with potting soil. Typically, these planters are watered from the top, allowing gravity to bring the moisture to all of the plants in the container. Strawberries and lettuce are two crops commonly grown in vertical planters with great success.
Vertical Hydroponic Systems
Vertical hydroponic systems utilize soilless gardening in a vertical position. Most vertical hydroponic systems are recirculating systems which means the nutrient solution is collected and reused after each feeding. The nutrient solution is commonly delivered to the upper most plant module so gravity can bring the solution to the remaining plants down below. Vertical hydroponic systems combine the speed of
growth associated with hydroponic gardening and the space maximizing benefits of vertical gardening.
Things to Consider with Vertical Gardening
There are a few things to consider when setting up a vertical garden. One big consideration is shading out other plants in the greenhouse. The tallest vertical system should be placed on the opposite side of the prevailing light. The best way to visualize an appropriate vertical garden in a greenhouse is to think of it as stadium seating. In other words, the plants are staggered from shortest to tallest so that the plants can receive the most sunlight possible. Another big consideration for vertical systems is nutrient consistency. This is most important in vertical hydroponic systems where the nutrient solution will be reused. Daily monitoring of nutrient and pH levels in a vertical hydroponic system is an absolute must. If constructing a homemade vertical system, make sure to take into account the additional weight of the plants and soil or medium. If a vertical system is extremely top heavy, it may need additional safety supports to prevent it from tipping or falling.

Trying a vertical gardening technique is a fun way for a greenhouse hobbyist to experiment with maximizing his or her given garden floor space. Experimenting with vertical gardening can be as simple as trying different shelving configurations or as advanced as an automated vertical hydroponic system. Vertical gardens allow greenhouse hobbyists to better utilize the space within a greenhouse by literally having plants from the floor to the roof. When the garden space is better utilized, more plants can be grown, which is good news for any greenhouse enthusiast.
For more information visit ArcadiaGlasshouse.com
Greenhouses
Sanitizing the Greenhouse and Overwintering Plants
Published
5 years ago
on
November 21, 2016

 As the cold weather approaches, greenhouse growers should begin preparing their greenhouses for the winter. Before bringing in the plants from outside, a good sanitizing of the greenhouse and the plants themselves is recommended. This can be viewed as a yearly maintenance and preventative procedure which can greatly reduce the likelihood of problems during the winter months. A good cleaning combined with proper placement of the plants in the greenhouse equates to a smoother transition into next year's growing season.
Sanitizing the Greenhouse
Before moving plants into the greenhouse for overwintering, it is a good idea to thoroughly clean the greenhouse. Start by removing any plants that are currently in the greenhouse. After the greenhouse is empty, hose down the entire greenhouse with soapy water. In most cases, soapy water is enough to prevent algae build up on the glaze or framing of the greenhouse. If algae have already built up, a good pressure wash can easily rectify the problem. It is very important for owners of polycarbonate greenhouses to avoid using window cleaners of any kind. Window cleaners can actually damage the polycarbonate panels and make them less transparent.
 After using soapy water and/or the pressure washer, it is a good idea to further sanitize the greenhouses with a sterilizing/sanitizing agent. A diluted bleach solution is one sanitizing agent commonly used by greenhouse horticulturists. However, there are two distinct disadvantages to using a bleach solution. First, the odor and fumes created by bleach can be overwhelming, especially when used in a contained area like a greenhouse. Second, a diluted bleach solution works fine for sanitizing the greenhouse itself, but should not be used on the plants that will be coming into the greenhouse from outside. Even a diluted bleach solution would be harmful to the plants. Molds and pathogens often enter the greenhouse by hitching a ride on a plant or in the soil of a plant brought in from outside.
A good solution to this is a cleaning agent called Physan 20. Physan 20 is an algaecide, fungicide, bactericide, and virucide. In other words, Physan 20 helps fight algae, fungi, bacteria, and viruses. After washing the greenhouse with soapy water, an application of Physan 20 will kill any remaining fungi, algae, bacteria, or viruses. Physan 20 is virtually odorless which makes it much easier to work with than a diluted bleach solution. Perhaps the largest advantage of Physan 20 is its ability to be used directly on ornamental plants and their soil. Physan 20 can be used as a soil drench to kill any pathogenic fungi, bacteria, algae, or viruses lurking in the soil of plants kept outdoors. Physan 20 comes in a concentrate form and must be diluted before use. Horticulturists should pay close attention to the manufacturer's recommended dilution rates for the various uses of the product. In other words, the recommended concentration for cleaning the greenhouse material will differ from the concentration for a soil drench.
Preparing the Plants for Overwintering
Before bringing outside plants into the greenhouse for the winter, a gardener should take a few steps to make the transition smoother. Start with cleaning the plants themselves by removing any dead or dying leaves from the plant and soil container. Examine the plants closely for pest insects. Any pest insect issues should be treated before bringing those plants into the greenhouse. If possible, time your watering so that the plants can receive a watering with the Physan 20 mixture right before entering the greenhouse for the winter. As previously mentioned, this will kill any fungi, algae, bacteria, or viruses that may be contained in the soil.
Plant Placement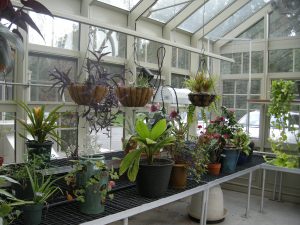
Plant placement is another important factor to consider when overwintering. Some plants are more sensitive to cold than others. The plants that will better handle cold conditions should be placed along the perimeter of the greenhouse and those more sensitive to the cold should be place closer to the center. If the plan is to grow orchids or food crops, the greenhouse will need to be heated by some sort of heating device in order to keep the ambient air temperature warm enough for flower/fruit production.
Sanitizing the greenhouse is an important preventive measure that can be the difference between a smooth transition and an utter catastrophe come spring. Cleaning and sanitizing the plants before they enter the greenhouse is a vital step to keep the plants healthy and happy all winter long. Proper plant placement is another crucial factor contributing to the heath of the plants. When planning the layout of the greenhouse for winter, do not forget to leave some space for next spring's seedings. After all, winter will be over before you know it and the next chapter of your garden will soon begin.
For more information visit ArcadiaGlasshouse.com.
Subscribe to Garden & Greenhouse Magazine
Subscribe to Garden & Greenhouse Email Newsletter
Hydroponics
Hydroponic Nutrients – The Essential Elements
Published
5 years ago
on
September 22, 2016

 There are 17 essential elements needed for plant growth. Three of them (hydrogen, oxygen, and carbon) are non-mineral elements and are absorbed by plants through the air or water. The other 14 essential elements must be provided by the soil or fertilization. Since hydroponic gardening bypasses the soil, all 14 essential mineral elements must be furnished in the hydroponic nutrient solution.
These essential mineral elements are broken into two categories: macronutrients and micronutrients. The macronutrients are the nutrients used in higher concentrations relative to micronutrients which are absorbed in smaller amounts. When shopping around for hydroponic nutrients, a gardener will quickly notice three numbers on the nutrient solution's label. These numbers represent the N-P-K values or ratios of nitrogen (N), phosphorus (P), and potassium (K) in that particular formula. Nitrogen, phosphorus, and potassium are the primary macronutrients. In other words, they are absorbed in higher ratios than any other essential mineral element. This is why it is important for fertilizer labels to disclose the N-P-K ratio. A closer look at all of the macronutrients found in hydroponic fertilizers will give growers a better understanding of how each element affects plant growth.
Macronutrients
Nitrogen (N)
A basic component of proteins and chlorophyll, Nitrogen is the main nutrient responsible for vigorous growth and luscious green coloration.
Phosphorus (P)
Plays an important role in root stimulation and establishment for young plants. Phosphorus also promotes flowering, fruiting, ripening, and respiration.
Potassium (K)
Promotes movement of sugars and other nutrients (via osmosis). Potassium is directly linked to stem strength and rigidity. Potassium increases a plant's overall resistance to cold, drought and pathogens. Much like phosphorus, potassium plays an intricate role in the formation of flower buds and fruiting/blooming processes.
Calcium (Ca)
Builds and becomes part of the cell walls. Calcium is vital to plant structure and strength and promotes growth of young shoots and roots. Calcium is needed for ripening and seed production.
Magnesium (Mg)
Reinforces cell walls and is an important component of chlorophyll. Magnesium promotes the absorption of phosphorus, nitrogen, and sulfur. It also plays a vital role in the ripening of fruit and the germination of seeds.
Sulfur (S)
Contributes to chlorophyll production and is a necessary component of several proteins, enzymes and vitamins. Sulfur aids the plant's absorption of potassium, calcium, and magnesium.
Micronutrients
Micronutrients, although absorbed in lower amounts than macronutrients, play an equally important role in overall plant health.
Chlorine (Cl)
Involved in the stimulation of photosynthesis.
Iron (Fe)
Assists in biochemical processes, including the manufacturing of chlorophyll. Iron also contributes to the formation of some enzymes and amino acids.
Boron (B)
Essential for tissue growth within the plant. Promotes the absorption of water and helps regulate a plant's metabolism. Boron also assists in the formation of fruit.
Manganese (Mn)
Plays an essential role in nitrogen assimilation and protein formation. Manganese can speed up a plant's maturity and helps promote seed germination. It is also necessary for chlorophyll production.
Zinc (Zn)
Helps the development of enzymes and growth hormones.
Copper (Cu)
Plays a role in chlorophyll production and helps activate various enzymes.
Molybdenum (Mo)
It is needed for the production of nitrogen-based proteins and is essential for nitrogen assimilation by plants.
Nickel (Ni)
Regulates mineral metabolism, enzyme activity and other metabolic processes in plants.
Hydroponic Base Nutrients
There are many choices and it can become overwhelming trying to choose a brand of hydroponic nutrients (fertilizers). The first thing a hydroponic horticulturist should do is choose a base nutrient formula. A base nutrient formula will contain all the essential mineral elements, therefore providing all elements necessary for plant growth. Depending on the manufacturer, the base nutrients may be a one, two, or three part formula. Regardless of how many parts it is all base nutrient formulas do the same thing: provide the plants with the essential mineral elements. A good hydroponic base nutrient is all that is needed to get started growing hydroponically.
Can I Use my Hydroponic Nutrients for Soil Gardening?
Hydroponic base nutrients are designed specifically for use in hydroponic systems. Although they can be used in a pinch to fertilize plants in soil containers, they are designed for hydroponics which means the ratio of some elements will differ from fertilizers designed specifically for soil.
pH in Hydroponics
In order for the plants to absorb the essential elements in a hydroponic system, the pH of the solution must be in a particular range. A pH of 5.5 – 6.0 is the desired range for most hydroponic systems. If the pH gets above or below that range, the plants will be unable to absorb certain nutrients. This will eventually lead to a deficiency. Hydroponic growers will need to have pH buffers (pH up and pH down) on hand to make adjustments when necessary.
Finding a hydroponic nutrient formula can be overwhelming for new growers. Just remember, a good base formula and pH buffers are all you need to get started. Once you feel comfortable with your base formula, you can begin experimenting with the plethora of hydroponic nutrient additives available at your local hydroponic retailer.
For more information visit ArcadiaGlasshouse.com.
Subscribe to Garden & Greenhouse Magazine
Subscribe to Garden & Greenhouse Email Newsletter
Hydroponics
Hydroponic Systems in a Greenhouse
Published
5 years ago
on
August 11, 2016

Accessibility to information, due mainly to the internet, has many home greenhouse hobbyists experimenting with hydroponic systems in a greenhouse. Hydroponic gardening is gardening without the use of soil. In other words, any type of growing system that bypasses the microbes in the soil and directly feeds the plants with nutrients can be considered hydroponics. There are many different hydroponic growing systems and each has its own advantages and disadvantages. A closer look at some of the systems commonly used by home hobbyists will give a grower a bit of insight into the fascinating world of hydroponic gardening and some inspiration to start experimenting.
Deep Water Culture
Deep water culture is perhaps the easiest hydroponic system to set up. A five gallon bucket or tupperware container can be converted into a deep water culture system with just a few parts from the hardware store. In a deep water culture system, the plant is held in place by a small amount of inert medium (usually gravel or clay pebbles). However, the vast majority of the plant's roots do not grow in the medium, but, rather, dangle down into the container where they are submersed in the nutrient solution. These systems are great because they are easy to build and can produce quick, vigorous growth. The biggest drawback of deep water culture systems is how susceptible they are to temperature changes. Since the roots are submersed in the solution, the temperature of that solution will greatly affect the way the plant's roots can receive oxygen. When temperatures are too warm, the plant's roots will not receive the oxygen they require and they will become susceptible to pathogens. For this reason, deep water culture should only be used by greenhouse growers in cooler climates or growers who have invested in cooling devices, such as water chillers or air conditioners. Without a cooling device, a grower may have a difficult time keeping the system's temperature in the desired range (65-75 degrees F).
Top-Drip
In a top-drip hydroponic system, the nutrient solution is delivered to each plant via a drip stake or drip line emitter. The individual plant modules will vary from system to system, but, generally, top-drip gardeners use standard potting containers. The medium for the containers can be any sort of inert medium or even soil if the grower wishes to have a more hybrid hydroponic/soil system. Top-drip systems can be set up as a recirculating system or a run-to-waste system. Recirculating top-drip systems will need a reservoir for holding the nutrient solution and the reservoir will need to be aerated. A timer is needed to trigger the pump for feeding intervals. The duration will fluctuate depending on the crop being grown and the particular stage of growth. Although top-drip systems are a little more expensive to start up than a deep water culture system, they fare much better at higher temperatures. Top-drip systems are also the preferred hydroponic system of commercial tomato growers.
Flood and Drain
A flood and drain system uses a table or trough which is flooded with nutrient solution for a given period of time and then drained. Traditional flood and drain systems use gravity to return the nutrient solution to the reservoir. In other words, once the pump that pushes water to fill the flood table is deactivated, the water drains back to the reservoir. Typically, containers filled with a medium, such as hydroton, stone wool, coco coir, or another soilless mix, are placed in the flood tables; however, the medium can also be placed directly in the table or trough. Flood and drain systems work well for hobbyists looking to experiment with hydroponics and/or beginner gardeners because they are easy to build and can accept a wide range of media. Like top-drip systems, flood and drain systems can offer a hybrid hydroponic/soil system to growers who are not ready to give up soil gardening completely, but still want to gain some of the benefits hydroponic gardening has to offer.
The previously mentioned hydroponic systems are commonly used by beginner hydroponic growers or hobbyists looking to do a little experimenting with hydroponics. Other systems, like aeroponics, nutrient film technique, and current culture, can also be used, but are typically reserved for growers with more hydroponics experience. That being said, remember that experimentation with hydroponic systems is a fun and exciting way to differentiate your greenhouse from others. There is no shame in trying out a new hydroponic system or trying to develop your own system for your particular greenhouse. Like other styles of gardening, hydroponic systems offer a lifetime of learning to anyone willing to give it a try.
For more information visit ArcadiaGlasshouse.com
Greenhouses
Arcadia Glasshouse Video Will Make Anyone Want to Get a Greenhouse
Published
6 years ago
on
May 5, 2016
If this video from Arcadia Glasshouse doesn't make you want to get a greenhouse nothing will. Enjoy!
Greenhouses
Organic Gardening in the Greenhouse
Published
6 years ago
on
April 27, 2016
 There is a lot of buzz surrounding sustainable and organic gardening. An increasing amount of people are realizing that the health benefits of eating organic foods extend not only to their own health but also contribute to the health of the entire planet. Conventional farming's use of chemical pesticides, chemical herbicides, and genetically modified organisms (GMOs) has many people concerned about the safety of the food found in grocery stores. This worry has more and more people wanting to control their food supply. Perhaps the best way to do this is to start an organic vegetable garden. In fact, many people are beginning to grow their own organic food, not necessarily to save money, but to ensure the quality of the food they consume.
Growing Organic in the Greenhouse
To grow organically means to grow plants without the use of chemical fertilizers or chemical pesticides. Simply put, what we call organic gardening today was what our grandparents just called gardening. Compost bins or piles are a great way to repurpose unwanted food scraps into usable fertilizer for an organic garden. There are also many prepackaged soils, fertilizers, and pesticides that carry the organic certification. Whether you build your own rich organic soil with compost or purchase prepackaged organic soil, organic horticulture in a greenhouse offers many distinct advantages. First and foremost, with the use of supplemental heat, greenhouse hobbyists have the unique opportunity to grow organic produce year round. Read our blog, Grow All Year Round with Artificial Heat.
Greenhouse growers with both supplemental lighting and supplemental heating have the ability to grow just about anything throughout the entire year. This means you can continuously supply or supplement your diet with homegrown organic produce. In fact, if staggered correctly, it is possible to grow many of the most popular vegetables throughout the entire year, including in the winter. Another huge advantage of organic gardening in a greenhouse is the heightened control that greenhouse horticulture offers. From environmental factors to pest and pathogen prevention, growing in a greenhouse gives more power to the horticulturist. In fact, greenhouse growers are not only able to extent the growing season into the fall/winter but can also get vegetables earlier in the spring and early summer. By growing all or a good portion of your own vegetables in a greenhouse, you can be certain of the quality of your produce and take control of your health.
Getting Started
Getting started with organic horticulture is as easy as purchasing certified organic seeds and potting soils or building your own organic soil from raw ingredients. There are many organic fertilizers, pesticides, and herbicides available which makes converting to organic very easy and convenient. Just about any style of gardening can easily be converted to organic growing. Many greenhouse growers prefer benches with containers while others prefer raised beds. Since you can successfully grow organic produce in either potting containers or raised beds, the decision comes down to the personal preference of the horticulturist or the crops themselves (some plants do better in raised beds than containers and vice versa).
Growing organic produce in a greenhouse is a fun and healthy hobby. There are few things as rewarding as producing your own fresh, organic herbs and/or vegetables. Growing organic produce in a greenhouse is an ongoing educational hobby that revitalizes and refreshes horticulturists year after year. After all, organic gardening in a greenhouse is a hobby that can be enjoyed for a lifetime.
For more information, please visit: ArcadiaGlassHouse.com.
Greenhouses
Sizing Your Greenhouse for Optimum Utilization of Space
Published
6 years ago
on
April 1, 2016
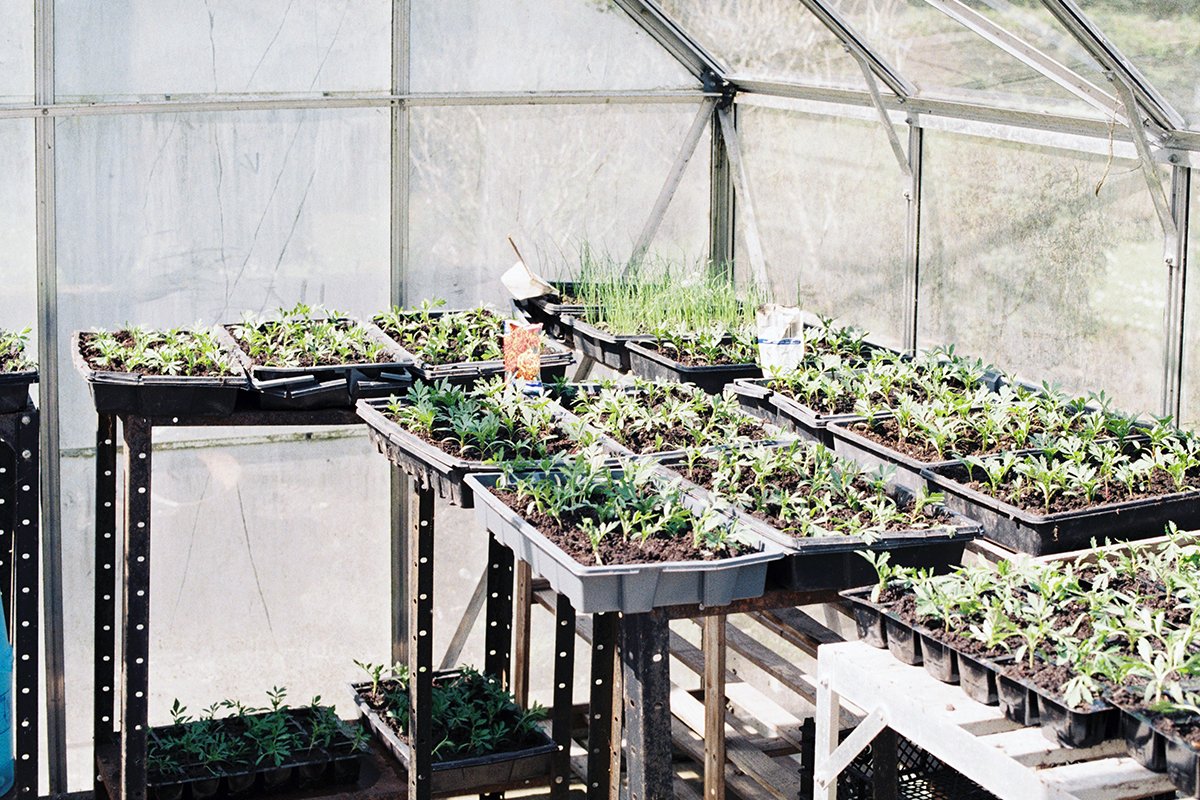
Prior to setting up a greenhouse it is important to consider how the space within the greenhouse will be utilized. Unfortunately, many gardeners do not think about how they are going to use the space before they set up or purchase a greenhouse. This can lead to frustration and an unsatisfying greenhouse experience. However, with a little forethought, you can get the appropriately sized greenhouse for your particular needs and desires. When thinking about the utilization of space, it is important to examine the available widths of the greenhouse and how it will affect the greenhouse's layout.
Greenhouse Widths
Greenhouses come in all lengths and widths. When contemplating the layout or floor plan of a greenhouse, a gardener should be most concerned with the width of the greenhouse because, in most cases, that is what will determine the dimensions of the benches and aisles. Hobby greenhouses are most commonly 8 or 10 feet wide but can also range from 12 – 20 foot widths. Most commercial or production greenhouses are usually wider and range from 20 feet and up. As previously mentioned, the width is important because it will determine the size of the benches that can be used. Benches are extremely popular for greenhouse gardeners and are used by most hobbyists. By examining the width of the greenhouse, a horticulturist can determine what kind of bench and aisle spacing he or she can have.
8 Foot Width
Many "hobby" greenhouses are available in 8 foot widths. Unfortunately, the 8 foot measurement is a representation of the outside dimensions of the greenhouse. In other words, this measurement does not take the frame into consideration and, therefore, the actual width on the inside will not be a full 8 feet. Greenhouses with 8 foot widths typically have 2 foot wide benches on either side of a 3 foot wide aisle. Although this may be big enough for some hobbyists, many horticulturists will quickly fill up the bench space and wish they had more room.
10 Foot Width
Greenhouses with a width of 10 feet are very popular among hobbyists because they instantly give 30% more bench space than an 8 foot wide greenhouse. A typical set up in a 10 foot wide greenhouse is to have 3 foot benches on either side of a 3 foot wide aisle. A 3 foot bench is the perfect size because it provides sufficient space for plants while not being so deep that the horticulturist can't reach the plants. All in all, a 10 foot wide greenhouse is a nice, comfortable width for hobbyists.
12 – 20 Foot Widths
Greenhouses that range from 12 – 20 feet wide are a good choice for horticulturists who want to grow on more than just benches. Growers who want to incorporate raised beds or who have a collection of tropical plants which need additional head space will find a greenhouse in this width range more suitable to their needs. Greenhouses of this width are also nice for hobbyists who want to add a seating area, water feature, or some other unique addition to their garden spaces. All of these greenhouse extras will take up space so always be sure to plan your greenhouse layout accordingly.
20+ Foot Width
Larger width greenhouses (20+ feet wide) are mainly reserved for educational or commercial applications. These wide greenhouses can have two 3 foot aisles with 3 foot benches on the outer sides and a 6 – 8 foot bench in the center. When optimizing space for production, these greenhouses are the ticket.
Before purchasing or building a greenhouse, make sure you take the time to think about the space within and how that space will be utilized. In most cases, the grower's intended application will determine the width of the greenhouse. A good greenhouse manufacturer will help you determine the most appropriate width for your application and help guide you to optimize the space within.
For more information visit ArcadiaGlasshouse.com
Greenhouses
Using a Greenhouse to Start Flower and Vegetable Plants in March
Published
6 years ago
on
March 22, 2016
March is a good month to begin plants for your flower and vegetable gardens. Listed below are some of the more common flower and vegetable plants that can be started in March. They will be ready to transplant outside in April and May. Varieties can be easily started in 1204 packs or 3″– 4″ pots. Plants in packs should be thinned to one plant per cell. The larger you want your transplants to grow, the bigger the cell or pot should be. If your germination space is small, you can start the seeds in smaller containers and transplant them into larger containers later.
The chart provides recommended, minimum size pots. Larger ones allow more room for roots, providing larger, healthier plants. Plants left in small containers too long will become root bound, decreasing growth vigor and production. Most tomatoes grown in larger pots will require staking.
The number of weeks recommended includes the period of germination at temperatures that are recommended by seed companies. To choose your planting date, decide when you want to sell or transplant your plant and begin germination the recommended number of weeks earlier. Seed companies can provide you with temperature and light/dark requirements as well. This information is often on the seed packages or provided in their catalogs.
| Variety | Number of Weeks | Container Size | Number of Weeks | Container Size |
| Basil | 6-8 | 1204 Pack | 9-12 | 4" Pot |
| Broccoli | 8 | 1204 Pack | ||
| Cabbage | 8 | 1204 Pack | ||
| Eggplant | 8 | 1204 Pack | 9-12 | 4" Pot |
| Lettuce/Greens | 3-4 | 1204 Pack | ||
| Onion | 8 | Open Pot or Flat | ||
| Pepper | 10 | 1204 Pack | 11-14 | 4" Pot |
| Tomato | 6-8 | 1204 Pack | 9-12 | 4-6" Pot |
| Dahlia | 8 | 1204 Pack | 9-12 | 4-6" Pot |
| Impatiens | 8-9 | 1204 Pack | 10-12 | 4" Pot |
| Marigold | 7-8 | 1204 Pack | 9-12 | 4" Pot |
| Nasturtium | 4-5 | 1204 Pack | 6-8 | 4" Pot |
| Petunia | 10-12 | 1204 Pack | 13-15 | 4" Pot |
| Sunflower | 4-5 | 4" Pot | 6-8 | 6" Pot |
| Zinnias | 5-6 | 1204 Pack | 7-9 | 4" Pot |
Lettuce and most other greens are ready to transplant in 3 or 4 weeks, but they can be planted in March and transplanted into the garden in April in many locations. Broccoli and cabbage can also be transplanted before the last frost date for your area. Using temporary covers, leaves will be protected from frost and allowed to mature more quickly. Seedlings can also be transplanted into the greenhouse floor or beds and be raised without additional heat.
The number of weeks recommended for flowers in packs will provide a healthy green plant, except for short marigolds, impatiens and some petunias, which may start blooming in the packs. For blooms in containers the longer number of weeks are recommended.
Melon, cucumber, squash, and pumpkin plants grow quickly and need only 3-4 weeks before they can be transplanted into the garden. They should be started later, usually in April, and planted in May after the soil has become warm.
Greenhouses
Greenhouse Space Saving Techniques
Published
6 years ago
on
March 15, 2016
With a little garden space planning, it is possible to drastically increase the productivity and enjoyment of a greenhouse garden. Like with any great structure, one can start from the foundation and work up to the top to make sure each area complements the others and is an efficient use of the space.
Going Underground
If a greenhouse is on a deck or already has permanent flooring, it may not be possible to take advantage of some great underground space. If at all possible, there are many advantages to having a "flexible" greenhouse floor. To start with, some area of floor that is not covered can allow for cultivation of the soil or the addition of a perfectly blended soil mix to grow plants at the ground level. This will result in an automatic space saving because the roots of the plants are occupying space below the greenhouse floor level that otherwise would be wasted. All that is generally necessary for walking and working in the greenhouse is to leave a three to four foot corridor down the middle and the rest of the floor area can be planted. But even this center corridor can be a door to an underground gardening powerhouse.
The Underground Greenhouse Engine
One of the best ways to turn a greenhouse into a full scale organic gardening machine is to convert the center corridor into an underground composting and/or vermiculture center, and it is quite easy to do. Simply dig a trench three to four feet wide and two to three feet deep in the center of the greenhouse from end to end. Stack a brick barrier on the sides and ends and cover with strong plywood sections. The plywood makes a nice greenhouse floor for walking through and tending plants. Sections of the plywood can be lifted to reveal the perfect cool damp environment for composting and/or vermiculture and a dry box section can be included for garden supply storage.
Hydroponics and the Underground
Any discussion of greenhouse space saving techniques would be incomplete without some mention of hydroponics. Hydroponics presents a level of control and efficiency that is geared toward productivity and getting the most out of available space. Underground is the perfect place to put nutrient reservoirs. Many hydroponics systems require the reservoir to be below the plant growing medium and below ground reservoirs allow the plant grow beds to be as low as ground level. They do not take up space in the greenhouse and keep the nutrient solution cooler in summer and warmer in winter.
Using Floor Space Wisely
With a few cautions in mind, the stacking plant growing space with tiered benches or shelves can add greatly to productivity. It is important to consider how the shelves and plants themselves will shade other plants from light. Just as tall plants are generally positioned in the back of the garden so they will not shade shorter plants, it is important to observe the path of the sun in relationship to the greenhouse placement and plant accordingly. Place tall shelving and plants where they will not block too much light from other areas of the greenhouse. Shelves and racks are best made of mesh or screen construction which allows light, air and moisture to pass more easily. Always try to buy adjustable shelving. It is much more versatile and allows for spacing shelves based on the requirements of each crop. Specially designed triangular shelves are also available for the corners of the greenhouse to take advantage of what is often dead space. One last note on shelving, and just about anything else that is placed in the greenhouse, light colors are best because they reflect light allowing more of it to be absorbed by the plants.
Using Lights to Increase Productivity
As mentioned above, it is best to position benches, shelving and plants to take the best advantage of the natural light that is available to the greenhouse. That said it is possible to lengthen the growing season, volume of plants that can be grown and productivity with the use of artificial lights. T5 Fluorescent lights have several advantages for greenhouse space saving. They do not require large bulky external ballasts, and are very low profile and can be attached to the bottom of a shelf to provide light to the plants on the next shelf down. Just be sure to have proper channeling for moisture from the plants above. Bulbs are available in warm, cool and full spectrum and they produce very little heat allowing them to be positioned quite close to growing plants. They are available in 48 inch long 2, 4, 6 and 8 tube models that are perfect for any width shelf.
Using Space Saving Hydroponics Towers
Hydroponics towers are a growing innovation that is hard to ignore when it comes to getting the most from each square foot. These systems stack growing containers in clever configurations so that plants still get light, but are vertically stacked to save ground space. Several different varieties are available to suit almost any greenhouse application.
Air Space
Last, but not least, because of their clear ceilings, greenhouses offer even more space for hanging plants. Once the floor and wall spaces have been planted, consider where hanging plants may work best without robbing too much light from other plants. As with shelves and other vertical plantings, it is important to study the path of the sun and shade in the greenhouse to determine where best to place hanging plants so the shade they provide is an asset not a determent to the greenhouse as a whole. This may be quite different depending on the season. In the summer, sun loving hanging plants may provide welcome shade when placed properly in the greenhouse. In the winter, they may need to be avoided entirely depending on the overall light requirements of the particular greenhouse application. Upside down tomato growers have also become popular for growing tomatoes and other plants hanging upside down and may make welcome space saving additions to the greenhouse.
It may perhaps be a habit from traditional outdoor gardening to look at the garden space as one dimensional and plan accordingly. A better approach is to take into consideration each level and surface from floor to sealing and how it will interact with the greenhouse as a whole. By taking a three dimensional view and planning the greenhouse garden from the floor up a better, more productive garden is within reach.
Want more information? Read these articles:
A Do-It-Yourself Greenhouse Built From Local Materials
Have a Plan Before Purchasing a Greenhouse
How to Build a Plastic Greenhouse
Sizing Your Greenhouse for Optimum Utilization of Space
Use a Cold Frame Greenhouse to Maximize The Natural Warmth Of The Sun
Using a Greenhouse to Start Flower and Vegetable Plants in March
Greenhouses
Does My Greenhouse Need a Permit?
Published
6 years ago
on
February 12, 2016

One of the first things a person must address when purchasing or building a greenhouse is what permits are required. The last thing a gardener needs is to purchase or build a greenhouse that doesn't meet the local code requirements. Every community is different so there is no standard when it comes to permits for greenhouses. However, finding out which permits are necessary is a relatively simple process and most potential greenhouse owners should be able to take care of it themselves. There are two types of permits that need to be considered when building or purchasing a greenhouse. Those two types of permits are zoning permits and building permits.
Zoning Permits
A potential greenhouse owner should check with his or her local zoning department to see what is required. Zoning permits regulate the location of the greenhouse on the property. For example, a zoning permit will specify how close to the lot lines you are permitted to build. This could be the side, rear, or front lot lines and will be determined by your community's rules and regulations. For instance, some communities may require that the greenhouse be built at least 20 feet away from the lot lines. Again, every community is different so be sure to check with your local zoning department to see how zoning permits affect your area.
Zoning permits will sometimes regulate the number of accessory buildings (greenhouses usually fall into this category) you can have on your property. Sheds and other outbuildings may be considered accessory buildings as well. The size of the building will also be taken into consideration by the zoning department. For example, the zoning department may decide that greenhouses that are less than 200 square feet need no additional building permits. In some cases, after meeting the zoning requirements, a potential greenhouse owner will have to get a building permit.
Building Permits
Building permits are typically issued by a county building department. Building codes look at the structural integrity and the physical appearance of the building. While many rural areas do not require any permits for accessory or agricultural buildings, most urban areas have some requirements. The building codes that address the structural integrity of a greenhouse generally deal with wind and snow loads and are specific to that geographical location. One of the first things to consider is whether you want a freestanding or attached greenhouse. Attached greenhouses normally require a building permit because they are considered an addition to the home and not an accessory building.
As far as building codes go, attached greenhouses are typically treated similarly to the addition of a sunroom. The building codes that deal with the appearance of the building will vary greatly from community to community. There may be regulations on how an accessory building appears. These rules are usually in place to maintain a high level of aesthetics in the neighborhood. In most cases, a greenhouse is welcomed by the community. Some homeowners' associations or condo associations may have stricter requirements on accessory buildings. They may even have their own architectural review board which would need to approve the greenhouse design prior to construction. In the rare case that a greenhouse doesn't meet the local requirements, you can apply for a variance. In most cases, a variance is possible because people like the idea of organic gardening in a greenhouse and local officials usually try to accommodate them.
Regardless of your location, experienced greenhouse manufacturers will help you work through the regulations process. In some cases, they may go as far as helping apply for variances or discussing your plans with a homeowners' association. Greenhouse manufacturers with quality customer service won't mind taking a few extra steps to ensure you get the right permits for your dream greenhouse.
For more information visit ArcadiaGlasshouse.com
Greenhouses
The Best Plants to Grow in a Hydroponic Greenhouse
Published
6 years ago
on
February 10, 2016
Hydroponic greenhouses can produce larger yields than a traditional greenhouse but for maximum success the grower must understand what to grow. Some plants may spread out too much to grow properly in a hydroponic greenhouse. Other plants may be cool weather plants and will not be able to stand the consistent high temperatures that other plants may need to thrive in. There are also plants that need special attention, if you decide to grow them in a hydroponic greenhouse and are too labor intensive.
Plants to Grow in a Hydroponic Greenhouse
Strawberries
Strawberries are one fruit that does quite well in a hydroponic greenhouse growing environment. Plants of this fruit are compact enough to fit in with the usual layouts of hydroponic greenhouses. You can set the plants out in a number of configurations and they will still thrive. Also, there are so many varieties to choose from depending on the size of berry and level of sweetness desired.
Potatoes
Potatoes and other root crops also work well, but only if they are given enough depth to grow adequately. You have to remember with these crops that they do a lot of their growing in the root area as well as up in their stems and foliage. If they are cramped for space, it will stunt their growth. You can choose the smaller varieties of the root crops, when available to help offer them enough depth.
Tomatoes
Tomatoes thrive when grown hydroponically. Of course, they need to have a support system with this type of greenhouse setting just as they do in a traditional greenhouse or garden setting. Some varieties grow larger than other ones though, so choose the type you think you can provide the best support for in your particular setup. Some other vining veggies that need support include peas, cucumbers and pole beans.
Mint
There are many varieties of mint that do well in this type of greenhouse, because they enjoy wet conditions. Mints spread quite a bit and should be given enough space. Other than this requirement, your chosen mint whether it be peppermint, spearmint, ginger mint or another type of mint should produce nicely for you.
Basil
Basil is another herb to plan to grow in your hydroponic garden setup. The moist conditions provided to the herb through this system actually enhance its flavor. As with other plants, your yield will most likely increase with using hydroponic methods of gardening. Many other herbs do well too, but you need to check the growing conditions they need to make sure before planting them.
Lettuce
Various types of lettuce will provide you with more flavorful harvests. Some people only think of iceberg variety when lettuce is mentioned, but there is romaine, sweet butter and many more to choose from for growing your salad greens hydroponically.
Cabbage
Cabbage is one of the cool weather vegetables that does well in this environment. You may need to adjust growing conditions for the cool weather vegetables. This means you may need to grow the plants according to their natural seasons. You can change the temperature settings in your greenhouse according to the crops you decide to cultivate.
Green Beans
Bush-style green beans will adjust quite well with the typical conditions set up in a hydroponic system. You will be able to harvest plenty for your table and have additional beans to can or freeze. The size of these is easier to deal with than the pole beans, even though with the right support, as mentioned earlier, you can also grow pole beans.
Propagation
Tips for Cloning Success
Published
6 years ago
on
February 2, 2016
Most of these tips will work for traditional cuttings as well as hydroponic cloning.
Select the plant you plan to clone. Select only plants that are in good health and are at least two months old. New growth is best if it's available, however, any healthy stem with at least two or three healthy sets of leaves will work. Only take cuttings from well hydrated plants. Plants that are dry will not perform as well as cuttings.
Hygiene cannot be stressed enough. Disease, fungus and viruses spread quickly and are a primary cause of failure. Luckily, a few easy steps will ensure healthy cuttings. It may be tempting to skip the cleaning steps, but you will be rewarded with quick healthy cuttings by spending a few extra seconds.
- Gather your tools: A sharp craft knife or razor blade, cutting shears, container with water, rooting hormone, clean cutting mat, cloning system.
- Prepare the water bath in the cloner. Measure nutrients carefully.
- Select a 2"-3" stem of plant, ideally with new growth. (Note: fall is the ideal time to find new growth, but cuttings will work in spring) cut below the intersection of leaves on the stem. Immediately place cutting into water until you are ready to process all cuttings.
- Remove lower leaves by carefully slicing them at the stem. Leave several leaves at the top of the stem. If leaves are too large for the cloning space, cut then lengthwise.
- Place cutting on a clean cutting mat. Sterilize blade with alcohol and carefully cut the stem diagonally at a 45° angle to expose as much of the plant's cambium as possible. Be careful not to crush any tissues. Dip knife in alcohol between each cutting.
- Place a small amount of rooting hormone in a small Dixie cup or small glass and dip cutting into hormone. Do not dip the cutting directly into main container to avoid contamination. Throw the excess compound away; do not add back to the original container. Note: Commercial growers typically use liquid rooting hormone because the plant absorbs the liquid faster than the powder.
- Secure the cutting in the basket and place in cloner.
Check your cuttings frequently. In a few days you will start to see nodes forming just prior to root development. Change the water once a week or per the manufacturer's instructions. Once roots are formed, transplant into 4" pots. Placing them in a cool greenhouse with bottom heat will encourage healthy root growth while keeping top growth compact and healthy.
Greenhouses
Greenhouse Construction: Planning for Snow Loads and Wind Loads
Published
6 years ago
on
January 18, 2016


With all the decisions to be made when contemplating purchasing or building a greenhouse, it may be easy to overlook snow and wind. However, a gardener needs to seriously consider how a greenhouse will handle snow and wind loads. As you can imagine, heavy snow fall or intense wind gusts can cause serious damage to a greenhouse structure. Unfortunately, not all greenhouse manufacturers are straightforward with snow and wind load ratings or requirements. It can also get confusing because many of the smaller hobby greenhouses are not required to meet the same codes as more permanent greenhouse structures. One thing is certain, potential greenhouse owners need to take it upon themselves to understand their geographical location's building code requirements and which greenhouse designs will meet those requirements.
The very first thing a gardener should do before constructing or purchasing a greenhouse is to check with the local building department (where building codes are issued) and see what the snow and wind load requirements are for his or her geographical location. Regardless of the type of greenhouse you plan to have (stand alone or attached) it is very important to check and see what the building code requirements will be. With this information you can go back to the greenhouse supplier or builder to see which greenhouse design will meet those requirements.
Small hobby greenhouses with a stamped aluminum construction generally will not require building permits but will rarely meet the requirements for snow or wind loads. Most hobby greenhouses are not designed to last a lifetime and will quickly degrade. Growers who are looking for a more permanent structure should look for greenhouses that utilize extruded aluminum framing instead of stamped aluminum framing.
Higher quality greenhouses with extruded aluminum framing will most likely meet local building code requirements. These greenhouses are designed to be a more permanent structure. Generally speaking, greenhouses need to withstand 30 pounds of snow per square foot (an equivalent of about four feet of snow) and wind gusts up to 105 MPH to meet most of the code requirements throughout the United States. Greenhouses built with quality extruded frames will not only be able to meet the wind and snow load requirements but will also be considered a truly permanent structure that is designed to last a lifetime.
In locations where snow loads or wind loads exceed the norm, additional bracing or advanced technological designs can be used to create additional strength. Some of the older greenhouses use heavy cross ties to meet higher snow load requirements. Many of the newer greenhouses are utilizing sophisticated engineering designs, like the scissor truss. The scissor truss design not only adds strength but also, because it eliminates the need for cross ties, allows for additional head room in the greenhouse.
If you are in the market for a greenhouse that will handle heavy snow and wind loads and last a lifetime, you should seriously consider a greenhouse with extruded aluminum framing. Small hobby greenhouses are suitable for some applications but should not be considered a permanent structure and certainly shouldn't be expected to withstand heavy snow loads or strong gusts of wind. A quick trip to your local building department will give you all the information you'll need for snow and wind load requirements. With that information you can discuss all of your options with your greenhouse supplier.
For more information visit Arcadiaglasshouse.com.
Photo Description: The innovative "Scissor Truss" design provides extra strength and higher headroom for larger spans in greenhouses that meet local building codes for snow load and wind loads specifications.
Hydroponics
Why Use a Growing Medium When Gardening With Hydroponics?
Published
6 years ago
on
January 12, 2016
Growing plants using hydroponics means you are growing without soil, but it doesn't necessarily mean that you are growing plants without a soil replacement. While not strictly necessary it is usually advantageous to use some form of growing medium. One very good reason to use a growing medium in your hydroponics garden is to ensure that the roots of your plants are adequately supplied with oxygen. In a traditional garden plant roots gather oxygen from the air trapped in the soil. A growing medium serves the same purpose for plants grown with hydroponics. Growing media are designed to trap air that can then be processed by the plant roots.
Another reason for using a growing medium is to provide a food reserve for the plants. Like air, nutrients from the feeding solution are trapped in the pores of the growing medium and are then available to the plants if needed. This can help to prevent crop failures. Here's a quick rundown of the kinds of media available to you when gardening without soil.
Types of Growing Media
Rockwool
Made from basalt rock and chalk, Rockwool is probably the most popular growing medium used by hydroponics gardeners. This porous material can trap large quantities of air and water at the same time.
Perlite and Vermiculite
Perlite is a pebbly volcanic rock that provides excellent drainage and aeration when used as a growing medium. It has a good drainage characteristic which means it does not hold much water and limited ability to trap nutrients. Vermiculite is a mineral that acts like a natural wick and is able to absorb large quantities of water. The combination of Perlite and Vermiculite is a natural for hydroponics system: one holds air and oxygen, the other holds water and nutrients.
Coconut Fibres
Made from the outer husks of coconuts this growing medium is becoming increasingly popular with organic growers. Some hydroponics growers feel coconut fibres are superior to Rockwool in their ability to retain air and water.
Expanded Clay Pellets
This medium is made from baked clay. The pellets are porous and retain both air and water very well. They can be reused as long as they are first sterilized.
Aquarium Gravel
This is the same colored gravel that is used in fish tanks. The main reason for its popularity is expense as it is inexpensive compared to other growing media. The downside is that it does not hold water, and therefore plant nutrients, very well at all. If you choose to use aquarium gravel you will need a constant water supply for your plants to avoid root drying.
Grow Lights
The 4 Types of Grow Lights
Published
6 years ago
on
January 8, 2016
Of all the hardware used in an indoor garden or greenhouse few compare in importance to horticultural lighting. For indoor gardens, horticultural lighting is the sole energy source for the plants. In greenhouses, artificial lighting supplements the sunlight and gives the plants enough light energy to perform up to the grower's standards. Whether a gardener is looking for a primary or supplementary lighting source, he or she should take the time to examine the lighting technologies available for horticulture. When making a choice, gardeners need to take into consideration the space they wish to illuminate and the cost of operation and maintenance. Currently there are four technologies used by horticulturists: high intensity discharge (HID), light emitting diodes (LEDs), fluorescents, and induction lighting.
High Intensity Discharge (HID)
High intensity discharge lighting includes both metal halide (MH) and high pressure sodium (HPS). HID lighting consists of three components: the ballast, the reflector or socket, and the bulb. Ballasts can be specific to the type of bulb (MH only or HPS only) or they can be switchable, or "smart" ballasts, which have the ability to operate either type of bulb. Most ballasts are specific to wattage; although some of the newer, digital ballasts can operate different wattage bulbs. The ballast connects to the power supply and acts as a power converter so the bulb receives the proper current. The reflector, or socket, is the component that connects the ballast to the bulb and the bulb itself is the component that actually emits the light. After receiving the proper current from the ballast, the bulb converts that energy into light. HID lighting is still the most popular choice for horticulturists for a few reasons. First, this technology has been around for a long time and is used in other industries. This means there are many manufacturers which helps lower the cost. Initial cost is not the only reason horticulturists continue to choose HID lighting. High wattage HID fixtures are very powerful and have the capability of penetrating a plant canopy along with covering a large area. For example, an indoor horticulturist who is using a 1000 watt HID light can adequately cover 25-50 square feet of garden space. Greenhouse growers looking for supplemental lighting can cover even more space with that same 1000 watt fixture. It is not uncommon for greenhouse gardeners to have a 1000 watt HID cover 100+ square feet for supplementary lighting purposes. Long story short, HID lighting has a low initial cost for a relatively large coverage area. This is the main reason HID lighting has remained so popular among horticulturists.
Light Emitting Diodes (LEDs)
Light emitting diodes, or LEDs, have been steadily gaining acceptance since their introduction within the horticultural community roughly ten years ago. Unlike other lighting technologies used in horticulture, LEDs are a solid state device which makes them extremely durable. LED fixtures usually consist of the panel of LEDs and a circuit board (generally housed within the lighting fixture). Many horticultural LEDs contain a heat sink and/or fan to help dissipate heat and increase the fixture's life span. The biggest advantages of LED technology are longevity and the ability to customize the light spectrum. Plants have a heightened response to particular light wavelengths and LED technology has the ability to provide higher amounts of the particular wavelengths plants desire. LEDs are the only technology that has the potential to manipulate the ratio of these wavelengths into the perfect ratio for photosynthesis. The first few generations of horticultural LEDs were somewhat of a disappointment to the horticultural community because they lacked the intensity to compete with HID lighting fixtures. Many of the original LED fixtures contained only two wavelengths of light (red and blue) and utilized low wattage diodes. LEDs have made great strides since the first generation and today's horticultural LEDs have the ability to compete with HID lighting in many ways. Many of the new LED fixtures contain more advanced wavelength ratios along with higher wattage diodes which allow for a greater penetration into the plant canopy. When comparing this technology to HID lighting, coverage is still somewhat of an issue. LED fixtures, unless they contain a special lens, are generally light-directional and the light will not spread out and cover a large area like a HID light. However, LEDs' higher energy efficiency combined with a lower heat signature has many indoor horticulturists, at the very least, giving LEDs serious consideration. There are also many greenhouse gardeners who have had success using LEDs for supplemental lighting.
Fluorescents
Fluorescent lighting has been used in horticulture for many years. Thanks to some of the newer fluorescents that are much more efficient than the shop lights from your dad's basement, fluorescents still have a solid place in horticulture. High efficiency fluorescents, like the T5 style, are still very popular among indoor horticulturists for vegetative lighting or for seedlings and clones. Fluorescent tubes, like the T5, automatically disperse light evenly throughout the entire length of the bulb. This is ideal for keeping young plants even in growth. Young plants grown under HID lighting (or any light source that is emitted from a single focal point) need to be continuously rotated to remain uniform. Unfortunately, as with the early generations of horticultural LEDs, fluorescents generally lack the punch needed to penetrate deep into a plant canopy for fruiting or flowering plants. Although some gardeners have had success fruiting under fluorescent lighting, HID lighting is a far more popular choice for fruiting plants. The light coverage of fluorescents is also limited to pretty much directly under the fixture which makes them less desirable for larger areas. Fluorescents can be a solid choice for supplementary lighting purposes in a greenhouse, especially when the grower is trying to limit heat in the greenhouse. When raised high enough above the plants, fluorescents can give adequate coverage in a greenhouse for supplementary purposes. However, if the garden requires more than four hours per day of supplementary lighting (like in a year round greenhouse) HID lighting may be a better fit.
Induction Lighting
Induction lighting is a technology that has recently been making headway in the indoor gardening industry. Induction lighting is unique in that it utilizes a sealed bulb design. This differs from HID and standard fluorescents because these technologies rely on electrodes which bring electricity into the bulb. Induction lighting utilizes microwave or radio frequencies to pass through the sealed bulb and excite the metals and gases sealed within. There are two types of induction lighting currently used in horticulture: induction fluorescents and sulfur plasma.
Induction Fluorescents
Induction fluorescents have all of the advantages of standard fluorescents but will not degrade as quickly. This allows them to retain a high CRI (color rendition index) and high amount of PAR (photosynthetically active radiation) for a long time. What this equates to is more uniform growth in the garden and much less maintenance. The initial cost of these fixtures is high but the gardener will not have to pay for bulb replacement throughout the entire life span of the fixture (usually 10-15 years). Like the T5 fluorescents, induction fluorescents are a great choice for vegetative growth or clones and seedlings. Induction fluorescents also have a coverage limited to almost directly under the light source. To combat this problem, some indoor horticulturists will place multiple fixtures close together to get adequate coverage.
Sulfur Plasma
Sulfur plasma is an induction technology that emits all its light from a small quartz sphere. The most promising thing about sulfur plasma is that it has the intensity of HID lighting with a more suitable light spectrum for plant growth. In fact, sulfur plasma lighting has the closest spectral light output to that of the sun than any other artificial light source. As with HID lighting, coverage and plant canopy penetration are not issues for sulfur plasma. Sulfur plasma is the newest lighting technology to be introduced to the horticultural industry and is currently very expensive. As more manufacturers produce sulfur plasma lighting, there will be a reduction in cost and, hopefully, a continued increase in efficiency. Sulfur plasma lighting could be the ideal lighting source for both indoor gardens and greenhouses in the future. Another advantage of sulfur plasma is longevity. As with induction fluorescents and LEDs, sulfur plasma lighting can last up to 10 years and will lose very little PAR and CRI over the course of the fixture's life span.
When purchasing a horticultural lighting system and facing all the choices, gardeners have their work cut out for them. As the old saying goes "there is more than one way to skin a cat". This could not be more true when it comes to horticultural lighting. All of the previously discussed technologies work well to grow plants. Some are more efficient with a higher initial cost while others are inexpensive and lose more energy to heat. Personal preference, an individual's budget, and the specific use for the fixture are all things that a grower must weigh heavily before making his or her final decision about a lighting system. Some gardeners want to experiment with the latest and greatest in horticultural lighting technologies. Some gardeners want a reliable lighting system that will not break their budgets. In the end, it is ultimately up to the gardener which lighting fixture is the best fit for his or her garden.
Greenhouses
Greenhouse Lighting Options
Published
6 years ago
on
December 16, 2015
Whether it's to provide supplementary lighting or to extend the length of the photoperiod, some greenhouse growers are equipping their greenhouses with artificial light sources. Before purchasing a lighting system for a greenhouse, a grower should first determine which type of lighting system will best meet their needs.
T-12 Fluorescent
T-12 fluorescent lights are the standard four foot fluorescent lights commonly used in garages and shops. In fact, many people refer to T-12 fluorescents as "shop lights". Although T-12 fluorescents are just fine for starting seeds indoors or illuminating indoor houseplants, they usually lack the intensity and efficiency to provide light to plants in a greenhouse.
T-5 Fluorescent
T-5 fluorescents are a more powerful and efficient version of fluorescent lighting. Still available in four foot lengths, the skinnier T-5 bulbs are 54 watts each. Specialty horticultural enhanced bulbs are available for T-5 fixtures in both the warm (red) and cool (blue) spectrums. The warm spectrum bulbs are rated around 3000 K and the cool spectrum bulbs are rated around 6400 K. During the fruiting or flowering stage of growth most plants require a higher percentage of red spectrum light. During the vegetative stage of growth plants require more blue spectrum light. Many T-5 fixtures hold multiple bulbs and allow "banks" of bulbs to be turned on or off. In other words, it is possible to set up a T-5 fixture to customize the light spectrum in your greenhouse. During the vegetative stage, the bank with the blue bulbs should be on. When the transition or flowering stage begins the banks with the red spectrum bulbs can be activated in order to give the plants the more appropriate spectrum for that stage of growth. Generally speaking, T-5 fluorescents are the most cost effective option for the hobby greenhouse grower.
Metal Halide
Metal halide is a type of high intensity discharge (HID) lighting that can be used in greenhouses. Metal halide lighting systems are more intense than fluorescent lighting fixtures and are a good choice when growing roses, tropical palm, or other plants that will require more intensity than fluorescents can provide. Metal halides generally produce a white or blue spectral output which makes them a good fit for vegetative growth. Metal halides are commercial quality fixtures that come in 400, 600, or 1,000 watts. Metal halide lighting systems require three components: the bulb, the ballast and the reflector or socket base. These lighting systems create a good amount of heat and can be quite expensive to operate. However, in some cases, metal halide is the only way to provide plants with the intense blue light spectrum they require for vegetative growth.
High Pressure Sodium
Like metal halide, high pressure sodium is a type of HID lighting. These lighting systems are also available in 400, 600, and 1000 watts. The biggest difference between high pressure sodium and metal halide is the spectral output. High pressure sodiums provide a good amount of red spectrum. This makes these lighting systems a great fit for fruiting or flowering plants. Since high pressure sodiums are also a type of HID lighting system, they will also require a ballast and reflector or socket.
If you have determined that your greenhouse will require a HID lighting system and you plan to provide artificial light during the plant's vegetative and flowering stages, you should look into a convertible ballast. Convertible ballasts allow the grower to use both metal halide and high pressure sodium bulbs in the same fixture (but not simultaneously). A grower can use his or her metal halide bulb during the vegetative stage and then switch to a high pressure sodium bulb during the flowering stage.
LEDs
There is certainly an emerging opportunity for LED lighting systems to be incorporated into the greenhouse. Consumers should be aware that LEDs are very spectral specific and they need to make sure the LED light system they purchase provides the spectral output required by their plants. Unfortunately, there are a lot of variables to consider when comparing LED lighting fixtures. The light spectrum, actual wattage, and type of lens used are all things to consider when purchasing a LED system. There is also a wide variance in overall quality. Many of the cheap LED fixtures will not stand up to the conditions found within a greenhouse. There is no doubt that LED lighting systems will continue to shape the future of horticulture but it is important for consumers to closely examine what they are purchasing.
For more information ArcadiaGlass house.com.
Pest Control
Tips for Keeping Pests Out of the Greenhouse
Published
6 years ago
on
November 18, 2015
The best way to avoid pest problems in a greenhouse is to keep them out to begin with. The list that follows gives many ways to help keep a greenhouse pest free. The more of these that can be integrate into greenhouse gardening practices, the better chance a gardener will have of winning the war against undesirable garden pests.
Start Plants from Seed
If plants are bought at a nursery or a garden center, one can not be assured that the plants are perfectly clean. If one has been getting plants from a reputable producer and has not had problems in the past, it would be a good idea to stick with that grower, even if the prices are higher. Treated seeds are safer for starting your greenhouse plants. Untreated seeds are more likely to carry a seed-borne bacterial or fungal disease.
Repot Plants Outside the Greenhouse
Repotting plants should be done outside of the greenhouse, and any used pots should be cleaned and disinfected with a 10% bleach solution before use. Commercially available soilless mix should be used as the media for seed starting and potting greenhouse plants. This will allow one to avoid introducing insect and microbial pests that often live in soil.
Protect the Work Area
Protect the ground on the floor of the greenhouse with a barrier to keep soil born pests from digging their way in from the outside. Work in the greenhouse first before working in the outside garden. Outside plants should not be kept near the greenhouse door. These plants can be a safe harbor for bugs waiting for a chance to get in the greenhouse.
Hands should always be washed before going into the greenhouse. This is particularly important after working with plants, or produce in the kitchen.
If one has been in close contact with plants, grass or dirt/mud, a change of clothing may be in order before entering the greenhouse. If one has been walking through grass or mud, it is a good idea to remove footwear, before entering your greenhouse. If one will be walking in the woods or a wooded area under trees, or even just walking on dirt paths, try to do it after working in the greenhouse.
Consider possible contamination by visitors to the greenhouse. Visitors should not enter the greenhouse after being in another greenhouse, a garden or an agricultural field.
Clean the Tools
Insects, mites or diseases can be taken into the greenhouse on garden tools that have been used outside. Tools should be thoroughly washed and disinfected with a 10% bleach solution before bringing them in the greenhouse and in between working on separate plants.
Items that have been exposed to plants or produce are a source of contaminants. Used plant shipping boxes and produce shipping boxes may be very useful, but they should never be taken into the greenhouse.
No Pets Allowed
Dogs and cats, that live or spend time outdoors, should never be allowed in the greenhouse.
A Few More Things
Screen air intakes to the greenhouse with a very fine mesh. The screen area should be at least five times the area of the greenhouse air intake, as to not restrict airflow.
Consider if a double door is possible. This is particularly helpful in keeping moths and butterflies out. Moths and butterflies are not generally a problem themselves, but when they lay their eggs on your plants, they will soon hatch caterpillars and start to eat their hosts. On your daily bases remove any of them that are present.
Sticky fly traps can help in early detection of some flying and crawling pests.
Inspect plants as often as possible for visual predators or damage caused by harmful pests, fungus, bacteria or disease.
Greenhouses
Sizing Heating and Cooling Equipment for a Greenhouse
Published
6 years ago
on
November 17, 2015
Maintaining consistent temperatures is one of the most important aspects of greenhouse gardening. During the hot, summer months, most greenhouses will require some sort of cooling to ensure the temperatures don't get too hot. During the cold winter months, most greenhouses will require some sort of heating to ensure temperatures do not get too cold. Before purchasing any heating or cooling equipment, a grower should take a close look at his or her space and make a few sizing calculations. With these calculations and a few considerations, a horticulturist can be sure to get the properly sized heating and cooling devices needed to keep the greenhouses' temperature in check.
Cooling/Ventilation
The most effective way to cool most greenhouses is with a powered fan. A powered fan will actively draw fresh air through the greenhouse and exhaust it outside of the greenhouse. The cooler air, from outside along with a natural evaporative effect, help keep the greenhouse cooler. In fact, a powered ventilation system will typically make a greenhouse run 10 degrees cooler than if the greenhouse is passively cooled (vents only). To make sure there is enough cooling power, a gardener must "size" the fan that will be needed for the given garden space. Fans are rated by their CFM or cubic feet per minute. Ideally, a greenhouse should have all of its air exchanged in 1-2 minutes. A simple and straightforward way to determine the needed CFM is to multiply the length by the width by the wall height of the greenhouse as shown below:
CFM Calculation
Length x Width x Wall Height = Recommended CFM (Cubic Feet of air volume per Minute)
Granted, this is not an exact calculation of the greenhouse's cubic feet because it does not take into consideration the roof pitch, etc. However, this measurement is accurate enough to properly size a powered fan for a greenhouse. Once a grower has calculated the recommended CFM, he or she can set out to find a fan that meets that criteria. For example, a greenhouse that is 20 feet long, 10 feet wide, and has a wall height of 10 feet will have a recommended CFM of 2,000 (20 x 10 x 10 = 2,000). The owner of this greenhouse should purchase a fan with a minimum of a 2,000 CFM rating.
Heating
A gardener planning to heat his or her greenhouse with gas or electric must first determine the size of the heater. The best way to determine this is to figure out how many BTUs will be required to heat the space. This is done by first calculating the total square footage of exposed surface area. In other words, the exposed wall and roof surface area. Remember that the roof area, due to the pitch, will not be equivalent to the area of the floor. In fact, the exposed surface area of the roof will be larger than the floor area footage. After determining the total square footage exposed, the grower must determine the maximum desired temperature in the winter (the temperature at which the gardener wants the greenhouse to operate during the winter months) and the minimum temperature outside of the greenhouse. Remember to be realistic when making the temperature determinations. In other words, base your calculations on average temperatures rather than the extremes. The BTU calculation is completed when you multiply the total exposed surface area by the difference between the desired temperature and the outside minimum temperature, and then divide that number by the R-value of the greenhouse material. It's important to remember when calculating the required BTUs that gas heaters operate at 80% efficiency compared to electric heaters which operate at 100% efficiency. In other words, a grower must take the lower efficiency into consideration in his or her calculations or he or she must find the gas heater's output BTU rating (which already takes the 80% efficiency into consideration).The following is the formula that should be used to calculate the needed BTUs:
BTU Calculation
Sq. Ft. Exposed Surface Area x ( Tmax – Tmin ) ÷ R Square Feet of Glass or Poly Surface Area x (Desired Temperature Inside – Minimum Temperature Outside) ÷ R-value
Here are the R-values of some commonly used greenhouse glazing materials:
| Material | R-Value |
| Glass – Single Pane | 1.0 |
| Polycarbonate – 8mm Twinwall | 1.7 |
| Polycarbonate – 8mm Triplewall | 2.1 |
| Glass – Double Pane | 2.3 |
| Polycarbonate – 16mm Triplewall | 2.6 |
| Polycarbonate – 16mm Five-wall | 3.0 |
| Glass – Double Pane Low-E | 4.0 |
Although all of these R-values may seem low when compared to a home or commercial building, there is a significant difference when comparing these materials to each other. For example, a greenhouse with single pane glass will require twice the BTUs (and cost twice as much to heat) as a greenhouse with a triplewall polycarbonate. In other words, when compared to each other, the R-values of these materials are quite significant, especially when considering how the required heating load is affected.
With a few simple calculations, any greenhouse grower can determine the appropriate size cooling fan and heater for his or her greenhouse. Greenhouses that have properly sized heating and cooling equipment will not only allow a gardener to extend the growing season but will also efficiently control temperatures in the greenhouse.
For more information visit ArcadiaGlasshouse.com.
Greenhouses
Grow All Year Round with Artificial Heat
Published
6 years ago
on
October 20, 2015

A gardener who owns a greenhouse has the capability of extending the growing season by a few months each year. There are even a select few greenhouse gardeners who can get away with growing year round without adding a heating system. In most climates, however, during the winter months the nighttime temperatures become too cold for most plant species. In order for most greenhouse hobbyists to keep the greenhouse operational year round, some sort of heating system will need to be added. The three most common ways to heat a hobby greenhouse are with gas, electric, or passive solar heat.
Gas
Heating a greenhouse with gas is the least expensive option. The cost of heating a greenhouse with gas is the main advantage of gas heating and is the main reason people choose gas heating over other options. Beware of open flame heaters for greenhouse applications. These heaters will emit ethylene gas which can affect budding plants, such as orchids, to the point where their blossoms will not form or will fall off altogether. The other problem with open flame heaters is they have safety oxygen sensors which will automatically turn off the unit when depleted oxygen levels occur. This is a great safety feature for a heater within a home but in a greenhouse it can cause some problems. Many of the newer greenhouses are practically air tight which means they can get depleted oxygen levels fairly easily. If the heater turns off during the night, all the plants in the greenhouse could perish. Gas heaters that have a flue and are power exhausted are the best for greenhouse applications. These heaters will need to have a hole punched into the side of the greenhouse for the exhaust. All in all, an average gas heater for a greenhouse runs at 80% efficiency (mainly due to the heat loss through the exhaust ports).
Electric
Because there is no need for ventilation with electric heat, this type of heating is the most efficient. Electric heating runs at 100% efficiency. However, electricity is expensive and heating a greenhouse year round with electricity alone may be too expensive for many gardeners' greenhouse budgets. However, there are some ways a gardener can supplement heat naturally to offset some of the cost of heating with electricity. For example, passive solar heat can be used to offset some of the cost associated with electric heating. If you do choose to go with an electric heater, it is best to get a 240V heater which will have plenty of heat capacity. Over the long run, 240V units save money and are very reliable. If you must go with a 120V unit, try to avoid infrared heaters or heaters that transfer heat to objects instead of heating the air. For greenhouse applications, a gardener will need a heater that will heat the air within the greenhouse. The best inexpensive 120V heaters for greenhouses are the oil-filled radiator-style heaters. If placed near a fan, these small heaters can adequately heat some small hobby greenhouses during the winter months.
Passive Solar Heat
Passive solar heat refers to collecting heat from the sun's radiation during the daytime and releasing that heat into the greenhouse during the nighttime. This is usually done with water or some other thermal mass that is capable of absorbing and holding heat for a duration of time. One technique is to line the north wall of a greenhouse with black water containers. When placed on the north wall, these containers will not shade light from reaching the plants in the greenhouse; instead, they will absorb light and heat that passes through the greenhouse to the north wall. When the sun sets, the heat that is held by the water will slowly dissipate into the greenhouse environment. When passive solar heat is used in conjunction with electric heat, it can significantly reduce the annual cost of heating a greenhouse.
For more information please visit ArcadiaGlasshouse.com.
Photo: The pictured 5-gallon water jugs are painted black and stacked against the north wall of the greenhouse to act as Passive Solar Heat Collectors in the winter.
General Gardening
Easy Composting with the Smart Pot Compost Sak
Published
6 years ago
on
October 13, 2015

Gardeners who live in the city often do not have the space for a traditional compost pile. However, this doesn't mean that a gardener living in an urban area cannot set up a compost bin and reap the rewards of composting. The idea of turning kitchen scraps and yard debris into an organic amendment for garden soil is catching on with an increasing amount of urban gardeners. The good folks at Smart Pot have created the most affordable way an urban gardener can get started composting their kitchen scraps and yard debris right away. The product is called the Compost Sak.
The Compost Sak
The Compost Sak is pretty self-explanatory. It is a large sack designed for composting. The Compost Sak is made out of a porous fabric material which allows the compost to "breath", in comparison to traditional nonporous bins. The Compost Sak is designed to be filled with kitchen scraps, yard debris, and/or other compostable items. The Compost Sak has a capacity of over 100 gallons. At 30" wide and 38" tall, the Compost Sak is capable of producing 12 cubic feet of pure compost. Some gardeners even add worms to their Compost Saks to aid the composting process.
Getting started composting with a Compost Sak couldn't be any easier. Start by placing the Compost Sak in a location that receives some sun and is mostly out of the way (for your convenience). Try to add two or three parts "brown" material for every one part "green" material. "Brown" material includes dead leaves; dried straw, cardboard, etc. "Green" material refers to wet plant material, like grass clippings, and kitchen scraps, such as banana peels. The actual compost process will begin naturally on its own. There are commercial compost starting agents available if a gardener wishes to get a leg-up on composting. Some people add a little water when they start a compost pile. Just be careful not to add too much. The key to a successful compost pile is a good ratio of moisture and oxygen. The balance between the two is what makes the microorganisms thrive.
The Compost Sak by Smart Pot is a lightweight, affordable, and easy way for anyone to get into composting. This product is not designed to replace high-end tumble composters or to replace the traditional multi-bin composting technique. Instead, the Compost Sak is designed to give gardeners, who live in the city or who do not have a lot of space, a way to inexpensively get into composting immediately.
For more information visit Compostsak.com or Smartpots.com.
Hydroponics
Flood Tray Liners by Smart Pot
Published
6 years ago
on
September 22, 2015
Flood and drain, also known as ebb and flow, hydroponic systems are one of the most popular hydroponic systems used by horticulturists. Most flood and drain systems consist of a tray (which holds the plants) and a reservoir (which holds the nutrient solution). The tray is set on a stand or raised up on blocks so that the bottom of the tray is higher than the top of the reservoir. In most cases, the tray sits directly above or sometimes even rests on top of the reservoir. A submersible pump within the reservoir then pumps the nutrient solution into the tray. The tray has an overflow valve installed so the depth of the nutrient solution in the tray can be controlled and ensures the tray doesn't overflow with nutrient solution. After a set duration of time, the pump shuts down and, with the help of gravity, the nutrient solution drains back into the reservoir. As with other hydroponic systems, plants grown in a flood and drain system generally experience faster growth rates and larger yields.
One issue with conventional flood and drain systems is the growing medium used in the planting containers and how it affects the pump. Because the nutrient solution needs to enter the planting containers from the bottom, a flood and drain system requires open bottomed planting containers. Typical planting containers can be used in a flood and drain system but can cause issues due to the size of the drainage holes in the container. As the water flows back to the reservoir and out of the planting containers, it can bring with it sediment and soil that will damage the pump and possibly compromise the entire hydroponic system.
Many growers who use flood and drain systems have already discovered the great benefits of using Smart Pot planting containers. Smart Pot fabric containers can act as filtration screens for the medium. When used in a flood and drain system, a Smart Pot fabric container will allow the nutrient solution to reach the root mass but will keep all soil and sediment from reaching the pump.
Flood Tray Liners by Smart Pot
The folks at Smart Pot took flood and drain hydroponic gardening to the next level when they introduced their Flood Tray Liners. These Flood Tray Liners are made from the same great material as the Smart Pot containers and fit directly into the flood tray. These liners give the grower many different options. Growers can place the medium directly into the liner and grow their plants in a large bed or they can use virtually any planting container they desire regardless of the size of holes in the bottom of the container. The Flood Tray Liner will essentially act as a filter so that the nutrient solution is never contaminated with soil or sediment from the medium. The Flood Tray Liners by Smart Pot come in three convenient sizes which fit the most commonly used flood trays: 4' x 4', 4' x 8', 3' x 3'. Smart Pot's Flood Tray Liners will save a grower both time and money and are a simple way to increase the productivity of a flood and drain hydroponic garden.
For more information visit Smartpots.com.
Greenhouses
Foundations for Greenhouses
Published
6 years ago
on
September 15, 2015

When setting up a greenhouse, one of the most important aspects of the construction process is the foundation. There are a few different types of foundations that can be used for greenhouses. The foundation used will be determined by the type of greenhouse, the building codes and, in some cases, personal preference. Essentially, the foundation is the complete system on which the greenhouse structure sits. One of the key components of a foundation is the footing. The footing refers to the point at which the structure meets the soil. This is the section that the structure rests upon. Footers are not always necessary for a standard hobby greenhouse. In situations where they are necessary, footers are typically poured concrete and their exact depth is determined by local building codes and the location's frost levels. Footers help to prevent sagging or the dropping of the structure's walls and/or floor into the ground. The choices for a greenhouse's foundation are typically dependent on the type of greenhouse structure that will be built.
Attached Greenhouses
If you have an attached even-span or a lean-to greenhouse there is a need for footers with the foundation. Local building codes will determine the exact depth needed for the footers. Basically, attached greenhouses require frost free footers that will not shift or move. As the ground freezes and thaws structures without the proper foundation could move or sag. If you plan on building an attached greenhouse, you should also plan on a more extensive foundation. In most cases, the gardener is already planning on the expense of a foundation for the attached greenhouse so the cost of pouring a concrete pad for the floor is seen as a minimal addition. However, some gardeners still prefer the moist, earthy smell of gravel and will have a gravel floor installed. A limestone screening and weed barrier placed beneath the gravel will ensure no weeds start growing from the floor. Some gardeners prefer a gravel floor for its natural drainage properties as well. Regardless of the floor material chosen, the footing requirements will not change.
Freestanding Hobby Greenhouses
Smaller, freestanding greenhouses do not have the same requirements as an attached greenhouse and, therefore, give the grower more options when it comes to the foundation and floor. Freestanding greenhouses can have a concrete slab poured without a deep foundation. In fact, if the greenhouse doesn't have a knee wall, it can be placed directly on a cement slab or it can be placed on a 4' x 6" treated lumber base. The best wood choices for a lumber base are usually cedar, redwood, or cypress. Rebar can be added to the wooden base for additional support if desired. For a freestanding greenhouse with a knee wall (a brick or cinder block wall that stands roughly knee high), a 12" x 12" surface footer is required. This is because the additional weight of the brick or cinder blocks could otherwise sink in to the soil and affect the structural integrity of the greenhouse. Knee walls are usually installed to add design appeal and for their natural high thermal mass. During the day, the stones absorb heat from the sun and during the night, they act as a passive heater as the heat is released into the greenhouse.
Generally speaking, greenhouses that are attached to the home or freestanding greenhouses that are more than 120 square feet will need building permits or will have to be up to code. However, it is always a good idea to check the local city codes to see what permits and footings are required before beginning construction on any greenhouse.
For more information visit ArcadiaGlasshouse.com.
Containers
What is Wrong With Transplanting
Published
6 years ago
on
September 8, 2015
I hear a lot of indoor and container gardeners speaking about how transplanting is bad, and that you want to minimize it. They also complain that it damages and stresses the root zone and causes the plant react poorly and be sad
None of Us Want Sad Plants
Mangling and abusing the root zone it is not a good idea – trauma is not good for anyone or their plants. I don't care what they say about "What doesn't kill you makes you stronger" it isn't accurate, because a maiming is not something that any plant wants, and it's not the way to help a plant thrive.
Transplanting is Different
Transplanting is a form of plant management that considers the optimal and most efficient environment for a plant's root zone at any stage of growth. Transplanting is:
- A way of controlling growth
- A way to reduce costs
- A way to reduce problems caused by environmental excesses
In the root's environment, an excess of moisture and the absence of oxygen will have an effect on the susceptibility of a plant to pathogens.
Start Small
When you are container gardening and growing indoors start small with your plants because small works in almost every situation. In a small container, the roots can grow into it without stagnant pockets where no uptake occurs. Let the plant grow into its container, and then give it some time. At each interval, when the roots have filled in, give it a bit more room and energy by transplanting.
A good rule of thumb I learned from a mentor is to double the container size every couple of weeks. You can modify that schedule, if needed, to control the growth – hold it longer and keep it from exploding, in the right conditions it will thank you. Plus, smaller pots mean we use less water, fewer nutrients and lower costs.
If you follow this process you can keep the substrate moist and the roots can handle it. If a container that is too large is used for a root mass that is too small, over-watering can cause death or stagnation. When this happens the plants suffer and a grower only wastes money and time.
At each transplant interval, give the plant what it needs and when it is time to move the plant do it gently. This process can be made easier by using containers that facilitate easy removal – graduated and conical shapes are best. Start by massaging and whacking the outside of the pot to break off the limpet-like roots, and then hold the soil with the stalk as you remove the old pot. The plant will barely notice.
Emulating nature is great, but urban gardeners do not have the luxury of sunlight in the best latitudes, constant fresh air and water, microbial and fungal networks, thriving ecosystems of predators and prey, etc. it just isn't available in a contained setting. But you do have the ability to coax plants into their optimal states in indoor and container gardens. With the right conditions and proper care there is some certainty that horticulture can bring out more from a plant than nature can alone.
Jason Rider is the president of Thriving Systems Design. He can be contacted at j.rider@c-bite.com and you can visit their website at C-Bite.com.
Pest Control
Conventional Pesticides Versus Minimum Risk Pesticides
Published
6 years ago
on
August 18, 2015
A pesticide is any substance or mixture of substances intended for preventing, destroying, repelling, or mitigating any pest and will make claims of this on the label and advertising. Any substance falling within this definition of a pesticide must be registered by the Environmental Protection Agency (EPA) before it can be legally sold or distributed in the United States. Section 25(b) of the Federal Insecticide, Fungicide, and Rodenticide Act (FIFRA) has determined a Minimum Risk Pesticide does not require EPA registration because it poses little to no risk to human health or the environment. Individual states may still require registration of minimum risk pesticides.
Even the most careful indoor gardeners can suffer from insect and disease problems with their plants. Minimum risk pesticides are made from natural ingredients that have proven over time to defend against insects and disease, making them an effective option for prevention and control that is also non-toxic to humans. Minimum risk pesticides are generally a solution of botanical oils from herbs such as clove, thyme and rosemary. They work on contact by smothering and dehydrating insects and disease spores while providing a barrier preventing pest establishment.
Things to Consider When Selecting a Minimum Risk Pesticide
Safety and Use
It is important to remember that these products are still pesticides and though their ingredients are naturally occurring, it does not mean all of them are suitable for consumption. Not all minimum risk pesticides are allowed for use on food crops. EPA regulations are very specific on which products are allowed and which are not. A product label should clearly list specific insects, diseases, and the crops they can be applied on.
Ingredients Approved for Use on Food
Castor oil (U.S.P. or equivalent), cinnamon and cinnamon oil, citric acid, cloves and clove oil, corn gluten meal, corn oil, cottonseed oil, garlic and garlic oil, geraniol, mint and mint oil, peppermint and peppermint oil, potassium sorbate, putrescent whole egg solids, rosemary and rosemary oil, sesame (includes ground sesame plant) and sesame oil, sodium chloride (common salt), soybean oil, thyme and thyme oil, white pepper
Ingredients Not Approved for Use on Food
Cedar oil, citronella and citronella oil, dried blood, eugenol, geranium oil, lauryl sulfate, lemongrass oil, linseed oil, malic acid, 2-phenethyl propionate, sodium lauryl sulfate, zinc metal strips
Efficacy and Control
There are significant differences in efficacy and control when using natural products. It may cost a little more, but purchasing the right product should resolve your pest problem and be safe for you and your plant. An easy test is to compare two products with the same active ingredient at different price points. The higher priced item is likely to have more active ingredient leading to a greater chance for control. Research the products before you make a purchase, a little digging can give you a lot of insight into what goes into making and supporting each product. For example, can you find test data to prove efficacy? Has a product been formulated using new techniques or technologies to give it a performance edge? These questions are just the start to finding the best minimum risk pesticide for your needs.
Propagation
A Consistent Environment is a Key Factor in Successful Plant Propagation
Published
6 years ago
on
July 27, 2015
Although germination and rooting techniques vary depending on the specific plant species, there are some general guidelines that can be followed for propagating the majority of greenhouse ornamentals and vegetable plants.
From Seed (Sexual Propagation)
A plant started from seed receives its genetics in a manner similar to the way humans receive genetics. Just as we are made up of a combination of our father and mother, a plant started from seed is made from the genetics of its father and mother. As with humans, some traits can skip generations and there is no guarantee that a plant started from seed will inherit specific traits from its mother or father. This is the main reason the majority of commercial plant propagation is done by clone or tissue culture. Starting from seed is unpredictable but it is also a chance to start a completely unique plant that will add more biodiversity to our wonderful planet.
Temperature and Humidity for Starting Seeds
Germination is the process in which the plant emerges from the seed to start its life. For most plants germination is best done in a very moist (high humidity) environment at a reasonably warm temperature, usually around 75-85 degrees F (the exception to this would be seeds that are generally planted in early spring when the ground temperature is much cooler). Propagation trays with humidity domes are great for starting seeds because they create a microclimate that is more easily controlled. Seeds can be placed directly into a moist medium in the tray and covered with the humidity dome. If the environment is not at least 75 degrees F consistently, it is advised to place a seedling heat mat under the tray to keep a constant temperature. Plants, in general, respond better to consistency and this is especially true with seeds or clones. Keep the top portion of the medium moist until all of the seeds have sprouted. Once the seedlings have broken the surface, lift the dome off periodically to bring in fresh air and also acclimate the seedlings to the lower humidity of the environment. Slowly increase the amount of time each day the dome is removed until it is removed entirely. Most varieties of plants can be acclimated in a matter of a few days. Follow the seed packet's instructions for thinning, spacing, and transplanting.
Another popular germination method is the wet paper towel technique. Place your seeds in a damp paper towel and fold the paper towel over the seeds. Put the paper towel in a ziplock bag and place it on top of your refrigerator (toward the back; this keeps the seeds at a consistent temperature). Check daily by gently unfolding the paper towel to examine the seeds. Keep the paper towel moist; adding water if necessary. In a few days you should see the first root coming out of the seed (radicle root). Gently, using a tweezers if necessary, place the seed into the soil with the radicle root facing downward. Cover the seed and keep the top layer of soil moist until the plant breaks the soil's surface. The paper towel technique is a fun way to teach children how plants start from seeds. This technique works best with larger seeds (melons, cucumbers, squash, corn, sunflower, etc.). Most smaller seeds, such as lettuce, are best planted directly into the soil.
From Clone (Asexual Propagation)
Starting a plant from a donor or mother plant is a form of cloning or asexual propagation. Some plants naturally propagate themselves this way; a good example is the inch plant (wandering jew). Cloning has become the most popular method among commercial growers because the offspring are identical to the donor plant so the growers know exactly what they are going to get. It also allows the gardener to replicate plants with desirable qualities such as a certain fragrance, color, resistance to pathogens, or any other trait that could be deemed as beneficial.
There are two popular types of cloning techniques: cuttings and tissue culture. Hobbyist gardeners generally take cuttings to replicate their favorite plants because tissue culture is a more involved process that requires special equipment. African violets, pothos, gardenia, crepe myrtle, cyperus, geranium, wandering jew, coleus, impatiens, spider plants and hibiscus are all easily propagated by cutting. Many vegetables, including peppers, tomatoes, cucumber and squash, can also be propagated by cutting. Some vegetables, like cabbage, can be cloned via their root. Although there is a slight variance in cloning techniques (depending on plant species) the majority of the focus should be on environmental conditions as they are usually the determining factor in cloning success.
Temperature for Cloning
Like plants started from seed, plants propagated from cuttings respond best to consistent temperatures. Ideally the root zone (or potential root zone) is kept at a temperature of 75-85 degrees F. If the environment where the clones are kept has fluctuating temperatures it is best to utilize a heat mat or heat cables to rectify this problem and maintain consistent temperatures. For most species of plants, if temperatures are too low or continually fluctuate below the desired range, the plants enter what I refer to as a state of suspended animation. In other words, they remain green and healthy looking but fail to create roots or carry out any vital functions needed to stimulate new growth. Eventually these clones will die without ever creating a root.
In cases where humidity levels are high and temperatures are low a cutting or seedling will dampen off. Damping off is a horticultural disease caused by pathogenic microorganisms which destroy a seedling or cutting before it has a chance to grow. On the other end of the spectrum, clones that are kept in temperature ranges above the desired range will commonly wilt or rot and turn into mush long before they develop a new root zone. An inexpensive digital thermometer is a great way to monitor the temperature of the root zone. Make sure to monitor the temperature during the coldest and hottest points of the day to ensure you stay within the desired range even when the atmospheric conditions are the most volatile.
Humidity for Cloning
Humidity levels for cuttings should be kept high for at least the first few days. Although they are not yet established plants, cuttings still transpire moisture through their stomata and without the ability to absorb replacement moisture through a root zone a cutting can quickly wilt in lower humidity environments. Ideally, the humidity level for cuttings should be kept at 80-100% for the first few days. Humidity domes, plastic bags, or any way you can temporarily enclose the cuttings to retain a high humidity environment will suffice. I prefer the humidity domes sold at local gardening centers because they make it very easy to acclimate the plants to their future environment.
After you take your cuttings, lightly spray the inside of the humidity dome with water and place it on the tray. In the subsequent days remove the humidity dome for a few minutes each day to give the cuttings some fresh air; very similarly to the way you would acclimate seedlings. After four days, you can incrementally increase the amount of time you remove the dome each day until the cuttings are completely acclimated to their environment. Although some plant species are more finicky than others, generally speaking, the cuttings will have created their own roots in 7-14 days and at that time should be completely acclimated to the environment.
Sterilize Equipment
Seedlings and cuttings are more sensitive, not only to environmental conditions but also to pests and pathogenic microorganisms, than adult plants. Before planting seeds or taking cuttings completely sterilize all the equipment you plan on using. Diluted bleach or hydrogen peroxide are great ways to effectively sterilize your propagation equipment before each use. Make sure the medium you choose is sterile as well. Prepackaged propagation mediums offer the peace of mind of a sterilized medium and ensure the seedlings or cuttings aren't being placed in a compromised medium.
There are many products on the market designed to aid the propagation process. Rooting hormones, seedling heat mats, aeroponic clone machines, humidity domes, sterile disposable scalpels and numerous prepackaged mediums are all products that can help achieve successful propagation. Just remember, there is no magic product that will automatically guarantee propagation success. These products teamed with sound environmental conditions are the keys to thriving seedlings and clones. Stable environmental conditions are the foundation for making any aspect of greenhouse gardening flourish and propagation is no different.
Greenhouses
Greenhouse Shade Cloth Options
Published
6 years ago
on
July 18, 2015

A shade cloth is used in a greenhouse for two reasons. First, to protect plants from getting burned by intense sunlight and second, shade cloth is a way to help keep a greenhouse cooler during the hot summer months. Shade cloth can be made from different materials but all shade cloth can be purchased in different filtration ratings. In other words, a gardener can select a percentage of shading that will best fit his or her needs. In most cases, a shade cloth will shade 50%, 60%, or 70% of the sunlight. The higher percentage (70% or greater) is usually reserved for situations where the greenhouse is receiving an abundance of intense sunlight; such as a south-facing greenhouse that receives full sun in the summer months. Shade cloth is usually sized according to the particular greenhouse. In other words, shade cloth is usually custom built for a particular situation. The shade cloth has grommets placed every four feet for hanging on hooks or guide wires depending on the application. A closer look at some of the shade cloth options will give greenhouse gardeners an idea of which shade cloth option will work best for them.
Aluminet
Aluminet is one of the most affordable and effective shade cloth materials available. Aluminet can be hung on the interior of a greenhouse and placed flush against the walls or ceiling. Aluminet is unique because it not only shades sunlight but it also reflects heat. The biggest advantages of Aluminet are that it not only shades the light but also helps to effectively cool the greenhouse by reflecting a portion of the heat away from the structure. Aluminet is very cost effective and a great choice for home hobbyists. If aesthetics are important (as they are with many home gardeners), the interior hung shade cloth does not take away from the natural beauty of the greenhouse structure.
Black Nylon
Black nylon shade cloth hung on the exterior of the greenhouse is another shade cloth option. The hooks for the grommets are on the outside of the structure and the shade cloth is hung around the exterior of the greenhouse. This type of shade cloth costs about the same as Aluminet and does a good job of filtering the light. Although the greenhouse will be cooler than without the shade cloth, due to its black color, this type of shade cloth does little to reflect the heat away from the structure. As can be imagined, a shade cloth hung on the exterior of the greenhouse will affect the aesthetics of the greenhouse. There is also some additional maintenance with exterior hung shade cloth as they tend to accumulate dirt, dust, etc.
Motorized or Manual Guide Wire Shade Cloths
Motorized shade cloth systems are so expensive they are generally reserved for large, commercial greenhouses. These systems have guide wires where the shade cloth is attached. When needed, a small motor pulls the shade cloth into place. Many commercial greenhouses utilize guide wires without motors as well. Similar to opening or closing a shower curtain, a large span of shade cloth can be opened or closed within the greenhouse. The biggest disadvantage of motorized or manual guide wire shade cloth systems is the shade cloth is never flush with the walls or ceiling of the greenhouse. This means that the heat is still entering the greenhouse. However, there are some situations where it is necessary for the shade cloth to shade a section of the greenhouse. For example, seedlings or light sensitive plants can be protected from intense light by being sectioned off with some shade cloth.
For most hobbyist growers finding a shade cloth that fits the budget and still performs up to par are the priorities. Gardeners with glass greenhouses which have south or west exposures almost always need to implement some sort of shade cloth. If reducing heat in the greenhouse is as important as eliminating hotspots in the garden a product like Aluminet would be a good fit. Regardless of the particular material chosen, a shade cloth is the best way to keep plants from being harmed by the intensity of the sun during the summer months.
For more information please visit ArcadiaGlasshouse.com.
General Gardening
The Overlooked Price of Ignoring Canopy Management
Published
6 years ago
on
June 24, 2015
As practitioners in the fields of horticulture and urban agriculture (fields we give important names to because they follow a proven process and mean something to us) – we growers and gardeners spend an inordinate amount of time fretting about the details.
All of us agree on the important things; the quality of our substrate, the stability of the environment, control over pathogens, deficiencies and excesses, good light, quality inputs, genetics, sustainability, biodiversity. All important stuff… but ultimately our efforts are geared towards producing quality and volume in our harvests.
How do we efficiently get from point A (seed) to point B (harvest) with maximum potential being achieved? It's a bunch of work. And nothing important should be omitted.
That being said, there is a metaphor that bounces around about a barrel and how each of the staves must fit with the others for the stave joints not to leak. If a stave is not fit or built sufficiently, or is missing: The water will leak and the barrel can never be full.
This metaphor as an analogy to describe an often overlooked leak in the barrel of our common growing knowledge: The problem of: how do we hold up our plants?
In controlled growing environments it is of great importance to manage the canopy. Canopy management should be considered a stave in the barrel for a number of reasons:
- To get even distribution of the best quality light at the optimal distance on the greatest number of fruiting and flowering parts to achieve maximum yield.
- To train branches for topiary or bonsai structures.
- To ensure that the plant is given sufficient ventilation and is not exposed to any environmental extremes such as heat or air flow stagnation.
- To use ways of stabilizing the plant and then anchor tie-offs in such a way that the plant is not damaged because breakage means the loss of quality produce.
Some plants don't need help; but some do, and most of us treat this as an afterthought. We spend time and money on all of the previously mentioned details, but then just jab stakes in into the root-zone and tie-off branches as they fall or droop. Pre-planning usually involves either a one-size-fits-all structure or some serious DIY.
That said doing something is the right thing to do: Why wouldn't all of us serious growers make a plan and fret, in advance, over the details and how to get the biggest bang for our bucks? Canopy management will help to produce larger harvests and make everything else we do work better.
Jason Rider is the president of Thriving Systems Design. He can be contacted at j.rider@c-bite.com and you can visit their website at C-Bite.com.
Greenhouses
Keeping Your Greenhouse Cool in the Summer
Published
6 years ago
on
June 16, 2015

In order for the plants in a greenhouse to continue growing rapidly during the summer months, a greenhouse gardener needs to make sure that the temperature within the greenhouse doesn't get too hot. There are a few different ways that greenhouse growers can maintain cooler temperatures during the heat of summer. A grower usually chooses a cooling method based on the size of the greenhouse and his or her budget. The most common types of cooling devices used in greenhouses are based on water evaporating which cools the air within the growing space. The most commonly used systems are wet wall systems, portable evaporative coolers, foggers, and humidifiers.
Wet Wall Systems
Wet wall systems are the most popular and efficient way to cool large, commercial greenhouses. These systems consist of cooling pads encased in aluminum housing. The aluminum housing appears similar to a honey comb. The honey comb design allows air to pass over the cooling pads which are kept drenched in water. The air is cooled significantly as it passes through the wet pad on its way into the greenhouse, much like a radiator cooling an engine. After entering the greenhouse, the evaporative effect cools the growing space. The powered fans (placed on the wall opposite the wet wall system) are the driving force for the air movement. The motorized shutters which allow air to enter the greenhouse are usually thermostatically controlled to open and close as determined by the temperature. Wet wall systems are fairly expensive and more elaborate in their installation. This is because the water used in a wet wall system is continuously recirculated and requires a fair amount of plumbing. Because of their expensive and more elaborate design, wet wall systems are usually only used in larger commercial greenhouses.
Portable Evaporative Coolers
Portable evaporative coolers are a cooling device which is much more commonly used by home hobbyist greenhouse growers. Portable evaporative coolers are completely self-contained, movable, and relatively inexpensive ($500-$1000 depending on size). Portable evaporative coolers contain a similar pad to that used in wet wall systems. Like wet wall systems, air is drawn in and forced over the wet pad to create an evaporative cooling effect. Portable evaporative coolers usually contain a float valve and are connected to a garden hose to maintain the water level in the tank as the water evaporates. Portable evaporative coolers work best when they have access to fresh air. In other words, for the best effect, portable evaporative coolers should be placed near the greenhouse entry or a fresh air intake vent. Portable evaporative coolers are thermostatically controlled and can easily be stashed under a bench or out of the way when not in use. Portable evaporative coolers are a great way for home hobbyist greenhouse gardeners to maintain cooler temperatures during the hot summer months.
Fogger or Humidifier 
For small hobby greenhouses, a fogger or humidifier can serve as an evaporative cooling system. A fogger is a device that emits water in a fine fog. These devices can be placed directly behind a circulating fan to blow the water-cooled air around the greenhouse. As the water evaporates, it creates a cooling effect. A humidifier found at a big box store can be set up in a similar fashion. When placed behind a circulating fan, the cool moist air can be blown across the greenhouse for an evaporative cooling effect. Both foggers and humidifiers emit water droplets so small that the plants within the greenhouse will not get wet. Instead, the water quickly evaporates and cools the greenhouses climate in the process.
Mist Systems
When discussing cooling systems within a greenhouse, some gardeners ask about mist systems. Although a mist system will cool a greenhouse, they are generally better suited for irrigation. The water droplet size from a mist system is much larger than that of a fogger or humidifier and this causes the plants to actually get wet which can create a whole new series of moisture related problems during the hot summer months.
By maintaining temperatures within the desired range for plant growth, a greenhouse gardener can ensure that he or she maintains vigorous growth even during the peak heat of the summer months. Whether a gardener is attempting to cool a large commercial greenhouse with a wet wall system or a small hobbyist greenhouse with a portable evaporative cooler or a humidifier, evaporative cooling is the best way to ensure that the plants beat the heat of summer.
For more information visit ArcadiaGlasshouse.com.
General Gardening
5 Warning Signs that Your Orchids Could be in Trouble
Published
6 years ago
on
June 11, 2015
Orchid growers need to always be on the lookout for signs of trouble in their plants. If you know what to look for, you might be able to stop the problem before it takes out your precious plant. But if not, all your efforts will have been in vain. With that in mind, here are five important warning signs that your orchids are in trouble:
Warning Sign #1 – Spotty Flowers
The flowers are definitely the most delicate part of your plant. That's why they'll often be the first to let on when there's a problem. If you notice dark spots on your flowers, this could be a sign of a fungal or viral infection about to take over your plant. Punctures in the delicate petals of your blossoms mean that you've got an insect problem.
Warning Sign #2 – Discolored Leaves
While the leaves of the orchid tend to show signs of trouble less readily than flowers, they're also much easier to monitor because they're continuously present during all life cycles of your plant. If your leaves are a darker shade of green, then the plant isn't receiving enough light. If your leaves are brown or yellowish, then your orchid is getting too much light.
If you find that black tips and brown spots are showing up mainly on the body of your orchid's leaves, then this might just be sun burn. Move your orchids away from direct sunlight and observe them for a week. If the spots continue to grow, then this might just be a case of bacterial or fungal infection. One way to treat this is by cutting off the affected part and applying fungicides. White scaly spots on your leaves are particularly worrisome, as this is a sign of a viral infection. (Sadly, there is currently no definite cure for viral infections.)
Warning Sign #3 – Shoddy Roots
You'll be repotting your orchid from time to time anyway so that it can get the proper aeration it needs to grow. When you do, always be sure to take a few moments to examine your plant's exposed root system. The roots should look thick and healthy. If they're discolored or brittle, or moist and malformed, you've probably got a case of root rot, which is either caused by overwatering or letting the plant's mixture turn stagnant.
Warning Sign #4 – Rapid Wilting
As mentioned above, the flowers are the most highly prized part of the orchid. While all aspects of growing an orchid can be enjoyable, it is the colorful blooms that you look forward to the most. If your flowers tend to wilt too soon after they bloom, then you've got good reason to be disappointed. Not only have you worked hard for lackluster results, you've likely got a problem with your root system as well, and the buds aren't getting enough nutrients. This is a good time to re-evaluate how you're caring for your orchids.
Warning Sign #5 – Crawly Things
Pests are a problem for any type of plant and orchids are no exception. Scale insects like to take up residence on the leaves of orchid plants and can be hard to spot, so carefully inspect every time you water. Mealybugs and aphids are a bit easier to notice because of their nasty habit of chewing holes through leaves and flowers. Using an approved insecticide such as malathion is recommended by the majority of growers, and organic alternatives also exist for those who value "green" gardening.
For additional tips on orchid care visit OrchidCareZone.com.
Grow Lights
Troubleshooting the Magnetic HID Light System
Published
6 years ago
on
May 20, 2015
This information can only be applied to "conventional" magnetic ballasts. Digital/electronic ballasts, which are becoming more common all the time, have some important differences regarding internal inspection, replacing parts, and matching bulb type to ballast. If your magnetic HID light system is giving you problems you can follow a few basic steps to identify the problem.
Step One
Isolate the problem by checking on a few things. Is the ballast receiving electricity? If you plug the lamp in and hear humming noise then it is a good bet that the ballast is working. If you do not hear humming noises check the plug and the outlet for a good connection. The next step is to check the transformer for burns; it is the large, dark steel box. If the transformer I burnt then it must be replaced.
For HPS units you can also check the starter and the capacitor which look like an oblong tin can. The sealed lip around each end of the can should be completely smooth and have no wrinkles. If the ends are pinched out then the capacitor, the starter or both are burnt out and will need to be replaced.
Step Two
If you have verified the ballast is working then the problem is probably with the bulb or the wiring. Check to ensure that the bulb is correctly and firmly screwed into the socket. This sounds simple but it by far the most common reason for bulb failure. With the bulb in place check all the connections for heat and firm contact. Make absolutely sure the ballast is unplugged before touching any bare wires or connections. Inspect thee arc tube inside the bulb. If it is dark, or if the bulb is over two years old, then it could be burnt out.
Step Three
If a fuse or breaker switch is thrown when you turn on the light then the circuit is being overloaded. For safety reasons you never use more than 80 percent of the amps available on a circuit. The amp rating should be printed on the breaker fuse.
Step Four
Do not worry if the lamp is flickering or pulsating. It takes approximately 100 hours of operation for the lamp halogens in the arc tube to stabilize and pulsate less. Color changes are also normal and do not affect the life or lumens of the bulb.
Step Five
Handle the bulbs gently and wipe off any fingerprints. Allow the bulb to cool for 15 minutes before restarting the lamp.
Facts about High Intensity Discharge Bulbs
- It is common for small pieces of glass or metal to be inside an HID bulb
- The HID lamp must run with a ballast of the corresponding and type of bulb. For example you should use a 1,000 watt Metal Halide ballast when you are using a 1,000 watt Metal Halide bulb.
- The light from the lamp will oscillate during the first few hours of use and decrease in intensity during the life of the lamp.
- The HID lamp takes approximately 3 minutes to warm up and reach 80% brightness. If the lamp is shut off after reaching full intensity it will take 10 – 20 minutes before it can restart.
- It is normal for the lamp to shift color during the first few hundred hours of use.
- HID lamps should be replaced after 12-18 months of use. The life span of the bulbs is dependent on how many times the lamp is turned on and off and frequent on-off cycles will shorten the life of the lamp.
Safety Information
- Do not look directly into the bulb during start up or operation.
- Turn the unit off immediately if the exterior glass of the light bulb cracks, punctures or breaks. Ultraviolet radiation from the HID lamp can cause serious skin burn or eye inflammation. They may still work but it should never be used in that condition.
- Inspect your bulb periodically for scratches and discard the bulb if scratches exist. Scratching the bulb or subjecting it to undue pressure could cause it to shatter.
- Use caution when watering foliage beneath lighting units and do not foliage when the lights are on or have just been turned off. Functioning or recently functioning bulbs are hot and may shatter or crack if contacted by water.
- Never remove or insert the bulb while the power is on
Containers
Selecting a Smart Pot Size
Published
7 years ago
on
May 14, 2015

Once all of the great benefits of growing in a Smart Pot fabric container have been experienced, a gardener will never go back to plastic potting containers again. Fabric containers offer more oxygen to the roots which automatically enables the roots to work more efficiently. Smart Pot containers also "air prune" roots which creates a series of lateral roots within the container instead of the spaghetti-like mess of tangled roots commonly found at the bottom of plastic potting containers. After growers have made the decision to use Smart Pot fabric containers, they must determine which size will best suit their gardening needs.
With container gardening, it is possible to grow any size plant in any size container. However, just because something can be done, doesn't necessarily mean it should be done. Growing basil in a 100 gallon pot or a giant pumpkin in a one gallon pot would be far from optimal and the grower would most likely be disappointed with the results. A plant grown in a Smart Pot will typically grow faster and larger than a plant grown in a traditional plastic container; however, growers who have experience with plastic containers can start using Smart Pots that are the same size as the plastic containers they are accustom to. In other words, if a gardener is currently using a three gallon plastic container, a three gallon Smart Pot can be substituted for the same purpose. If the gardener has no experience with plastic potting containers, he or she should consider the following before choosing the container size:
Portability
If you need or plan to move your planting container around, get a Smart Pot size you can handle. For example, a 10 gallon Smart Pot can weigh close to fifty pounds once filled with soil. Smart Pots are durable enough to be slid around for transport but the overall weight of the container should always be a consideration (especially for your back).
Fitting a Smart Pot
Many gardeners like to use Smart Pots as inserts that fit into other potting containers. This way he or she can receive all the benefits of growing in a fabric container while still displaying a decorative planting container. Just remember, Smart Pots have straight sides (no taper). If you plan on placing the Smart Pot inside another container, make sure the bottom diameter will fit and that you can lift it out if necessary.
Genetic Potential of the Plant
The type of plant you plan to grow will be a determining factor of the size container you should use. Plants that typically grow large in size will not perform up to their genetic potential if they are grown in a container that is too small. The same is true for smaller plants; they will not always perform as well in containers that are too big.
Smart Pot Sizing Recommendations
There are always exceptions (like the grower's physical growing space) that will contribute to the decision when choosing a container size. That being said, there are general recommendations that can help a grower determine which size Smart Pot to use. The following are recommendations of which Smart Pot size to use for some commonly grown vegetable crops:
7 Gallon Smart Pot
Garlic, leeks, shallots, lettuce, spinach, arugula, chard, endive, escarole, basil, parsley, rosemary, thyme, oregano, sage, beans, bok choy, kale, peas, parsnips, and small annuals
10 Gallon Smart Pot
Peppers, artichoke, broccoli, brussels sprouts, cabbage, cauliflower, strawberries, onions, beets, turnips, carrots, radish, patio cucumbers, patio tomatoes, and larger annuals
15 Gallon Smart Pot
Cucumbers, potatoes, summer squash, zucchini, patty pan squash, crooked neck squash, eggplant, and tomatillos
20 Gallon Smart Pot
Tomatoes, muskmelons, watermelons, pumpkins, sweet potatoes, winter squash, acorn squash, butternut squash, and hubbard squash
Hydroponic gardeners who use Smart Pots will follow slightly different guidelines for determining the best size container for their gardens. The type of hydroponic system, the fertilizers being used, and the type of soil mix will all be factors to consider when choosing the correct size Smart Pot for a hydroponic garden.
For more information visit Smartpots.com
Hydroponics
Hydroponics System Daily Maintenance Check List
Published
7 years ago
on
May 13, 2015
Once a growing system is up-and-running, to successfully grow hydroponic plants, there are only a few tasks required. Check the system daily or every other day and do the following keeping in mind the 5 basic requirements of plants (light, water, nutrients, temperature and oxygen).
- Most plants love humidity so mist them continually and they will be happy.
- Watch the system and make sure it is performing properly. If it floods the plants and drains at a specific time – verify this. Small bits of growing medium can clog the tubing of a system in no time flat and either leave your plants 'high and dry' or continually flooded. This happened to me once.
- As your nutrient solution evaporates, add tap water to refill it to where it should be. Do not ever add a touch more of nutrient powder to replace what you think has been used up. This is a really good way to kill your plants.
- Keep an eye out for pests and disease as well as nutritional deficiencies.
- Take care of any problems as fast as possible or they will grow into large problems faster than you will believe.
- Take a look at the plants. Are they wilting and is the growing medium completely dry? Or is it continually soaked? Adjust the amount of nutrient solution accordingly (this is for systems that periodically receive nutrient solution most likely through a timer).
- Dead growth saps the energy of a plant and can be a good beginning for a disease or pest problem so keep the dead matter pruned.
- Keep track of the temperature if you are in a greenhouse and ventilate if necessary by opening doors, windows and turning on a fan.
- In an enclosed area like a greenhouse, let some bugs and breezes get in. This not only helps with pollination but some bugs will actually protect your plants by eating the bad ones.
- Learn to identify the good vs. bad bugs. Dragonflies, spiders and 'daddy long legs' are good to have around – they eat the bad bugs so encourage them. I personally love dragonflies – I've seen them dive-bomb horse flies and moose flies and eat them.
- Keep a log. What becomes second nature to you now will probably be completely forgotten in a few months so write it down.
I know this seems like a lot of effort but once you get a routine down you may not need more than a few minutes a day to perform these tasks. Keep up the vigilance and you will grow hydroponic plants that are healthy and you will be amply rewarded with a large amount of vegetables and herbs.
Hydroponics
Choosing a Hydroponic Fertilizer is Kind of Like Buying a Car
Published
7 years ago
on
May 7, 2015
Upon entering a hydroponic retailer, a consumer will quickly notice the seemingly countless options available. There are many choices when it comes to choosing a brand of hydroponic nutrients (fertilizers) and this can be overwhelming for a novice hydroponic enthusiast. Choosing a hydroponic fertilizer is kind of like buying a car. There are many options but, at the end of the day, they all get you from point A to point B.
Base Nutrients
The base nutrients of a hydroponic nutrient solution do just that, get your plants from the beginning to the end. The base nutrients will contain all the mineral essential elements and will provide all that is necessary for plant growth. The essential elements found in hydroponic nutrients can be derived from a variety of sources. The varying sources will affect the formula's stability. This leads to different types of formulas for the horticulturist to choose from. Typically speaking, there are three types of formulas produced by manufacturers of hydroponic nutrients. One-part formulas (stand-alone grow and bloom), two-part formulas (grow A and B and bloom A and B), and three-part formulas (micro, grow and bloom). A hydroponic grower will usually first choose from a one-part, two-part or three-part formula and then choose which brand of fertilizer he or she wishes to use.
One-Part Formulas
A one-part formula consists of one individual grow formula and, if it is for growing a plant that produces fruit or flowers, one individual bloom formula. One-part formulas are great for beginner hydroponic growers as they only require the dosing and mixing of one product. The stage of growth of the plant(s) will determine if the gardener uses the grow or the bloom formulation. The type of crop and stage of growth will determine the dilution rate for the particular product. One-part formulas will contain all of the essential elements needed to sustain plant health. However, one-part formulas will usually contain less than optimal levels of some of the essential elements in order to make the overall formula stable. For example, many one-part formulas contain only small amounts of calcium and rely on calcium contained within the grower's water to make up the difference. Horticulturists using one-part formulas may, in some cases, need to supplement additional sources of certain essential elements.
Two-Part Formulas
A two-part formula consists of two parts for both the grow and the bloom stages of plant growth. In other words, during the vegetative stage of growth, both a grow A and a grow B formula will be required. If the horticulturist is growing a particular plant variety with a fruiting or flowering stage of growth, he or she will be required to use both a bloom A and a bloom B during that period. Two-part formulas offer an advantage as they are able to separate some of the elements that would otherwise create an unstable formula when mixed in the concentrated forms. More specifically, two-part formulas are able to separate particular compounds containing concentrated calcium and phosphorus which could react poorly when mixed. A two-part formula allows the horticulturist to dilute the concentrated calcium before adding the phosphorus. This is why the part A of a two-part formula will usually contain the calcium. Generally speaking, two-part formulas can contain a higher concentration of calcium and a more ideal ratio of all the essential elements than a one-part formula.
Three-Part Formulas
A three-part formula consists of separate micro, grow and bloom formulas. Unlike the one-part and two-part formulas where the "grow" is used exclusively in the vegetative stage and the "bloom" is used exclusively in the fruiting or flowering stage, three-part formulas use all three parts throughout the entire life cycle of the plants. The ratio of the three parts (micro, grow, and bloom) will change depending on the particular dietary needs of the plant and the stage of growth. For example, a pepper plant in its vegetative stage will receive different ratios of each of the three parts than a pepper plant when it is producing peppers. As the names suggest, the "micro" contains most of the micronutrients (and usually the calcium), the "grow" contains nutrients more specific to growth and the "bloom" contains nutrients more specific to blooming. Although growers will use all three parts throughout the plant's life cycle, they will typically use a higher ratio of "grow" during the vegetative stage and a higher ratio of "bloom" during the fruiting or flowering stage. A three-part formula offers heightened control to the horticulturist and gives the ability to more quickly correct deficiencies.
Additives
After a hydroponic gardener has established an effective base fertilizer program, he or she can begin to experiment with the various nutrient additives available on the market. Micronutrient supplements, carbohydrate formulas, enzyme formulas, plant vitamins, plant hormones and beneficial microorganisms are just some of the options a hydroponic gardener can experiment with. Each garden is different and the best way to determine if a nutrient additive is truly beneficial is by way of experimentation.
Greenhouses
Size Matters in a Greenhouse
Published
7 years ago
on
May 6, 2015
They say that everything is bigger in Texas. Well, Texas is a fine state but you don't have to live there to enjoy the benefits of a big greenhouse. A good general rule is to figure out what size footprint you need for growing things and then double it. That should be about the right size for your greenhouse. Here's why I suggest this approach to sizing:
Easier Heating and Cooling
Smaller structures heat up too quickly and cool down too quickly. Think of how temperamental a cold frame is. If you don't quickly vent them, they'll cook your plants in a matter of a couple of hours. The same hold true for a small greenhouse, so bigger is better.
Room to Work and Grow
You need room to work in addition to the space allocated for growing. A greenhouse footprint based on sufficient room for growing plants is a bit like space planning for an office. It's nice if the desk fits well in the room, but you also need room for your large office chair, a bookcase and a filing cabinet. And, you'd like to be able to push back from the desk and lean back in your chair as well. All of this requires "swinging room."
Room to Relax
Don't forget about room to relax. When you're taking a break from gardening, you'll want some space where you can sit down and enjoy the splendor that you've created. What could be more enjoyable than relaxing in a comfortable chair and enjoying the sights and smells of your herb garden or tomato jungle?
Room for Storage
Lastly, you need room for features like tool storage, a hose rack, walkways, a sink for rinsing off your root vegetables and perhaps a work table or space dedicated to starting seeds in covered, lighted and heated seedling greenhouse within your greenhouse. Also, don't forget that a drum wall for passive solar energy storage takes up about four square feet per drum. When you start to think about it, there's plenty of reason to have room in a greenhouse for things that aren't green. You simply can't expect to "dance" in a hall closet. You need room to spread out.
I'm not advocating a huge greenhouse, but we need to be aware that there are people, accessories, resources, tools, walkways and activities that need to be included in our indoor growing spaces – along with all the plants. If you forget about room for these types of things, you'll soon come to the conclusion that you built a structure that simply isn't big enough for your needs and longer term interests.
Greenhouses
The Importance of Ventilation in a Greenhouse
Published
7 years ago
on
May 6, 2015

Proper ventilation is imperative for a greenhouse to function properly. The ventilation system of a greenhouse provides fresh air to the plants (CO2), helps to control temperature and humidity, and reduces the likelihood of disease. Greenhouses are generally enclosed structures that will not ventilate entirely on their own. In order to ensure that proper ventilation in the greenhouse is achieved, gardeners must install either a passive or powered ventilation system.
Passive Ventilation System
A passive ventilation system is a ventilation system without powered fans. Instead, the greenhouse is ventilated via convection (hot air becomes less dense and rises) through the ridge vents. In addition to the ridge vents, a passive ventilation system needs intake vents to allow cool air to enter the greenhouse and displace the hot air as it rises. These intake vents are generally placed on the lower portion of the side walls of a greenhouse. The largest advantage of passive ventilation systems is that they are virtually silent. This can be advantageous for a gardener whose greenhouse is attached to his or her home and the noise of a powered fan would be a disturbance. The biggest disadvantages of a passive ventilation system are cost, maintenance, and efficiency. Most people don't know that a ridge vent system will cost 3-4 times as much as a PVS (powered ventilation system). Also many people do not understand that maintenance is required with a passive ventilation system. The ridge vent needs to be kept free of debris and cleaned periodically. Also, the pistons on the vent system will need to be lubricated. Last, but not least, because air is not being forced through the greenhouse, a passive ventilation system is not as efficient as a powered ventilation system. All in all, passive ventilation systems are a great fit for greenhouses where the noise of a powered fan would be an annoyance.
Powered Ventilation System (PVS)
A powered ventilation system for a greenhouse is a ventilation system with a powered fan and intake vents. The cubic feet of the greenhouse space will be the determining factor for sizing a fan system. The minimum goal is to get the cubic volume of air turned over in less than two minutes. In many cases, a fan will be sized to turn over the air in less than one minute. A quick turnover makes it much easier to control temperature and/or humidity, keeping the greenhouse about 10 degrees cooler than a passive cooling system. The fan should be installed on the top section of the wall opposite of the intake vents and screen door. In other words, the intake vents should be installed on the same wall as the door and the fan should be installed on the top of the opposite wall. This ensures that the fresh air entering the greenhouse travels across the greenhouse before being evacuated. Powered ventilation systems are usually set up with a thermostatic control which will turn on the fan when the set-point temperature is reached. The intake vents are synced with the fan so they will open at the same time the fan is activated. In order to maintain the highest level of performance, the thermostat sensor should be placed at plant height.
In addition to the cooling/exhaust fan of a PVS, a greenhouse should also be equipped with a circulating fan. Circulating fans provide continuous air movement within the greenhouse which helps to maintain uniform temperatures and humidity while also increases the structural integrity of the plants (much like the wind strengthens plants in nature). Greenhouses with circulating fans are the most effective and efficient for maintaining desirable atmospheric conditions.
Whether you choose a passive or powered ventilation system, making sure a greenhouse is properly ventilated is crucial to creating an ideal growing environment for plants. A greenhouse's temperature, humidity, and ambient CO2 levels are all determined by the ventilation system. In other words, the ventilation system is one of the most important determining factors over the way plants will perform in a greenhouse and should be contemplated by every potential greenhouse gardener.
For more information visit ArcadiaGlasshouse.com.
Photo – A Powered Ventilation System (PVS) and circulating fans provide optimum cooling efficiency.
Vertical Gardens
Foody 12 Hydroponic Tower by Foody
Published
7 years ago
on
April 29, 2015

Most people appreciate easy access to fresh produce. This is one of the main reasons many of us become horticulturists. As we go through the trials and tribulations in an attempt to perfect our green thumbs, we each find a "system" that works for us. What if I told you there was already a clever solution to the problem of finding easily accessible, sustainably grown produce? The folks at Foody have solved this quandary with their Foody Vertical Gardens.
The company "Foody" was spawned from a farmer's passion to help people grow their own food, no matter where they live. Foody Vertical Gardens allow anyone to grow fresh herbs, fruits, or vegetables year-round, indoors and/or outdoors. The vertical garden has a very small footprint (taking up only two square feet) which means it can fit just about anywhere. Aside from making fresh produce as accessible as possible, Foody Vertical Gardens are designed to increase production through their efficient use of space and reduced requirements of water and nutrients. All of this, combined with no need for herbicides, equates to a reduction in overall expenses for the grower. Foody's automatic hydroponic system, the Foody 12 Hydroponic Tower, makes growing your own produce as simple, and cost effective, as can be.
Foody 12 Hydroponic Tower
The Foody 12 is a hydroponic vertical garden which utilizes deep water culture (DWC) hydroponic technology. One of the largest advantages of the DWC technology is the rate of growth. Plants grown in the Foody 12 will grow more rapidly than plants grown in soil. The plants will come to maturity sooner and this enables the gardener to enjoy the fruits of his or her labor more quickly than with traditional soil gardening. The watering system on the Foody 12 is completely automated. The garden comes with a submersible pump and water distribution system. Individual siphons are in each growing pod which allow the water level to move up and down automatically ensuring excellent root aeration. The tower's three growing pods each hold 12 plants (the base holds another eight) and the pods can be rotated manually or by the optional automated drive system (an available accessory). The towers are made from BPA-free, food-grade materials which means they can be used for certifiable organic production. Towers are also UV resistant which ensures years of trouble-free use. The Foody 12 uses only 10% of the water normally required by plants grown in soil. Also, there is no need for herbicides because there are no weeds; just fresh produce at your fingertips. The vertical construction naturally reduces the need to bend over, making the Foody 12 a back saver as well. All the benefits and available options for the Foody 12 make it the most comprehensive vertical gardening system available. However, what makes the Foody 12 so great isn't just its small footprint or optional automated drive system; it is the fact that the Foody 12 gives anyone the ability to grow fresh food in the comfort of his or her home.
There is no doubt that we will continue to need solutions to our modern agricultural dilemmas. Companies, like Foody, who create effective, yet simple, horticultural solutions are sure to become household names. People desire access to fresh, sustainably grown produce and there is no better, or easier, way to obtain food security than by growing your own food using a Foody Vertical Garden.
For more information visit FoodyVerticalGarden.com
Greenhouses
The Different Types of Attached Greenhouses
Published
7 years ago
on
April 24, 2015
Attached greenhouses are exactly what they sound like: greenhouses attached to another structure. In many cases, the other structure is the gardener's house. Attached greenhouses include lean-to greenhouses, window-mounted greenhouses, and attached even-span greenhouses.
Lean-to Greenhouses
Lean-to greenhouses are built against an existing building using that structure for one or more of its sides. In most cases, lean-to greenhouses are attached to a house. Lean-to greenhouses can be as long as the length of the building they are attached to or as short as desired. Because of their particular construction, lean-to greenhouses are typically limited in width to roughly 12 feet wide. The advantages of a lean-to greenhouse are accessibility to electricity and water (when placed against a house with electricity and water) and decreased cost of materials (since one of the main walls is an existing structure). Lean-to greenhouses typically require less heating than freestanding greenhouses. This can save a gardener a significant amount of money especially if he or she is located in a colder climate. Another advantage of lean-to greenhouses is accessibility. Since the greenhouse is so close to the home, the gardener has easy access to culinary herbs and vegetables. Accessibility also makes it easier for gardeners to keep up with greenhouse maintenance. The last advantage of lean-to greenhouses is that they are relatively simple to construct or inexpensive to purchase. Building a custom lean-to greenhouse can be an easy project for hobbyists who are not usually considered handy at construction. In fact, dozens of basic plans for homemade lean-to greenhouses can be found on the internet. Building one's own greenhouse can give gardeners a feeling of self-reliance. For gardeners who don't wish to build their own greenhouses, a lean-to greenhouse kit is an inexpensive way to get into home horticulture. The biggest disadvantages of lean-to greenhouses are their limited space and, in some cases, limited light. Whenever possible, lean-to greenhouses should be constructed on the side of the home that will receive the most sunlight (south side). Even when perfectly placed, a lean-to greenhouse will not receive as much light as a freestanding greenhouse.
Window-Mounted Greenhouses
Window-mounted greenhouses are special structures built into a window frame of a home, usually on a south facing wall. These handy, little greenhouses are a great way for hobbyists to keep their thumbs green year-round. Window-mounted greenhouses give hobbyists the opportunity to have fresh culinary herbs and ornamental plants at their fingertips while in the comfort of their own homes. The advantages of window-mounted greenhouses are they are relatively inexpensive and allow growers to harvest plants from inside their homes. In some cases, window-mounted greenhouses can help with heating a home as they let in passive solar heat. The disadvantage of a window-mounted greenhouse is space. These greenhouses are relatively small which limits the species and number of plants a gardener can grow.
Attached Even-Span Greenhouses
Attached even-span greenhouses are less common than lean-to greenhouses but also share a wall with an existing structure. The difference is that an attached even-span greenhouse appears very similar to a freestanding greenhouse except it is attached to an existing structure at one gable end. In other words, it doesn't "lean" against the existing structure, but instead has its own symmetrical roof. Attached even-span greenhouses can be much larger than lean-to greenhouses and there are countless design possibilities. The largest advantage of an attached even-span greenhouse is they are less expensive than a freestanding greenhouse and can provide a lot of growing space. As with lean-to greenhouses, water and electricity are more accessible. Disadvantages of an attached even-span greenhouse are increased cost compared to other attached greenhouses and reduced light from shadowing of the attached structure (usually a home).
Containers
Cleaning and Reusing Smart Pots
Published
7 years ago
on
April 16, 2015

Many indoor horticulturists are reaping the benefits of growing in Smart Pot fabric containers. Not only do fabric containers give a plant's roots maximum exposure to oxygen, but they also naturally "air prune" the roots. Once "air pruned" these roots create multiple lateral, fine roots which, in turn, enhance the entire root structure and increase the plant's ability to manage moisture and nutrients. Once a garden cycle is complete and the plants have been harvested or transplanted, Smarts Pots have one more trick up their sleeves: they can be cleaned and reused.
In order to reuse a Smart Pot the first thing a gardener should do is let the container dry out completely. The best way to do this is to remove the medium from the container and let the container sit somewhere in low humidity for a day or two. The goal is to get the container itself and any medium, root debris, etc which remains stuck to the fabric to dry out completely. Once dry, the Smart Pot can be rubbed against itself in order to remove as much debris as possible. After removing as much sediment as possible, the Smart Pot can be sterilized.
One common way to sterilize a Smart Pot is to put it in the washing machine with a sterilization solution. It is important to choose a sterilization solution that is capable of killing bacteria. Hydrogen peroxide, OxyClean, or a bleach solution all have the capability to sterilize a fabric planting container. Be sure to rinse thoroughly after the sterilization process to ensure all residuals from the sterilization agent are removed. Growers with a large number of Smart Pots may want to utilize a laundry mat for the sterilization process. Please be sure to remove all soil from the Smart Pots before bringing them to the laundry mat. For gardeners with few containers or for those who do not have access to a washing machine, Smart Pots can be soaked in a container of sterilization solution and agitated manually.
Drying is a very important part of the cleaning process. Do NOT put Smart Pots in the dryer. Smart Pots should only be hung to dry or fluff dried.
Gardeners who experience excess salt buildup on their fabric containers can rectify the problem with a vinegar-water solution. Salt encrusted Smart Pots can be soaked in a vinegar-water solution which will break up the salt and remove it from the fabric. Be sure to rinse thoroughly after this process as well.
One of the best things about the Smart Pot brand of fabric containers is its durability. Smart Pot containers are truly built to last and can withstand many washings and growing cycles. Some growers may be timid about reusing Smart Pots. Don't be. Smart Pots are built to withstand the abuse of use and reuse. While other fabric containers fall apart during the cleaning process, the Smart Pot fabric container will hold strong and be able to be used time and time again.
For more information visit Smartpots.com.
Greenhouses
Greenhouse Glazing Options
Published
7 years ago
on
April 15, 2015
When purchasing a greenhouse, a gardener is faced with a few options in regard to the type of material the transparent panels are made from. Although all greenhouses are designed to allow sunlight to reach the plants, there can be a difference in the way a garden performs due to the materials that make up the greenhouse. Hobbyists looking to set up a greenhouse have essentially three choices when it comes to the greenhouse's glazing options: single pane glass, double pane glass, or multi-wall polycarbonate. Each glazing option has its own advantages and disadvantages which means growers should examine each before making a final decision.
Single Pane Glass
The older-style single pane glass greenhouses with overlapping glass are less than desirable due to the fact that many of them are not adequately sealed. This can cause a series of problems including inefficiencies with heating and cooling and humidity/moisture problems. The good news is that most of the newer-style single pane glass greenhouses have full length glass panels and are sealed which solves many of the problems associated with the outdated, leaky designs. One great thing about single pane greenhouses is that they look fantastic. Single pane glass greenhouses are very aesthetically pleasing and will only cost a little more than a polycarbonate greenhouse. However, single pane greenhouses should probably be avoided by gardeners in northern climates. Single pane glass greenhouses are the least energy efficient type of greenhouse. In fact, a single pane greenhouse will have double or even triple the heating costs when compared to a double pane or multi-walled polycarbonate greenhouse. Single pane glass greenhouses allow for 92% light transmission. This can be an advantage or a disadvantage depending on your climate and the location of the greenhouse. Greenhouses should let in as much sun as possible, right? In some cases, a glass greenhouse can allow too much light to reach the plants which may create "hot-spots" and cause significant damage to the plants. The gardener may need to install a shade cloth in the greenhouse to rectify this problem. All in all, single pane glass greenhouses are a good choice for gardeners who will not be heating the greenhouse or who strongly desire an aesthetically pleasing greenhouse.
Double Pane Glass
Double pane glass greenhouses are the bee's knees when it comes to greenhouses. Double pane glass greenhouses are designed to be the most energy efficient and offer gardeners half the heating costs associated with single pane glass greenhouses. In other words, gardeners can look at a double pane glass greenhouse as a long term investment that will pay for itself in the form of energy savings. Double pane glass can also include a special low-e reflective coating on the inner pane of glass which reflects heat and acts as an insulator. For a serious hobbyist searching for the nicest looking and most energy efficient greenhouse, a double pane glass greenhouse is for you. The only real disadvantage of a double pane glass greenhouse is the initial cost. Double pane glass greenhouses are by far the most expensive option but, again, when examining the long term energy savings, the increased initial cost of the greenhouse would be paid back over time.
Multi-Wall Polycarbonate
Another glazing option for a hobbyist looking to set up a greenhouse is polycarbonate. Multi-wall polycarbonate greenhouse material comes in a variety of thicknesses (8mm triple-wall, 16mm 5-wall). The construction of the material varies slightly but all include multiple walls inside of the material which form channels that hold air. This airspace is important because it creates insulation value. A polycarbonate greenhouse offers similar energy efficiency to a double pane glass greenhouse. One advantage of polycarbonate material is that it naturally diffuses the sunlight. By diffusing the sunlight, polycarbonate greenhouses reduce the likelihood of "hotspots" and give the plants in the greenhouse an even distribution of light energy. Polycarbonate panels that are slightly tinted can also be installed in the roof of the greenhouse to reduce or eliminate the need for shade cloth. This is a great option for gardeners in hot, sunny locations. Although polycarbonate is not as aesthetically pleasing as glass, these greenhouses offer the best upfront value. Polycarbonate can also be used to retrofit older greenhouses to increase efficiency.
Please remember when making a decision regarding your greenhouse glazing options that efficiency and greenhouse performance are dependent on many factors including your geographical location and the orientation of the greenhouse. Where you live and what you grow will make a big difference in your selection of a greenhouse and greenhouse glazing. Take the time to explore all of your options to find the greenhouse design that will best serve your purposes.
For more information, please visit ArcadiaGlassHouse.com.
Grow Lights
Most New Lighting Technologies Still Struggle to Compete with Yields Produced by HPS & HIDs
Published
7 years ago
on
April 12, 2015
Revolutionizing the 1000w Fixture: The HSE NXT2
Although there is no shortage of new lighting technologies being introduced, high intensity discharge, or HID, lighting systems are still the staple for indoor horticulture. Most of the new lighting technologies are still unable to compete with the growth rates and yields produced by high pressure sodiums and metal halides. While many manufacturers are concentrating their efforts on reinventing the wheel, other companies are putting their efforts toward improving the efficiency of HID fixtures. This is exactly what P.L. Light Systems has done with their revolutionary HSE NXT2 1000w fixture. In fact, the HSE NXT2 could very well be the pinnacle of 1000w horticultural fixture designs.
The Design
When designing the HSE NXT2, P.L. Light Systems took everything they learned from developing past models and set out to develop the most technically advanced fixture available to the horticultural market. The HSE NXT2 has an electronic driver which allows for quiet and efficient operation. The HSE NXT2 also utilizes an all-new custom aluminum ballast compartment with built-in heat fins which reduce the electronic driver's operating temperature by 6%. The reduction of operation temperature increases both the efficiency and longevity of the unit. Another change to the ballast itself is a hinged compartment which makes servicing super simple. P.L. Light Systems also incorporated a breathable membrane in the HSE NXT2 which keeps dust and dirt out but still allows for excellent ventilation. This ventilation around the ballast equates to even cooler operation and increased longevity. P.L. Light Systems redesigned the lamp holder assembly as well. The new single-part casting with lock sockets makes bulb changes much quicker and easier.
Double Ended Lamp
The HSE NXT2 utilizes a HPS 1000w double ended lamp which has increased light levels by up to 20%. Double ended bulb technology has actually been used in other sectors for years but only recently has been introduced to the horticultural industry. There are many benefits to double ended (DE) technology. The most significant benefit to horticulturists is extended lamp life. In fact, DE bulbs degrade about half as fast as standard mogul-based bulbs which means they can be used for horticultural purposes twice as long. The other huge advantage of DE bulbs is an increased light output level.
Reflector Options
To best meet the demanding needs of indoor horticulturists, the HSE NXT2 has two distinct reflector options: the Alpha or the Beta. The Alpha reflector is designed for uniformity and the most even dispersion of light levels possible. The Beta is designed to produce a more focused output for increased light levels.
There are many light technologies for horticulturists to choose from. High intensity discharge lamps, especially double ended bulb fixtures, are sure to remain the industry standard for some time. The HSE NXT2 may very well be the best lighting option currently available to horticulturists. If you are going to grow, you might as well grow with the best. Check out the HSE NXT2 today!
For more information about the HSE NXT2 and other P.L. Light Systems products, please visit: Urban-Gro.com.
Propagation
A Stable Atmosphere Equals More Success with Plant Clones
Published
7 years ago
on
April 8, 2015
Unstable atmospheric conditions may be the biggest cause of failure in cloning by novice gardeners. Some plant varieties are resilient and will not be adversely affected by large temperature or humidity swings. However, many plant varieties require uniform atmospheric conditions during the initial rooting stage.
A temperature range of 70-80 degrees F for clones is generally accepted. If this is not possible in your greenhouse or indoor garden it may be necessary to create a small sub-climate elsewhere. Uniform temperature is probably the single largest factor for cloning success. If the temperature gets too hot, the clones will wilt and die before creating roots and if the temperature gets too cold, the clones will enter a state of suspended animation and never create the root systems they need to become individual plants.
Seedling heat mats are a great way for horticulturists to maintain the proper temperature during the cloning process. Humidity is also a large contributing factor to successful cloning. Many plant varieties do best with a high humidity (80-99%) during the beginning stages of cloning.
The cutting, once removed from the donor plant, has no root system to bring in moisture. It is, however, able to lose moisture through the surface of its leaves. This makes the cutting rely heavily on the moisture in the surrounding air to maintain health, especially for the first few days. Humidity domes or humidity chambers are great ways for a gardener to maintain a higher level of humidity for the initial stages of cloning. Generally speaking, it is a good idea to acclimate the clone to the ambient humidity after three to seven days. This can be done by taking off the humidity dome each day for a few minutes and then increasing the duration of removal each day.
Propagation
What to do With a Fresh Cutting
Published
7 years ago
on
March 26, 2015
After selecting, inspecting, and preparing the donor plant, a gardener may begin taking cuttings. Generally speaking, it is best to make a 45 degree angle cut just above a node site (the place where a leaf or branch attaches to the main stem). There are some varieties of plants that create roots very easily. Those plants can be placed directly into a cup of water after being cut from the donor plant. For example, spider plants, wandering jew, and coleus can all be easily rooted in a cup of water. However, some plant varieties need a little extra care to ensure rooting success. For these plants it may be necessary to use a rooting hormone or cloning gel. These products aid in speeding up the cloning process by immediately providing the cutting with the hormones necessary for root production. When using a rooting hormone or cloning gel, the freshly cut end should be dipped into the hormone right after it has been taken from the donor plant. After dipping the cutting, it can be placed into the chosen medium.
Some plants can be rooted directly in water and do not require a special medium for rooting. Many plant varieties clone best when placed in some sort of inert grow medium designed for root development. Stonewool, coco fiber, peat moss, perlite and clay pebbles are all examples of inert media that gardeners commonly use to root clones. Some gardeners even choose to place the freshly cut clones into a light soil mix for rooting. In many ways the medium chosen is personal preference. As long as the medium has the ability to hold some moisture and provide oxygen to the developing roots, it will work just fine. Nutrition is not as important in the medium during the early stages of root development. In fact, soils rich in nutrients (especially high nitrogen soils) can slow or inhibit early root development. Most gardeners use no fertilizers during the cloning process; although I have had more than a few people swear by using a very diluted blooming fertilizer (less nitrogen) until the clone has developed a healthy root system.
Propagation
Selecting a Donor Plant for Plant Cuttings
Published
7 years ago
on
March 23, 2015
One of the most important aspects of cloning by taking cuttings is selecting an appropriate donor plant. The idea is to select a plant variety that has the traits a grower wishes to replicate. However, it is also very important to select a donor plant that is in good health. If the donor plant has diseases, pest insects, or other pathogens chances are good that any clones taken from that plant will have those same problems. Always inspect a potential donor plant carefully before taking cuttings.
Once a donor plant is selected, it can be prepared for the cloning procedure. One technique that helps to increase cloning success rates is to limit the donor plant's exposure to intense light for 24 hour prior to taking clones. The plant does not need to be moved into complete darkness. Moving the donor plant to a shaded section of the greenhouse or removing the plant from direct horticultural lighting will help to prepare the plant for cloning purposes. It is also important that the donor plant is not showing any signs of environmental stresses. In other words, it is not wise to take clones from a donor plant that is wilted due to heat or lack of water. If possible, try to make sure the donor plant is at the highest level of health before taking clones.
Greenhouses
Choosing an Attached or Freestanding Greenhouse and Greenhouse Orientation
Published
7 years ago
on
March 16, 2015

When setting up a greenhouse, one of the first things a gardener needs to decide is whether the greenhouse will be a freestanding or an attached greenhouse. A closer look at some of the advantages and disadvantages of each will give a gardener a better idea of which type of greenhouse will best suit his or her needs.
Advantages of an Attached Greenhouse
One of the biggest advantages of an attached greenhouse is that they are generally more energy efficient. This is because one wall is already heated by the home. Another advantage of an attached greenhouse is accessibility. Many attached greenhouses are accessible from the living space which makes entering the greenhouse especially convenient. Attached greenhouses can also add aesthetic value to a home. In many cases, a greenhouse will enhance and/or complement the architecture of the home.
Disadvantages of an Attached Greenhouse
The disadvantages of an attached greenhouse are that attached structures will require a frost-free footer and a foundation. This can be an added cost to the project. Also, building codes are generally more stringent for structures attached to living spaces.
Advantages of a Freestanding Greenhouse
Perhaps the biggest advantage of a freestanding greenhouse is that there are fewer limitations regarding size, height and style. Another significant advantage is that freestanding greenhouses usually have better lighting conditions because they can allow light to enter on all four sides of the greenhouse.
Disadvantages of a Freestanding Greenhouse
A disadvantage of a freestanding greenhouse is an increased heating cost during colder months. Due to all four sides being exposed to the elements, freestanding greenhouses are less energy efficient compared to an attached structure. Freestanding greenhouses are also less convenient to access because the gardener must go outside to enter the greenhouse.
Location of the Greenhouse
Many gardeners believe that a greenhouse should always be located facing south so it receives the most light possible. However, this is not always the best location for a greenhouse. Although the southern exposure will receive the most light, the truth is that most plants do not need that much light and, in some ways, a southern exposure can be counterproductive. During the summer months, a south facing greenhouse can easily get too hot and require a shade cloth to help protect the plants. An overheating greenhouse can hinder plant growth and be a nightmare for the grower. For most hobbyist applications, a greenhouse with western exposure is the way to go. Think "west is the best". This is not to say that other orientations will not work. In fact, an eastern exposure will work just fine for most plants. A northern exposure may be too shady for any tropical varieties and is the only orientation that should be avoided if possible. Since virtually any orientation will work, greenhouse hobbyists should choose a location that will best complement the home or garden. Just remember that greenhouses do not need to be exposed to the maximum amount of light at all times. In fact, most horticulturists will want sunnier and shadier locations in their greenhouses to accommodate the needs of the various plant varieties.
For more information, please visit ArcadiaGlasshouse.com.
Containers
Not All Fabric Potting Containers Are Created Equally
Published
7 years ago
on
March 13, 2015
Over the last few years, many indoor horticulturists have discovered the benefits of using fabric potting containers. These containers are designed to maximize air exposure to the root mass. Maximizing the exposure to air creates a couple of significant advantages when it comes to root growth and development. First, roots love oxygen. Oxygen helps to promote white, vibrant roots. Because of their breathability, fabric potting containers allow the roots to receive heightened access to oxygen. Fabric potting containers also naturally "air prune" the plant's roots. As a root reaches the side of a fabric planting container, it gets exposed to air and naturally prunes itself. When the root tip is air pruned, a multitude of lateral roots stem from that root. This creates an unmatched fibrous root structure. When compared to a plastic potting container, where the roots wind upon themselves and become a tangled mess, a fabric container filled with healthy lateral roots reigns supreme. The healthy lateral roots are more efficient at nutrient and moisture uptake which means plants that are grown in fabric containers usually experience accelerated growth rates and larger yields.
Due to all the advantages offered by fabric potting containers, it is no wonder that so many indoor horticulturists are incorporating them into their gardens. However, some of the growers who are using fabric containers may be doing themselves a grave injustice as well. In truth, not all fabric containers are created equally. In fact, there is a large variance between the way fabric containers are manufactured and this can have a significant effect on the quality of the product and the safety of the plants grown within.
The folks at High Caliper Growing have their fabric containers (Smart Pots and Big Bag Beds) manufactured in the USA and have ultimate control over the manufacturing process. When a horticulturist purchases a Smart Pot or a Big Bag Bed it will be the same quality product day after day, year after year. On the contrary, when companies do not have control over the manufacturing process, they have little control over the quality and consistency of the fabric. Many of the fabric potting container suppliers probably do not even know what is in their fabric.
High Caliper Growing has tested their fabric to ensure a high level of consistency and safety. They proudly boast that their fabric containers contain absolutely no BPA. High Caliper Growing independently and scientifically tested four of their leading competitors for BPA. Guess what? Three out of the four have BPA present in their fabrics. I don't know about you but I don't want anything I plan on consuming growing in a container that leaches BPA into the most sensitive area for plant absorption (the root mass).
For indoor horticulturists who want to gain all of the benefits of a fabric container and also want a safe, consistent product, Smart Pots by High Caliper Growing are the way to go. For more information visit Smartpots.com.
Grow Lights
Cleaning and Maintaining a P.L. Light System Reflector
Published
7 years ago
on
March 4, 2015
The light energy emitted from a horticultural lighting system is the driving force behind every indoor garden. This is why indoor horticulturists spend a lot of time and money to ensure the lighting system is operating properly. P.L. Light Systems offers some of the best reflectors and these reflectors are designed specifically for high performance indoor gardens. Countless hours of research and development have produced some of the most comprehensive light systems for horticulturists. In order to maintain the highest level of performance, it is recommended that the horticulturist clean the reflector and bulb periodically. It is estimated that light output can be reduced by as much as 15% due to dirt, dust, and other residues that build up on a reflector. Even in gardens where the environment is seemingly clean, reflectors have a tendency to collect dust and dirt over time and should be cleaned.
In order to clean the bulb and reflector, the horticulturist should first make sure the fixture is unplugged (or power is disabled) and the bulb has been given sufficient time to cool. Next, the gardener should carefully remove the bulb with gloved hands or a cloth and set it aside for cleaning. With the bulb removed, the horticulturist can follow P.L. Light System's reflector cleaning instructions.
P.L. Light System's Reflector Cleaning Instructions
1. Carefully remove the reflector from the fixture. Flush the reflector with water both inside and out to remove residues or environmental contamination. Spraying the reflector with a low powered hose works great for this step. This initial step removes the majority of the dust and dirt found on the reflector.
2. Fill a large basin with vinegar and water at a ratio of 1:100 (1 part vinegar to 100 parts water). Submerge the reflector and clean with a very soft brush. This step removes the grime and residues that could be the result of foliar sprays, pesticides, and condensation.
3. Fill a second large basin with clear water. Rinse the reflector in the clear water to remove the cleaning solution.
4. Lastly, fill a third basin with distilled water. Rinse the reflector in the distilled water to remove any hard water residues. Skipping this step could result in hard water spots remaining on the reflector's surface. If there are any remaining residues after this step repeat steps 1-4.
The Fixture
The electronics within the fixture are extremely sensitive to dust and other outside influences. This is why all of P.L. Light System's fixtures include a special membrane that prevents dust from entering while still ensuring excellent ventilation. The membrane also protects the electronic components from moisture. The protective membrane means a long, problem-free life for the electronics and is one of the reasons why P.L. Light System fixtures outperform and outlast other light systems on the market.
Cleaning the HID Bulb
After cleaning the reflector and placing it back in the fixture, the horticulturist can clean or replace the HID bulb. In order to clean a HID bulb, the horticulturist can use isopropyl alcohol and a clean, soft cloth. Be careful not to touch the bulb after it has been cleaned because the oils from your fingers can cause a "hotspot" on the bulb which could lead to bulb failure or worse. Using gloves or a cloth, place the bulb back into the reflector.
Mark the Calendar
Reflector and bulb maintenance should be performed at least once a year. For many indoor horticulturists bulb and reflector maintenance is part of their cyclical maintenance. In other words, the horticulturist will perform these tasks after every garden cycle. This way, the horticulturist is sure to continuously provide his or her garden with the highest light output levels possible.
For more information about P.L. Light Systems be sure to visit Urban-Gro.com
Propagation
Ten General Houseplant Propagation Rules
Published
7 years ago
on
March 2, 2015
There are several easy propagation methods you can use for houseplants. There are some basic concepts that apply to all propagation methods, rather you are try plant plant cuttings, plant division, offsets, air layering, or plantlets.
General Propagation Rules
- Always use clean sharp utensils that have been sterilized in alcohol.
- Whichever propagation method you select, the parent plant must be healthy. Cuttings taken from a sick or dying plant are doomed to fail.
- Rooting hormone helps roots develop; but too much is worse than none at all.
- Since moist conditions are needed for rooting to be successful, it is important to use a rooting hormone that contains a fungicide to prevent plant diseases.
- The rooting medium should be light and fast draining. If you purchase new construction sand, vermiculite, peat moss, or perlite, it can be used directly from the bag. Medium taken from any other source should be sterilized by heating it in the oven at 200 degrees for 30 minutes.
- Pots or containers for the new plants must be clean and free of old soil and plant material; if using old pots be sure to wash them well with a household disinfectant. It's important to use very small containers when you propagate to prevent over watering and help roots development. 2" or 4" pots work well for a single cutting or use a 6" pot for several cuttings.
- Roots that form in water are different than roots that form in soil. If possible, use soil rather than water to propagate plants.
- Indirect light and temperatures between 70-80 degrees are best for propagation.
- Never allow the soil of newly propagated plants to dry out, but on the other hand, the soil should never be soggy. If the planting medium is too dry or too wet, roots don't develop.
- To increase the humidity and keep the soil from drying out place newly propagated plants into a plastic bag and seal the top or cover the plants with a sheet of plastic. You can use small picks or sticks to keep the plastic from resting on the plants.
Grow Lights
HID Lighting Has a Low Initial Cost for a Relatively Large Coverage Area
Published
7 years ago
on
February 27, 2015
High intensity discharge lighting includes both metal halide (MH) and high pressure sodium (HPS). HID lighting consists of three components: the ballast, the reflector or socket, and the bulb. Ballasts can be specific to the type of bulb (MH only or HPS only) or they can be switchable, or "smart" ballasts, which have the ability to operate either type of bulb. Most ballasts are specific to wattage; although some of the newer, digital ballasts can operate different wattage bulbs.
The ballast connects to the power supply and acts as a power converter so the bulb receives the proper current. The reflector, or socket, is the component that connects the ballast to the bulb and the bulb itself is the component that actually emits the light. After receiving the proper current from the ballast, the bulb converts that energy into light.
HID lighting is still the most popular choice for horticulturists for a few reasons. First, this technology has been around for a long time and is used in other industries. This means there are many manufacturers which helps lower the cost. Initial cost is not the only reason horticulturists continue to choose HID lighting. High wattage HID fixtures are very powerful and have the capability of penetrating a plant canopy along with covering a large area. For example, an indoor horticulturist who is using a 1000 watt HID light can adequately cover 25-50 square feet of garden space. Greenhouse growers looking for supplemental lighting can cover even more space with that same 1000 watt fixture. It is not uncommon for greenhouse gardeners to have a 1000 watt HID cover 100+ square feet for supplementary lighting purposes. Long story short, HID lighting has a low initial cost for a relatively large coverage area. This is the main reason HID lighting has remained so popular among horticulturists.
Propagation
Tips for Tissue Culture Cloning
Published
7 years ago
on
February 19, 2015
Tissue culture, in horticulture, refers to the replication of a plant from its cells or tissue which are grown in a nutrient culture medium under sterile conditions. Basically, tissue culture is like growing a plant in a petri dish from just the tiniest slice of tissue. Most plant varieties can be successfully duplicated with tissue collected from the root, stem, leaves, seed, flower, or virtually any other part of the plant. Sterile conditions are crucial for the tissue culture technique because living plant materials are naturally contaminated with microorganisms. Tissue culturists must sterilize the starting plant material in a chemical solution, usually consisting of alcohol and sodium hypochlorite. After sterilization, the starting plant material is placed in a sterilized container which contains the nutrient culture medium. The nutrient culture medium consists of a correct balance of plant hormones (auxin and cytokinin) and a nitrogen source. Too much auxin will result in excess root growth, whereas too much cytokinin will result in excess shoot growth. Once the specimens grow large enough, they can be transplanted into potting soil or other desired medium to grow like normal plants.
Tissue culture offers the horticulturist many different advantages. Like conventional cloning, tissue culture offers the ability to create large numbers of genetic copies of a desirable plant. Unlike conventional cloning, tissue culture can be used as a way to preserve rare or endangered plant species and can also be used to rescue embryos in distantly related cross pollinated species. The biopharmaceutical industry uses massive bioreactors filled with tissue cultures which can produce valuable compounds used as biopharmaceuticals. Another huge advantage of tissue culture is the ability to "clean" plant material of contaminates. In other words, a plant that has developed a disease or virus can still be propagated without bringing the pathogen along with it. This advantage alone provides an invaluable asset of preservation to modern horticulture.
Tissue culture kits are available for hobbyists to use. There are even some recipes online for creating tissue culture kits out of mostly around-the-house items. Because sterilization is so important, hobbyists who want to experiment with tissue culture need to have a dedicated area. Although tissue culture may be a fun experiment, other asexual propagation techniques are more practical for the average greenhouse hobbyist.
Greenhouses
A Quick Guide to Greenhouse Structure and Frame Materials
Published
7 years ago
on
February 19, 2015
There are several frame types being used to construct greenhouses. And Depending upon your needs some are better than others. The primary materials are galvanized steel, aluminum, PVC, fiberglass and wood.
Galvanized Steel
Steel is one type of framework used on kits. It is strong, and galvanized steel will be rust resistant, but in time will rust a bit. Because of the weight, it will cost more to ship than other materials. Galvanized steel tends to be used on the lower end greenhouse kits, but it can be found on the more expensive ones too.
Aluminum
Aluminum is strong, will not rust and is lightweight. Round or square tubing is used, depending upon the covering material that is being used. Square tubing is available from building supply stores and this material could be used to construct a greenhouse frame. Drilling holes in it is fairly easy, so fiberglass panels or polycarbonate sheets could be fastened to the structure.
PVC
PVC pipe can be used to construct a Quonset type greenhouse frame. It is readily available, inexpensive and easy to work with. Up to one inch diameter can be bent to form hoops over which Polyethylene film can be stretched. Ends can be constructed from either plywood or fiberglass sheets. Fiberglass sheets can also be screwed to the hoops to form a cover over the frame.
Wood
Treated wood can also be used to construct a greenhouse. If you are do-it-yourself grower, this type of structure can be a bit harder to build. Just about any type of covering could be installed over a wood frame. It is strong enough for glass, Polyethylene films can be stapled to it and polycarbonate or fiberglass sheets can be screwed to it. Wood is the most versatile material available for a greenhouse structure. Besides pressure treated lumber, cedar and redwood can also be used for greenhouse construction. Both are lightweight and strong. Redwood is the most readily available and tends to be used in high end kits. Greenhouses constructed from redwood are both attractive and long lasting.
Fiberglass
Fiberglass tubing is also used as a greenhouse framing material. An advantage to this material is that it will not conduct heat or cold easily, thus helping keep heat in and cold out.
Greenhouses
Tips for Choosing the Right Size Greenhouse
Published
7 years ago
on
February 17, 2015
 The size of a greenhouse can be determined primarily by the quantity of plants you plan to grow during the period of cold weather when additional heat and protection from frost is required. Plants that prefer warmer climates can continue to grow inside the greenhouse to produce flowers, fruits, or vegetables through cold and warm seasons. Plants, requiring shade during both cold and warm weather, can be protected from direct sun with a shade cloth. Size also will be influenced by the amount of space and money you have available.
The square footage required can be determined by laying out a floor plan that includes growing areas, walkways, and work and storage spaces not provided for in other structures. Enough space should be provided to prevent plants from touching greenhouse walls during freezing weather and to allow adequate air circulation. Plants should be reachable from walkways or from between benches and beds to allow for regular watering, fertilizing, and insect and disease control.
Walkways must accommodate the movement of workers, customers, equipment, plants, and vegetables in and out of the greenhouse. However, you want to minimize your walk, work, and storage areas as much as possible, because only the growing areas provide income or plants and vegetables for your own use.
If you are a commercial grower your greenhouse will need to accommodate trucks backing into (or at least close to) the greenhouse to load and unload. If this is the case make sure the greenhouse doors are large enough to accommodate them.
If money is tight, you can make the permanent greenhouse smaller by using less expensive temporary structures to raise early and late vegetables. Bedding plants can also be moved outside early to harden off, using temporary covers to protect them when frost is predicted.
Double and triple uses of greenhouse space allow for increased production per square foot. A simple wooden or metal frame can be built over a supply-storage area, creating more room for flats of plants. Temporary benches, filled with plants, can be set between rows of transplanted vegetables and moved as space needs change. Lettuce, spinach, radishes and other quick maturing crops can be planted early between tomato and pepper plants and harvested before later crops grow large enough to block the light.
Greenhouse rafters should be high enough to hang baskets above the heads of workers and customers, especially in walkways, yet low enough to water and fertilize regularly. They will need to be spaced far enough apart to grow without crowding and to allow light penetration to plants below.
Propagation
Propagating Plants from Seeds
Published
7 years ago
on
February 13, 2015
A plant started from seed receives its genetics in a manner similar to the way humans receive genetics. Just as we are made up of a combination of our father and mother, a plant started from seed is made from the genetics of its father and mother. As with humans, some traits can skip generations and there is no guarantee that a plant started from seed will inherit specific traits from its mother or father. This is the main reason the majority of commercial plant propagation is done by clone or tissue culture. Starting from seed is unpredictable but it is also a chance to start a completely unique plant that will add more biodiversity to our wonderful planet.
Temperature and Humidity for Starting Seeds
Germination is the process in which the plant emerges from the seed to start its life. For most plants germination is best done in a very moist (high humidity) environment at a reasonably warm temperature, usually around 75-85 degrees F (the exception to this would be seeds that are generally planted in early spring when the ground temperature is much cooler). Propagation trays with humidity domes are great for starting seeds because they create a microclimate that is more easily controlled. Seeds can be placed directly into a moist medium in the tray and covered with the humidity dome. If the environment is not at least 75 degrees F consistently, it is advised to place a seedling heat mat under the tray to keep a constant temperature. Plants, in general, respond better to consistency and this is especially true with seeds or clones. Keep the top portion of the medium moist until all of the seeds have sprouted. Once the seedlings have broken the surface, lift the dome off periodically to bring in fresh air and also acclimate the seedlings to the lower humidity of the environment. Slowly increase the amount of time each day the dome is removed until it is removed entirely. Most varieties of plants can be acclimated in a matter of a few days. Follow the seed packet's instructions for thinning, spacing, and transplanting.
Another popular germination method is the wet paper towel technique. Place your seeds in a damp paper towel and fold the paper towel over the seeds. Put the paper towel in a ziplock bag and place it on top of your refrigerator (toward the back; this keeps the seeds at a consistent temperature). Check daily by gently unfolding the paper towel to examine the seeds. Keep the paper towel moist; adding water if necessary. In a few days you should see the first root coming out of the seed (radicle root). Gently, using a tweezers if necessary, place the seed into the soil with the radicle root facing downward. Cover the seed and keep the top layer of soil moist until the plant breaks the soil's surface. The paper towel technique is a fun way to teach children how plants start from seeds. This technique works best with larger seeds (melons, cucumbers, squash, corn, sunflower, etc.). Most smaller seeds, such as lettuce, are best planted directly into the soil.
Greenhouses
Reasons #9 & #10 of the Top 10 Reasons to Build Your Own Greenhouse
Published
7 years ago
on
February 11, 2015
Beat the Cost of Grocery Store Produce
One of the best reasons for a greenhouse of your own is to beat the escalating price of food. For a family of three, a greenhouse will pay for itself in a year or two. No more multiple dollars per pound for produce that you can grow in your own backyard.
Self-Reliance and Independence
As consumers, we are ever more dependent on jobs, fuel, utility companies and government. A greenhouse of your own helps you become independent and self-reliant in one of the most important areas of life — keeping you and your family fed.
Containers
Fabric Containers for Indoor Horticulture
Published
7 years ago
on
February 10, 2015
Lighting, atmospheric conditions and nutrition are some of the most important garden variables that new growers must master in order to be successful. After a grower has a good understanding of the basics behind the operation of an indoor garden, he or she can begin searching for other ways to help maximize performance. There are numerous variables that make up a well functioning indoor garden but examining the potting containers is a good place to begin.
For many growers, plastic potting containers have become the norm because that is what their friends use or they do not understand that there are other options available. The truth is, plastic potting containers are not necessarily the best option for indoor horticulture. Fabric containers, like the Smart Pot, are changing the way indoor horticulturists view planting containers. There are multiple benefits to using a fabric planting container in an indoor garden; all of which can help a grower to maximize his or her return.
Breathability
The biggest difference between a fabric container and a plastic container is breathability. A plastic container is non-permeable and will not allow any air to reach the side portions of the planting container. With a Smart Pot all of the soil within the container is exposed to air. This "breathability" creates two distinct advantages over plastic potting containers: air pruned roots and increased oxygen to the root mass.
Air Pruned Roots
After branching out from the center, the roots will eventually reach the wall of the potting container. In a typical plastic potting container, the roots will reach the wall and turn. This creates a circling of roots within the container. The roots in a fabric container behave differently. As a root reaches the wall of a fabric container, the exposure to air causes the root to air prune. The tip of the root is "pruned" and stops growing. As the tip of the root stops growing, a series of lateral roots grow off the main root. This creates a more uniform root mass within the potting container. A plant with a uniform root mass is more efficient at up-taking nutrients and moisture. It is the natural air pruning from fabric containers that creates a healthier, more uniform root mass. As many growers know, a plant with a robust root mass will be healthier and produce better yields.
Increased Oxygen
Aside from the benefits of air pruning, the increased exposure to air provides the roots with a higher oxygen content. Roots love oxygen. When a plant's roots are provided with increased oxygen levels healthier, brilliantly white and fuzzy roots with lateral branches are created. The increased oxygen is also a safe guard against many root-borne pathogens. Root rot (pythium) is a common problem for indoor horticulturists. This nasty disease is capable of wiping out an entire garden in a matter of just days. By using a Smart Pot, indoor gardeners automatically protect themselves from pythium or other anaerobic pathogens that breed in oxygen depleted environments.
Indoor gardeners who are still using plastic potting containers to house their soil should definitely give a fabric container, like the Smart Pot, a try. If the science behind the fabric containers doesn't convince you, try doing a side by side comparison. Grow one plant in a fabric pot right next to a plant of the same variety in a plastic container. Once you have experienced the increased growth rates and the healthiest root masses you've ever grown indoors, you'll be switching every plastic container to Smart Pots before you can say, "air pruned".
For more information regarding quality fabric containers and the Smart Pot, please visit Smartpot.com.
Greenhouses
Reasons #7 & #8 of the Top 10 Reasons to Build Your Own Greenhouse
Published
7 years ago
on
February 4, 2015
Reason #7 – Get Out of the Wind and Harsh Weather
Greenhouses shield you and your plants from the damaging effects of a storm that might bring high winds, driving rains and hail or freezing weather with ice and snow. It also protects your plants from the constant drying effects of winds in more arid environments.
Reason #8 – Garden Year Round
In most places across the country, the sheltered environment of a greenhouse provides enough protection for growing vegetables year round. Even when temperatures drop into the single digits, many cold tolerant vegetable crops can survive just fine.
Learn All 10 Reasons
Greenhouses
Reasons #5 & #6 of the Top 10 Reasons to Build Your Own Greenhouse
Published
7 years ago
on
February 3, 2015
Reason #5 – Extend the Season
Get started earlier than normal and garden longer than your normal summer season. Unless you are growing plants that are very temperature sensitive, and your environment is harsh, you should be able to count on nearly two months head start and two months extended growing season, all with no supplemental heat.
Reason #6 – Create a Warm and Humid Environment
Plants love warmth and humidity. They thrive in it. A greenhouse allows you to easily capture and maintain an environment of warmth and humidity.
Grow Lights
Premium Lighting Systems for Indoor Horticulture
Published
7 years ago
on
February 3, 2015
Of all the components that make up a successful indoor garden none are as important as the horticultural lighting. Although it is a combination of many variables that ultimately determines the success of a horticulturist, the single component responsible for providing the energy for growth comes from the horticultural lighting. One of the most important parts of a lighting system is the reflector. It was not long ago that indoor horticulturists hung bare bulbs in a large room and let things grow wild. As more advanced light reflection technologies were developed, indoor horticulturists started to pay closer attention to the light energy and how to maximize its use in the grow room. Although the first few generations of reflectors would be considered inefficient by today's standards, they were a big step forward from hanging bare bulbs. Reflectors, like other hardware used by indoor horticulturists, have evolved rapidly, especially in the last 10 years or so. One company that stands out in terms of research and development is P.L. Light Systems.
P.L. Light Systems develops and manufactures innovative fixtures, lamps and reflectors designed to optimize light distribution. P.L. Light Systems realizes that different crops have different lighting needs and so they have developed multiple reflectors for varying crops and applications. All of P.L. Light System's reflectors are high performance reflectors and are a product of extensive research and development. Each reflector has its own associated applications and specific properties. When examining a P.L. Light reflector it doesn't take a light scientist to see that these reflectors would outperform the boxy reflectors commonly sold within the industry. Remember, a reflector with corners means a reflector with dead spots. This equates to less light reaching the plant canopy.
As our knowledge of plant physiology has increased, the way we measure and calculate light energy relative to plants has changed. Until fairly recently the indoor horticulture community viewed lumens per area or watts per square meter as a valid way to calculate light intensity. It has now become almost common knowledge that plants do not see light in the same way humans do. There are particular wavelengths of light that affect photosynthesis and those don't necessarily correspond to the light that the human eye is sensitive to. In other words, we have learned that lumens are for humans and that photo synthetic active radiation (PAR) is what horticulturists should be concerned with. For indoor horticulturists, one of the most accurate representations of light energy is expressing the amount of micromoles (µmoles) per meter squared.
Unfortunately, providing cutting-edge light calculations is not common practice for most lighting manufacturers. Few companies understand the need for high quality equipment and comprehensive lighting advice. Many indoor horticulture companies sell products that are generic and not tailored to any specific purpose. Companies that sell the same outdated technologies make companies like urban-gro stand out even more. Not only is urban-gro a licensed distributor of P.L. Light Systems but they also provide custom light plans to help their customers achieve the optimal light levels for their indoor gardens. The detailed light plan can be developed for a specific crop and a given space New indoor gardeners looking to set up their garden or experienced growers looking to retrofit their growing facility should visit Urban-gro.com to take a closer look at P.L. Light Systems. Urban-gro will provide a scientific light calculation which includes a light uniformity percentage and average micromoles at a given distance from the light source. In other words, a grower will know exactly how much usable light will be reaching the plant canopy.
The more information a grower can gather about a light fixture's light energy output, the more efficiently the garden can be set up. Comprehensive light plans, like those offered by urban-gro, help growers maximize return and fully understand the variables that go into optimizing an indoor horticultural lighting system. After all, Isn't it a functioning lighting system that drives the production of any indoor garden? Growers who set up their horticultural lighting in the most efficient way possible are sure to receive abundant yields and the highest return on their investments.
Do your homework. If you have questions feel free to contact urban-gro. Don't your plants deserve the best?
Propagation
Asexual Propagation Using Cuttings is Easy and Effective
Published
7 years ago
on
February 2, 2015
For years commercial horticulturists have been taking advantage of the multiple advantages offered by asexual propagation. These advantages are now being reaped not only by the commercial growers but by hobbyists as well. One of the largest advantages of asexual propagation is the reduced time it takes for a plant to reach maturity or get to a sellable size. This has obvious advantages for the commercial grower but the advantages extend to the hobbyist as well. The faster the plants can reach maturity, the longer the hobbyist can literally enjoy the fruits of his or her labor. Asexual propagation also gives the gardener the ability to create identical replicas of the most prized plants. This can be especially advantageous for the vegetable grower who wishes to replicate the plants with desirable traits. The best tasting tomatoes or crispest cucumbers can be perpetually grown and cloned in a hobby greenhouse and enjoyed year after year. Aside from flavor and aroma, plants can be cloned to preserve other desirable traits like a heightened resistance to stress or disease. Cloning by taking cuttings is the most common asexual propagation technique used by the hobbyist.
This technique is very effective on a wide variety of plants and is also relatively easy to master. The process of cloning some varieties of plants may only consist of cutting a small branch off the plant and placing the stem in water. After a few days roots will begin to form and the plant can be transplanted into soil or another desired medium. The once part-of-a-plant becomes a plant itself; a genetic duplicate of its donor plant. Spider plants, wandering jew, and coleus are a few plants that clone very easily in straight water and with very little effort.
However, not all plants will root as easily as a coleus. Other plant varieties require a little more attention to obtain a high propagation success rate. These varieties usually root better with the aid of a rooting hormone and more precise control over temperature and humidity. Tomatoes, peppers, cucumbers and many other vegetable varieties clone best in a consistent environment. Geraniums, hibiscus, and some African Violet varieties will root much faster and at a higher percentage within a consistent environment. When cloning these more finicky plants, try to keep the temperature consistently between 72-85 degrees F, especially in the root zone. A seedling heat mat may be necessary to ensure a consistent temperature during the night hours. The optimal humidity for clones during the first stages of propagation is 80-100%. After the plants create their own roots they can be acclimated into the ambient humidity. Humidity domes placed over the propagation trays are a great way to control the higher humidity needs of clones and seedlings without affecting the ambient humidity of the greenhouse. Clones that are kept in a consistent environment will root faster and also have a higher overall success rate.
Tip for the Hobbyist
When taking a cutting off a plant, it is best to do so just above a node site (a site where a branch occurs). A 45 degree angle cut just above a node site is my preferred method for most soft stemmed plant varieties. After cutting, place the clone directly into a rooting compound or water. Not only does this method create healthy clones, it also promotes the donor plant to multiply its shoots.
Grow Lights
How LED Grow Lights Have Changed and Can be Used by Today's Grower
Published
7 years ago
on
January 31, 2015
Light emitting diodes, or LEDs, have been steadily gaining acceptance since their introduction within the horticultural community roughly ten years ago. Unlike other lighting technologies used in horticulture, LEDs are a solid state device which makes them extremely durable. LED fixtures usually consist of the panel of LEDs and a circuit board (generally housed within the lighting fixture). Many horticultural LEDs contain a heat sink and/or fan to help dissipate heat and increase the fixture's life span.
The biggest advantages of LED technology are longevity and the ability to customize the light spectrum. Plants have a heightened response to particular light wavelengths and LED technology has the ability to provide higher amounts of the particular wavelengths plants desire. LEDs are the only technology that has the potential to manipulate the ratio of these wavelengths into the perfect ratio for photosynthesis.
The first few generations of horticultural LEDs were somewhat of a disappointment to the horticultural community because they lacked the intensity to compete with HID lighting fixtures. Many of the original LED fixtures contained only two wavelengths of light (red and blue) and utilized low wattage diodes.
LEDs have made great strides since the first generation and today's horticultural LEDs have the ability to compete with HID lighting in many ways. Many of the new LED fixtures contain more advanced wavelength ratios along with higher wattage diodes which allow for a greater penetration into the plant canopy. When comparing this technology to HID lighting, coverage is still somewhat of an issue. LED fixtures, unless they contain a special lens, are generally light-directional and the light will not spread out and cover a large area like a HID light. However, LEDs' higher energy efficiency combined with a lower heat signature has many indoor horticulturists, at the very least, giving LEDs serious consideration. There are also many greenhouse gardeners who have had success using LEDs for supplemental lighting.
Greenhouses
Reasons #3 & #4 of the Top 10 Reasons to Build Your Own Greenhouse
Published
7 years ago
on
January 30, 2015
Reason #3 – Choose Your Own Design
A homemade greenhouse provides you the opportunity to design it yourself. It can be as wide, as long, as tall and as strong as you need it to be. Need another door or vent? Just put that into your plan. You're not stuck with someone else' design.
Reason #4 – Save Money on Materials and Labor
If you build your own greenhouse, you save more than half the cost of a kit and all the labor costs associated with having it assembled.
Grow Lights
Why High Intensity Discharge (HID) Grow Lights Remain Popular
Published
7 years ago
on
January 29, 2015
High intensity discharge lighting includes both metal halide (MH) and high pressure sodium (HPS). HID lighting consists of three components: the ballast, the reflector or socket, and the bulb. Ballasts can be specific to the type of bulb (MH only or HPS only) or they can be switchable, or "smart" ballasts, which have the ability to operate either type of bulb. Most ballasts are specific to wattage; although some of the newer, digital ballasts can operate different wattage bulbs. The ballast connects to the power supply and acts as a power converter so the bulb receives the proper current.
The reflector, or socket, is the component that connects the ballast to the bulb and the bulb itself is the component that actually emits the light. After receiving the proper current from the ballast, the bulb converts that energy into light. HID lighting is still the most popular choice for horticulturists for a few reasons. First, this technology has been around for a long time and is used in other industries. This means there are many manufacturers which helps lower the cost. Initial cost is not the only reason horticulturists continue to choose HID lighting.
High wattage HID fixtures are very powerful and have the capability of penetrating a plant canopy along with covering a large area. For example, an indoor horticulturist who is using a 1000 watt HID light can adequately cover 25-50 square feet of garden space. Greenhouse growers looking for supplemental lighting can cover even more space with that same 1000 watt fixture. It is not uncommon for greenhouse gardeners to have a 1000 watt HID cover 100+ square feet for supplementary lighting purposes. Long story short, HID lighting has a low initial cost for a relatively large coverage area. This is the main reason HID lighting has remained so popular among horticulturists.
Greenhouses
Reason #2 of the Top 10 Reasons to Build Your Own Greenhouse
Published
7 years ago
on
January 26, 2015
Reason #2 – A Greenhouse Allows you to Have a Designated Spot for Gardening
It provides a home for special accessories, tools and supplies necessary for starting seeds, transplanting, growing, harvesting, cleaning and preparing vegetables and cut flowers.
Greenhouses
Reason #1 of the Top 10 Reasons to Build Your Own Greenhouse
Published
7 years ago
on
January 23, 2015
Garden & Greenhouse contributing editor Clair Schwan has developed a list of the top 10 reasons to build your own greenhouse.
Reason number 1 is Multiple Purposes
A greenhouse is great for growing fresh organic vegetables, you can also use it to grow flowers, house plants, bulb plants and seedlings of all types. Change what your focus is each year or mix it up as you like.
Containers
Advantages of Fabric Containers for Outdoor Growing
Published
7 years ago
on
January 23, 2015
Choosing a planting container for outdoor gardening is a decision that will have a direct impact on the yield and quality of the finished crop. After all, the plant's root mass will be housed within that container and the roots are a plant's direct connection to water and nutrients. Without a flourishing root system, a plant will never live up to its potential. Many outdoor gardeners are starting to realize the vast benefits of quality fabric containers for outdoor cultivation. The biggest advantage of fabric containers is a healthier root structure. A healthy root structure equates to healthier growth and more abundant yields. Fabric containers, like Smart Pot, create a healthier root structure because of the increased aeration created by a permeable, fabric material. Seasoned gardeners understand that a well aerated root zone will stimulate growth and increase plant health. Aside from the general benefits of an aerated medium, using Smart Pots for outdoor crops offers other distinct advantages.
Releases Heat
Unlike plastic containers, which are notorious for trapping and holding heat, fabric containers offer a heightened "breathability" that allows the heat to escape easily. Heat trapped around the root zone can create a perfect breeding ground for pathogens and may end up being catastrophic for the plants. A fabric container, like a Smart Pot, has increased aeration and will actually allow evaporative cooling to occur within the container. This creates a more uniform soil temperature (regardless of the side of the container facing the sun) throughout the entire container. Plastic containers will develop a "hot spot" on the side of the container which faces the sun. The hot spot on a plastic container can create a temperature that is too warm for any root growth to occur. When temperatures are too high around the root zone, the plant will slow its growth or stop altogether. A fabric planting container's ability to release heat allows plants to continually develop healthy root growth, even on hot summer days.
Air Pruning and Lateral Root Growth
Perhaps the most significant advantage of a fabric pot is the way it alters root growth. In a plastic container, roots will grow out until they reach the side of the container. After hitting the side of the container, the root will follow the wall around and around. This creates a ball of circled roots. Any gardener who has transplanted from a plastic container has seen the evidence of the circling roots. The roots of plants grown in fabric containers do not circle but instead get "air pruned." When the root reaches the side of a fabric container, the root tip stops growing and the root develops a series of lateral roots. The roots created by air pruning are extremely fibrous and increase the root's surface contact area. Plants with vibrant, fibrous roots will grow strong, healthy plants which produce prolific yields.
Outdoor growers are always looking for ways to increase crop production. Smart Pots are high quality fabric containers that offer many significant advantages to outdoor horticulturists. The unique aeration qualities provided by a fabric planting container create a root mass unmatched by any plastic container. Heathy roots are the key to a productive garden. Outdoor growers looking to increase root health and, in turn, the garden's production can visit SmartPots.com for more information on Smart Pot fabric planting containers.
General Gardening
Welcome to Garden & Greenhouse Blog
Thank you for making the right decision to start blogging in your Joomla! website.

Published
7 years ago
on
December 29, 2014

Not All Potting Soils are Created Equal
Most experienced soil gardeners know the imperative role a well-balanced soil plays in the success of their gardens. A quality potting soil will have a balanced nutrient content, stabilized pH and the ability to retain moisture and air at the same time. There are many different potting soils available to horticulturists. In fact, there are so many that it can become overwhelming for a gardener to choose which soil will best suit his or her purpose. The truth is every potting soil is not created equal. There are actually large variances in the formulation, quality control and pH stabilization of many of the prepackaged soils on the market. In order to mass-produce the product, many soil companies have taken short cuts in their recipes or ignored the importance of quality control. No matter how large it becomes, there is one soil company that has stayed true to their roots and has dedicated itself to producing the highest quality soil possible while retaining the highest level of customer service possible. That company is The Good Earth Organics. Read our entire review of their products.
better homes and gardens vertical blinds printed oak
Source: https://www.gardenandgreenhouse.net/articles/january-february-2010/photosynthesis-respiration-and-plant-growth/
Posted by: smithbutch1974.blogspot.com
0 Response to "better homes and gardens vertical blinds printed oak"
Post a Comment